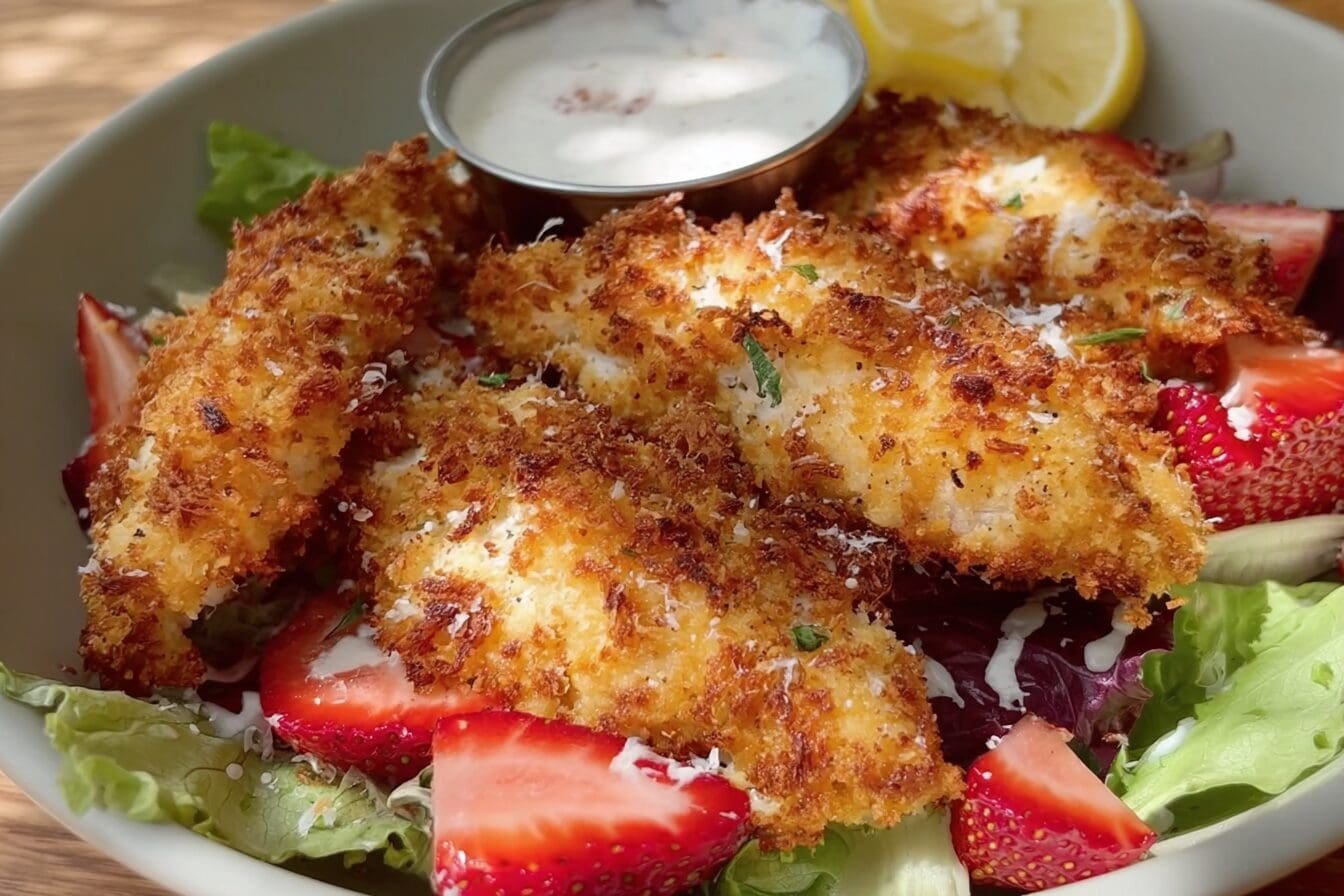
Why You’ll Love This Crispy Parmesan Chicken Tenders
There’s something truly satisfying about biting into perfectly crispy parmesan chicken tenders that crunch with every bite. This recipe has become a family favorite for good reason, and once you try it, you’ll understand why it appears on weekly meal rotations everywhere. Whether you’re cooking for picky toddlers or hungry teenagers, these tenders deliver on both flavor and texture.
The best part about these oven chicken tenders? They come together quickly, making them perfect for busy weeknights when you need dinner on the table fast.
- Ease of preparation: These parmesan chicken tenders require just 10 minutes of active prep time. With simple ingredients you likely have in your pantry, you can have dinner ready in under 30 minutes total. No marinating, no complicated techniques, just straightforward cooking that anyone can master on their first try.
- Health benefits: Unlike deep-fried versions, these healthy crispy parmesan chicken tenders are baked in the oven, cutting the fat content significantly while maintaining that satisfying crunch. Baking instead of frying reduces calories by nearly half, making this a smarter choice for families watching their intake without sacrificing taste.
- Versatility: This parmesan crusted chicken recipe adapts easily to various dietary needs. Need gluten-free? Swap panko for gluten-free breadcrumbs. Watching carbs? Use almond flour instead. The recipe works beautifully with substitutions, so everyone at your table can enjoy them.
- Distinctive flavor: The combination of parmesan cheese, garlic powder, and paprika creates a savory coating that’s tangy, slightly smoky, and incredibly addictive. Each tender delivers restaurant-quality taste at a fraction of the cost.
Jump To
- 1. Why You’ll Love This Crispy Parmesan Chicken Tenders
- 2. Essential Ingredients for Crispy Parmesan Chicken Tenders
- 3. How to Prepare the Perfect Crispy Parmesan Chicken Tenders: Step-by-Step Guide
- 4. Dietary Substitutions to Customize Your Crispy Parmesan Chicken Tenders
- 5. Mastering Crispy Parmesan Chicken Tenders: Advanced Tips and Variations
- 6. How to Store Crispy Parmesan Chicken Tenders: Best Practices
- 7. FAQs: Frequently Asked Questions About Crispy Parmesan Chicken Tenders
- 8. Crispy Parmesan Chicken Tenders
Essential Ingredients for Crispy Parmesan Chicken Tenders
Creating the perfect crispy baked parmesan chicken tenders recipe starts with quality ingredients. Each component plays a specific role in achieving that golden, crunchy exterior and juicy interior.
Main Ingredients
- 1 lb chicken tenders The star of the dish. Chicken tenders are naturally tender and cook quickly. Pat them dry before coating to help the breading adhere properly.
- 1 cup panko breadcrumbs Japanese-style breadcrumbs create an extra-crispy texture that regular breadcrumbs cannot match. Their larger flakes provide more surface area for that satisfying crunch.
- 1/2 cup grated parmesan cheese Freshly grated parmesan adds nutty, salty depth to the coating. Pre-grated cheese works but contains anti-caking agents that can affect browning.
- 1 tsp garlic powder Delivers consistent garlic flavor throughout the coating without burning like fresh garlic would. It pairs beautifully with the parmesan.
- 1 tsp paprika Adds a subtle smokiness and beautiful golden color to the finished tenders. Smoked paprika works wonderfully for a deeper flavor profile.
- Salt and pepper to taste Season to your preference. Start with 1/2 teaspoon of salt and adjust after tasting the coating mixture.
- 2 large eggs, beaten Acts as the binding agent that helps the breading stick to the chicken. Room temperature eggs coat more evenly.
- Cooking spray or olive oil Essential for achieving that golden-brown color when baking. A light spray keeps calories down while ensuring crispiness.
Special Dietary Options
For those following specific diets, here are the modifications you can make:
- Gluten-free option: Replace panko breadcrumbs with gluten-free panko or crushed gluten-free crackers. The coating will still get crispy and delicious.
- Low-carb/Keto option: Substitute panko with 1 cup almond flour or crushed pork rinds for a keto-friendly coating that keeps carbs under 5g per serving.
- Lighter option: Use just egg whites instead of whole eggs to reduce cholesterol. Light parmesan cheese also works well for calorie-conscious cooks.
How to Prepare the Perfect Crispy Parmesan Chicken Tenders: Step-by-Step Guide
Making easy oven baked parmesan chicken tenders is straightforward when you follow these detailed steps. The process involves three main stages: preparation, coating, and baking. Each step builds on the previous one to create that restaurant-quality result at home.
First Step: Preparation and Mise en Place
Before you begin cooking, proper preparation makes the entire process smoother. Start by preheating your oven to 425°F. This high temperature is crucial for achieving crispy parmesan crusted chicken tenders without deep frying.
Line a large baking sheet with parchment paper or place a wire rack on top of the baking sheet. A wire rack allows hot air to circulate around all sides of the tenders, resulting in even crispiness without flipping. If you don’t have a rack, parchment paper works fine.
Take your 1 lb of chicken tenders and pat them completely dry using paper towels. Removing excess moisture is essential because wet chicken will steam instead of getting crispy. Set the dried tenders aside on a clean plate.
Second Step: Creating the Coating Mixture
In a wide, shallow bowl or pie plate, combine 1 cup panko breadcrumbs, 1/2 cup grated parmesan cheese, 1 tsp garlic powder, 1 tsp paprika, and salt and pepper to taste. Mix well using a fork or whisk until all ingredients are evenly distributed.
Taste a small pinch of your coating mixture to check seasoning levels. Remember that parmesan is naturally salty, so you may need less added salt than expected. Adjust if needed before proceeding.
In a second shallow bowl, beat 2 large eggs until smooth. Add a tablespoon of water or milk to thin slightly if desired. This helps the egg wash coat more evenly and makes dipping easier.
Third Step: The Dredging Process
Working with one tender at a time, dip each piece into the beaten eggs. Lift and let excess egg drip back into the bowl for about 2 seconds. Too much egg makes the coating soggy and prevents proper adhesion.
Transfer the egg-coated tender to your breadcrumb mixture. Press firmly on both sides, using your fingers to pack the coating onto the chicken. The more contact you create between the coating and chicken, the better it will adhere during baking.
Place each coated tender on your prepared baking sheet or wire rack. Leave space between pieces for air circulation. Crowded pans lead to steaming rather than baking, resulting in less crispy tenders.
Fourth Step: The Secret to Maximum Crispiness
Here’s where many recipes fall short. After placing all tenders on the baking sheet, spray them generously with cooking spray or drizzle with olive oil. This step is non-negotiable for baked chicken tenders that rival fried versions.
The oil helps the panko brown and crisp up in the oven. Without it, you’ll get pale, dry-tasting tenders. Make sure to coat all exposed areas, especially the tops and sides.
If you prefer a more indulgent version, brush melted butter over the tenders instead. Butter adds richness and helps the coating brown beautifully, though it does increase the calorie count.
Fifth Step: Baking and Serving
Place the baking sheet in your preheated 425°F oven. Bake for 15-20 minutes, flipping halfway through cooking time. If using a wire rack, you can skip the flip since air circulates underneath.
The tenders are done when the coating is golden brown and the internal temperature reaches 165°F at the thickest part. Use a meat thermometer for accuracy, especially when cooking for children or elderly guests.
For extra crispy results, switch your oven to broil for the final 2 minutes. Watch carefully during this step to prevent burning. The coating should turn a deep golden brown with some darker spots.
Remove from the oven and let rest for 3-5 minutes before serving. This resting period allows juices to redistribute throughout the meat, ensuring every bite is moist and tender.
Serve your parmesan chicken tenders baked oven-style with your favorite dipping sauces. Marinara, ranch, honey mustard, or garlic aioli all pair wonderfully. For a complete meal, add a fresh salad or roasted vegetables on the side.
Pro Tip: For meal prep, double the recipe and freeze half before baking. These parmesan crusted chicken tenders freeze beautifully and can go straight from freezer to oven on busy nights.
Looking for more delicious chicken recipes? Try this crispy baked parmesan chicken for another family-friendly dinner option.

Dietary Substitutions to Customize Your Crispy Parmesan Chicken Tenders
Protein and Main Component Alternatives
While chicken tenders are traditional, this versatile coating works beautifully with other proteins. For a different take, try these substitutions:
Chicken breasts: Slice boneless, skinless chicken breasts into strips about 1 inch wide. Pound them slightly for even cooking. Adjust baking time to 18-22 minutes depending on thickness.
Chicken thighs: Boneless, skinless thighs offer more flavor and stay juicier. Cut into strips and follow the same process. The higher fat content creates incredibly tender results.
Turkey cutlets: A leaner alternative with mild flavor. Pound thin for quick cooking. Turkey pairs especially well with the parmesan coating and cooks in 12-15 minutes.
Fish fillets: White fish like cod, tilapia, or haddock work wonderfully. Cut into strips and reduce cooking time to 10-12 minutes. The parmesan crust protects delicate fish from drying out.
Plant-based proteins: For vegetarian options, use thick slices of firm tofu or tempeh. Press tofu for 15 minutes to remove moisture before coating. Adjust cooking time to 15-18 minutes at 400°F for best texture.
Vegetable, Sauce, and Seasoning Modifications
The beauty of parmesan chicken tenders lies in their adaptability. Different seasonings create entirely new flavor profiles:
| Seasoning Blend | Ingredients to Add | Flavor Profile |
|---|---|---|
| Italian Herb | 1 tsp dried Italian seasoning, 1/2 tsp oregano | Classic Mediterranean flavors |
| Spicy Cajun | 1 tsp Cajun seasoning, 1/4 tsp cayenne | Smoky with a kick of heat |
| Lemon Herb | 1 tsp lemon zest, 1/2 tsp dried thyme | Bright and refreshing |
| Buffalo Style | Add hot sauce to egg wash, serve with blue cheese | Tangy and spicy |
| Everything Bagel | 2 tbsp everything bagel seasoning | Savory with onion and garlic notes |
For dipping sauces, homemade versions taste far better than store-bought:
- Honey mustard: Mix 1/4 cup Dijon mustard, 2 tablespoons honey, and 1 tablespoon mayonnaise for a sweet-tangy dip.
- Garlic aioli: Blend 1/2 cup mayonnaise, 2 minced garlic cloves, 1 teaspoon lemon juice, and fresh herbs.
- Spicy ranch: Add 1/2 teaspoon sriracha to 1/4 cup ranch dressing for a kicked-up version.
Discover another flavorful chicken dish with this roasted red pepper spinach stuffed chicken recipe that’s perfect for special occasions.
Mastering Crispy Parmesan Chicken Tenders: Advanced Tips and Variations
Once you’ve mastered the basic recipe, these advanced techniques will take your crispy parmesan chicken tenders to the next level. Professional chefs use these methods to create restaurant-quality results at home.
Pro Cooking Techniques
The difference between good and great tenders often comes down to a few key techniques. First, consider double-dipping for an extra-thick, super-crunchy coating. After the first coating, dip back into egg and then back into breadcrumbs. This creates a thicker crust that rivals any restaurant version.
Temperature matters enormously. Let your chicken sit at room temperature for 15 minutes before cooking. Cold chicken straight from the refrigerator takes longer to cook, leading to overcooked exteriors and undercooked centers. Room-temperature meat cooks more evenly throughout.
For air fryer enthusiasts, this recipe adapts beautifully. Cook at 400°F for 10-12 minutes, shaking the basket halfway through. Air frying creates incredibly crispy results with even less oil than oven baking. The circulating hot air mimics deep frying without the excess fat.
Flavor Variations Worth Trying
Beyond seasoning blends, ingredient substitutions create entirely new dishes. Try these delicious variations:
Cheddar parmesan tenders: Replace half the parmesan with sharp cheddar cheese. The result is richer and more indulgent, perfect for cheese lovers.
Ranch parmesan tenders: Mix 1 tablespoon dry ranch seasoning into the breadcrumb mixture. Serve with extra ranch for dipping. Kids especially love this variation.
Lemon parmesan tenders: Add 1 teaspoon lemon zest to the coating and finish with fresh lemon juice after baking. This bright, fresh version pairs wonderfully with light summer sides.
Presentation Tips
Visual appeal matters, especially when serving guests or picky children. Cut tenders into uniform sizes for even cooking and attractive plating. Arrange on a wooden board or platter with small bowls of dipping sauces. Garnish with fresh parsley or grated parmesan just before serving.
For casual meals, serve in a basket lined with parchment paper with a side of fries or sweet potato wedges. For elegant dinners, slice tenders diagonally and fan over a bed of arugula with shaved parmesan and a balsamic reduction.
Make-Ahead Options
Busy schedules require smart strategies. Prepare tenders up to the baking stage and refrigerate, covered, for up to 24 hours. When ready to cook, add an extra 2-3 minutes to account for the cold starting temperature.
For longer storage, bread the tenders and freeze on a baking sheet until solid. Transfer to freezer bags with parchment between layers. Bake directly from frozen at 425°F for 22-25 minutes. This method means you always have a homemade meal ready in minutes.
How to Store Crispy Parmesan Chicken Tenders: Best Practices
Proper storage preserves the quality of your homemade parmesan chicken tenders. Understanding the best methods keeps leftovers tasting fresh and allows for convenient meal prep.
Refrigeration Guidelines
Store cooled tenders in an airtight container in the refrigerator for up to 4 days. Place parchment paper between layers to prevent sticking and maintain the coating’s integrity. Never store hot tenders, as condensation makes the coating soggy.
Freezing for Long-Term Storage
For longer storage, freeze cooked tenders for up to 2 months. Flash freeze on a baking sheet first, then transfer to freezer bags with the air pressed out. Label with the date and contents. Vacuum sealing extends freezer life to 3 months.
You can also freeze uncooked, breaded tenders for up to 3 months. This is perfect for meal prep. Bake directly from frozen without thawing.
Reheating for Best Results
The key to reheating is restoring crispiness without drying out the meat. Microwave ovens should be your last resort, as they make the coating soft and rubbery.
Oven method: Preheat to 375°F and place tenders on a wire rack over a baking sheet. Heat for 10-12 minutes until warmed through and crispy. The wire rack allows air circulation all around.
Air fryer method: Set to 380°F and cook for 5-7 minutes, flipping halfway through. This method produces the best results, nearly indistinguishable from freshly made tenders.
Skillet method: Heat a small amount of oil in a skillet over medium heat. Cook for 2-3 minutes per side until heated through and crispy. Works well but requires more attention.
Meal Prep Considerations
When batch cooking, double or triple the recipe. Cool completely before storing. Package in individual portions for grab-and-go lunches or quick dinners. Pair with prepared sides like roasted vegetables or salad for complete meals ready in minutes.
For more healthy chicken options, check out this balsamic chicken breast recipe that’s perfect for meal prep.

FAQs: Frequently Asked Questions About Crispy Parmesan Chicken Tenders
How do I make crispy parmesan chicken tenders at home?
To make crispy parmesan chicken tenders, start with 1 lb chicken tenders, patted dry. Mix 1 cup panko breadcrumbs, 1/2 cup grated parmesan, 1 tsp garlic powder, 1 tsp paprika, salt, and pepper in a bowl. In another, beat 2 eggs. Dip tenders in egg, then coat in breadcrumb mixture, pressing firmly. For baking, place on a parchment-lined sheet, spray with oil, and bake at 425°F for 15-20 minutes, flipping halfway, until golden and internal temp reaches 165°F. For extra crisp, broil 2 minutes. Fry in 1/2 inch hot oil (350°F) for 3-4 minutes per side. Serve with marinara or ranch. This yields 4 servings in under 30 minutes prep-to-plate. (92 words)
Can I bake parmesan chicken tenders instead of frying them?
Yes, baking parmesan chicken tenders gives crispy results without frying oil. Preheat oven to 425°F and line a baking sheet with parchment or a wire rack. Prep as usual: dredge 1 lb tenders in egg wash, then 1 cup panko mixed with 1/2 cup parmesan, Italian seasoning, salt, and pepper. Arrange in a single layer, spray lightly with cooking spray or olive oil for browning. Bake 18-22 minutes, flipping once, until crispy outside and 165°F inside. This method cuts calories by 50% compared to deep-frying while keeping texture crunchy—perfect for weeknights. Air frying at 400°F for 10-12 minutes works too. (98 words)
What sides go best with parmesan chicken tenders?
Pair parmesan chicken tenders with fresh sides for a balanced meal. Try roasted vegetables like broccoli or zucchini tossed in olive oil, garlic, and lemon—bake alongside at 425°F for 20 minutes. A crisp green salad with cherry tomatoes, cucumber, and balsamic vinaigrette adds lightness. For carbs, air fryer sweet potato fries (400°F, 15 minutes) or coleslaw with a creamy yogurt dressing complement the cheesy crunch. Dipping sauces: honey mustard (mix 1/4 cup mustard, 2 tbsp honey, 1 tbsp mayo) or marinara. These combos serve 4 and keep dinner under 40 minutes total. (92 words)
How do I store and reheat leftover parmesan chicken tenders?
Store cooled parmesan chicken tenders in an airtight container in the fridge for up to 4 days or freeze for 2 months in a freezer bag. To reheat without sogginess, use an oven at 375°F for 10-12 minutes on a wire rack, or air fryer at 380°F for 5-7 minutes, flipping halfway. Microwave only as last resort (1-2 minutes covered, but crispness suffers). Avoid stacking to prevent steaming. Revive with a quick spray of oil before reheating for that fresh-baked crunch. This keeps texture intact for meal prep. (89 words)
Are parmesan chicken tenders keto-friendly or low-carb?
Yes, parmesan chicken tenders can be keto-friendly with tweaks. Use almond flour or pork rinds (1 cup crushed) instead of panko for under 5g net carbs per serving. Stick to 1/2 cup parmesan, egg wash, and seasonings like garlic powder and oregano—no sugar. Bake at 425°F for 20 minutes. Each of 4 servings has about 3g net carbs, 30g protein, fitting keto macros (under 20g carbs/day). Track with an app like MyFitnessPal. Pair with cauliflower mash or zucchini noodles for a full low-carb meal under 400 calories. (92 words)

Crispy Parmesan Chicken Tenders
- Total Time: 37 minutes
- Yield: 4 servings
- Diet: High-Protein
Description
🍗 Crispy oven-baked chicken tenders with cheesy Parmesan crust – juicy inside, crunchy outside without frying!
🔥 Healthier alternative to fast food nuggets, packed with protein for family dinners or snacks in just 30 minutes.
Ingredients
– 1 lb chicken tenders
– 1 cup panko breadcrumbs
– 1/2 cup grated parmesan cheese
– 1 tsp garlic powder
– 1 tsp paprika
– Salt and pepper to taste
– 2 large eggs, beaten
– Cooking spray or olive oil
Instructions
1-First Step: Preparation and Mise en Place Before you begin cooking, proper preparation makes the entire process smoother. Start by preheating your oven to 425°F. This high temperature is crucial for achieving crispy parmesan crusted chicken tenders without deep frying. Line a large baking sheet with parchment paper or place a wire rack on top of the baking sheet. A wire rack allows hot air to circulate around all sides of the tenders, resulting in even crispiness without flipping. If you don’t have a rack, parchment paper works fine. Take your 1 lb of chicken tenders and pat them completely dry using paper towels. Removing excess moisture is essential because wet chicken will steam instead of getting crispy. Set the dried tenders aside on a clean plate.
2-Second Step: Creating the Coating Mixture In a wide, shallow bowl or pie plate, combine 1 cup panko breadcrumbs, 1/2 cup grated parmesan cheese, 1 tsp garlic powder, 1 tsp paprika, and salt and pepper to taste. Mix well using a fork or whisk until all ingredients are evenly distributed. Taste a small pinch of your coating mixture to check seasoning levels. Remember that parmesan is naturally salty, so you may need less added salt than expected. Adjust if needed before proceeding. In a second shallow bowl, beat 2 large eggs until smooth. Add a tablespoon of water or milk to thin slightly if desired. This helps the egg wash coat more evenly and makes dipping easier.
3-Third Step: The Dredging Process Working with one tender at a time, dip each piece into the beaten eggs. Lift and let excess egg drip back into the bowl for about 2 seconds. Too much egg makes the coating soggy and prevents proper adhesion. Transfer the egg-coated tender to your breadcrumb mixture. Press firmly on both sides, using your fingers to pack the coating onto the chicken. The more contact you create between the coating and chicken, the better it will adhere during baking. Place each coated tender on your prepared baking sheet or wire rack. Leave space between pieces for air circulation. Crowded pans lead to steaming rather than baking, resulting in less crispy tenders.
4-Fourth Step: The Secret to Maximum Crispiness Here’s where many recipes fall short. After placing all tenders on the baking sheet, spray them generously with cooking spray or drizzle with olive oil. This step is non-negotiable for baked chicken tenders that rival fried versions. The oil helps the panko brown and crisp up in the oven. Without it, you’ll get pale, dry-tasting tenders. Make sure to coat all exposed areas, especially the tops and sides. If you prefer a more indulgent version, brush melted butter over the tenders instead. Butter adds richness and helps the coating brown beautifully, though it does increase the calorie count.
5-Fifth Step: Baking and Serving Place the baking sheet in your preheated 425°F oven. Bake for 15-20 minutes, flipping halfway through cooking time. If using a wire rack, you can skip the flip since air circulates underneath. The tenders are done when the coating is golden brown and the internal temperature reaches 165°F at the thickest part. Use a meat thermometer for accuracy, especially when cooking for children or elderly guests. For extra crispy results, switch your oven to broil for the final 2 minutes. Watch carefully during this step to prevent burning. The coating should turn a deep golden brown with some darker spots. Remove from the oven and let rest for 3-5 minutes before serving. This resting period allows juices to redistribute throughout the meat, ensuring every bite is moist and tender. Serve your parmesan chicken tenders baked oven-style with your favorite dipping sauces. Marinara, ranch, honey mustard, or garlic aioli all pair wonderfully. For a complete meal, add a fresh salad or roasted vegetables on the side.
Notes
🔥 Pat chicken dry before breading for maximum crispiness and adhesion.
🥚 Use room temperature eggs for better coating coverage.
⏱️ Don’t overcrowd the pan – bake in batches if needed for even cooking.
- Prep Time: 15 minutes
- Cook Time: 22 minutes
- Category: Main Course
- Method: Baking
- Cuisine: American
Nutrition
- Serving Size: 4 tenders
- Calories: 320 kcal
- Sugar: 1 g
- Sodium: 680 mg
- Fat: 12 g
- Saturated Fat: 4 g
- Unsaturated Fat: 7 g
- Trans Fat: 0 g
- Carbohydrates: 12 g
- Fiber: 1 g
- Protein: 38 g
- Cholesterol: 150 mg
Keywords: parmesan chicken tenders, crispy baked chicken, oven chicken tenders, easy parmesan tenders