Why You’ll Love This Crispy Orange Chicken
If you’re craving something that tastes like takeout but made with ingredients you trust, this easy orange chicken will quickly become a family favorite at your dinner table. This crispy orange chicken recipe is simple and quick to cook, requiring minimal ingredients and straightforward steps that save time in the kitchen. Made with wholesome ingredients, this dish offers nutritional advantages such as lean protein and vitamins, supporting wellness while satisfying your taste buds. The recipe is highly adaptable to various dietary needs, including vegan, gluten-free, and low-calorie options, making it suitable for everyone. The unique combination of the tangy orange sauce and crispy chicken coating delivers a standout dish full of vibrant flavors and satisfying textures.
Benefits of Making Orange Chicken at Home
Creating your own crispy orange chicken at home comes with numerous advantages beyond just great taste. When you prepare this dish yourself, you have complete control over the ingredients, allowing you to make healthier choices without sacrificing flavor. Restaurant versions often contain excessive amounts of sodium, sugar, and unhealthy fats. By cooking at home, you can adjust these elements to suit your dietary preferences while still enjoying that delicious takeout experience you love.
Another significant benefit is the cost savings. Ordering delivery can add up quickly, especially for families. This recipe uses affordable, readily available ingredients that you likely already have in your pantry. Plus, the satisfaction of creating something restaurant-quality in your own kitchen is unmatched. Children particularly enjoy the sweet and tangy flavor profile, making it an excellent option for picky eaters who might otherwise turn away from more complex dishes.
The Perfect Balance of Flavors
What sets this crispy orange chicken apart from other recipes is the careful balance of flavors. The sweetness from the sugar and orange juice perfectly complements the savory soy sauce, while the red chili flakes add just the right amount of heat to keep things interesting. The aromatic notes from fresh garlic and ginger elevate the entire dish without overpowering the main ingredients. This harmonious blend is what makes orange chicken such a beloved dish worldwide and explains its enduring popularity across different cultures and age groups.
The crispy coating creates a delightful texture contrast that makes every bite exciting. Many home cooks struggle to achieve that perfect crunch, but with the right technique and ingredient ratios, you’ll consistently produce restaurant-quality results. The coating also helps keep the chicken moist and tender inside, creating that ideal combination everyone seeks in a well-executed orange chicken recipe.
Jump To
- 1. Why You’ll Love This Crispy Orange Chicken
- 2. Essential Ingredients for Crispy Orange Chicken
- 3. How to Prepare the Perfect Crispy Orange Chicken: Step-by-Step Guide
- 4. Dietary Substitutions to Customize Your Crispy Orange Chicken
- 5. Mastering Crispy Orange Chicken: Advanced Tips and Variations
- 6. How to Store Crispy Orange Chicken: Best Practices
- 7. FAQs: Frequently Asked Questions About Crispy Orange Chicken
- 8. Crispy Orange Chicken
Essential Ingredients for Crispy Orange Chicken
Creating the perfect crispy orange chicken starts with gathering the right ingredients. Each component plays a crucial role in achieving that signature taste and texture you’re looking for. Below is a detailed list of everything you’ll need to bring this delicious dish to life in your kitchen.
Chicken Coating Ingredients
The foundation of any great orange chicken is properly prepared and coated chicken. The coating process creates that irresistible crunch while sealing in moisture to keep the meat tender. For this recipe, you’ll need:
- 4 boneless skinless chicken breasts cut into bite-size pieces
- 3 whisked eggs
- 1/3 cup cornstarch
- 1/3 cup flour
- salt to taste
- oil for frying
For the coating, you’ll also need 1 cup all-purpose flour to create a crispy exterior, and 2 eggs to help bind the coating to the chicken pieces. The 1/2 cup cornstarch is essential as it enhances crispiness and ensures a crunchy exterior that rivals your favorite restaurant version.
Orange Chicken Sauce Ingredients
The sauce is what gives this dish its distinctive flavor profile. A well-balanced orange sauce should hit all the right notes sweet, tangy, savory, and slightly spicy. For the orange chicken sauce, you’ll need:
- 1 cup orange juice
- 1/2 cup sugar
- 2 tablespoons rice or white vinegar
- 2 tablespoons soy sauce (or tamari for gluten-free option)
- 1/4 teaspoon ground ginger
- 1/4 teaspoon garlic powder or 2 finely diced garlic cloves
- 1/2 teaspoon red chili flakes
- the zest of 1 orange
- 1 tablespoon cornstarch
The 1/4 cup soy sauce adds umami and saltiness, balancing the sweetness, while 1/3 cup brown sugar sweetens the sauce for a perfect flavor contrast. The aromatic elements come from 2 cloves garlic, minced, which infuses aromatic depth, and 1 tsp grated ginger, which provides warmth and spice. You’ll need 2 tbsp vegetable oil for frying the chicken to achieve that perfect golden-brown color.
Garnish Ingredients
While not strictly necessary, garnishes add visual appeal and an extra layer of flavor that elevates the dish from good to exceptional. For garnish, have ready:
- chopped green onions
- additional orange zest
These simple additions create a beautiful presentation and introduce fresh flavors that complement the rich sauce perfectly. They only take a moment to prepare but make a significant difference in the overall dining experience.
Special Dietary Options
This versatile recipe can be easily adapted to suit various dietary needs without compromising on flavor or texture. Here are some common substitutions you might consider:
Vegan Option: Substitute chicken with tofu or seitan; use gluten-free flour for coating. This plant-based version maintains the crispy texture and delicious sauce while being completely animal-friendly.
Gluten-Free Option: Replace all-purpose flour with rice flour or gluten-free baking mix. This simple swap makes the dish accessible to those with gluten sensitivities without sacrificing the crunchy coating everyone loves.
Low-Calorie Option: Use air-fried chicken pieces and reduce sugar in the sauce accordingly. This lighter version allows you to enjoy all the flavors with significantly fewer calories, perfect for those watching their intake.
According to chicken nutrition experts, properly prepared chicken breast is an excellent source of lean protein, making this dish not just delicious but nutritionally sound as well.
How to Prepare the Perfect Crispy Orange Chicken: Step-by-Step Guide
Now that we have all our ingredients ready, let’s dive into the cooking process. Follow these detailed steps to create crispy orange chicken that will impress your family and friends. Don’t worry if you’re new to cooking this recipe is designed to be approachable for cooks of all skill levels.
Preparing the Chicken
The first step is to prepare all ingredients by cutting the chicken into bite-sized pieces and setting up three bowls for flour, beaten eggs, and cornstarch. This assembly-line approach makes the coating process efficient and prevents cross-contamination. Cut your chicken breasts into uniform pieces, approximately 1-inch cubes, to ensure they all cook at the same rate. Consistency in size is key to achieving evenly cooked chicken throughout the dish.
Season your chicken pieces lightly with salt before coating them. This simple step enhances flavor from the inside out. While the sauce provides plenty of seasoning, a little salt on the chicken itself ensures every bite is perfectly seasoned, not just the exterior coated in sauce.
Creating the Coating
Coat the chicken pieces first in flour, then dip in eggs, and finally coat evenly with cornstarch for maximum crispiness. This three-step coating process is what creates that restaurant-quality crunch that makes this dish so special. The flour provides a base layer, the egg helps the final coating adhere, and the cornstarch creates the crispy exterior we all love.
For the crispiest results, shake off excess flour and egg between steps. Too much coating can become heavy and soggy rather than light and crispy. Work in small batches to ensure each piece gets proper attention and coating. Set up your workstation with the bowls in order: flour first, then eggs, then cornstarch. This logical arrangement makes the process smooth and prevents confusion.
Frying the Chicken
Heat vegetable oil in a deep pan to 350°F (175°C) and fry the chicken pieces in batches until golden brown and cooked through, about 4-5 minutes each batch. Maintaining the correct oil temperature is crucial if it’s too low, the chicken will absorb excess oil and become greasy; if it’s too high, the outside will burn before the inside cooks through.
Use a kitchen thermometer to monitor the oil temperature accurately, adjusting the heat as needed to maintain 350°F. Fry only a few pieces at a time; overcrowding the pan will lower the oil temperature dramatically and result in soggy chicken. As each batch finishes, transfer the chicken to a wire rack or paper towel-lined plate to drain excess oil. This simple step helps maintain the crispy texture until serving time.
Preparing the Orange Sauce
While the chicken is frying, prepare the sauce. In a separate saucepan, combine orange juice, soy sauce, brown sugar, minced garlic, and grated ginger. Simmer the sauce over medium heat until slightly thickened, approximately 5-7 minutes. Stir occasionally to prevent the sugar from burning and ensure all ingredients are well incorporated.
The sauce should have a glossy appearance and coat the back of a spoon when properly thickened. If it becomes too thick, add a splash of water or orange juice to thin it slightly. The perfect consistency is somewhere between syrup and a thick glaze thick enough to coat the chicken generously but not so thick that it becomes gloppy or hard to work with.
Combining Chicken and Sauce
Toss the fried chicken pieces in the prepared orange sauce, ensuring each piece is fully coated. This step should be done just before serving to maintain the contrast between the crispy exterior and tender interior. If the sauce sits on the chicken too long, the coating will become soft and lose its crunch.
For the best results, work in batches when combining the chicken with sauce. Add a portion of chicken to the sauce, gently toss to coat, then transfer to a serving platter. This method ensures even coating without breaking apart the crispy pieces. The residual heat from the chicken will slightly warm the sauce, creating the perfect temperature for serving.
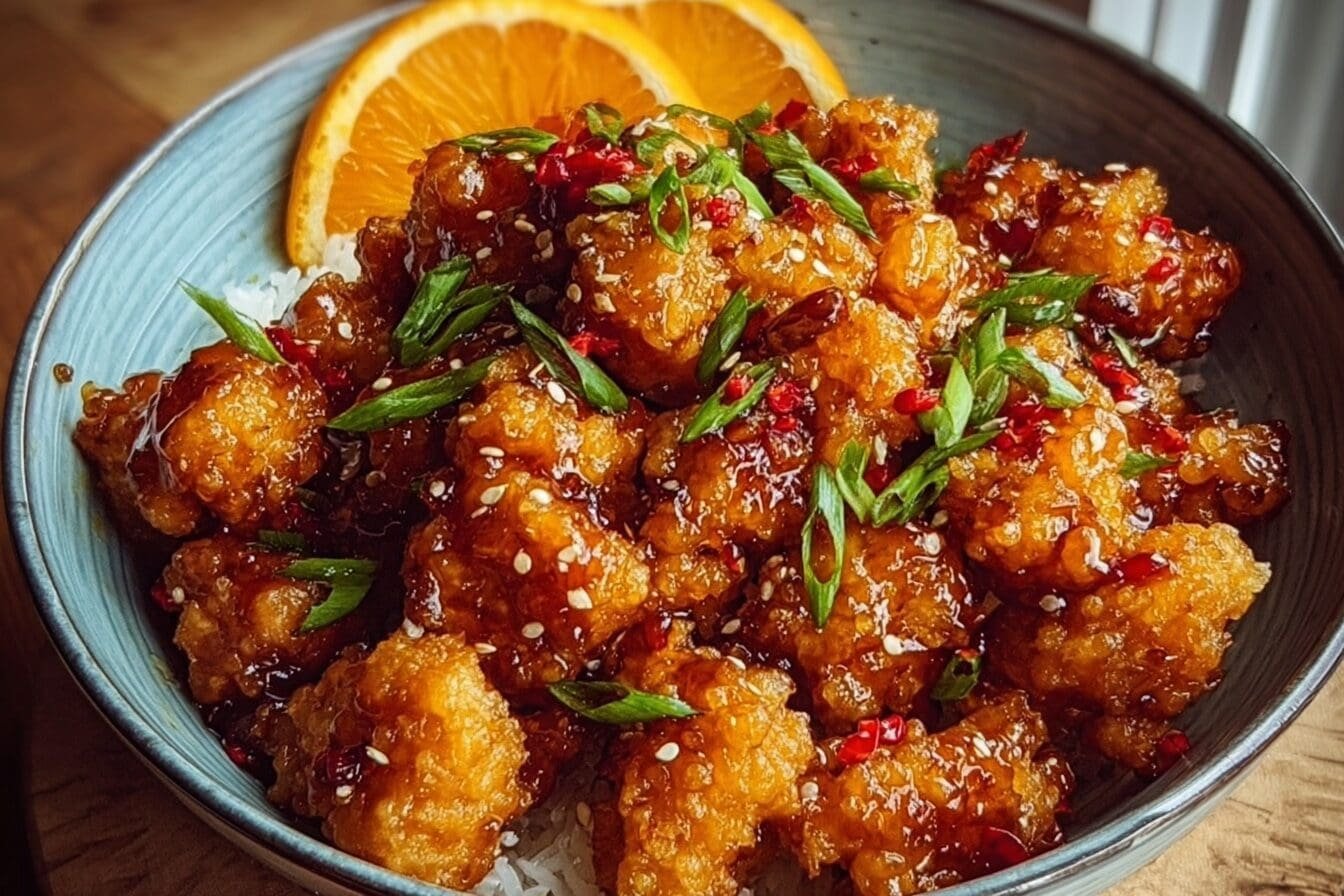
Final Presentation
Serve immediately, garnished with sliced green onions or sesame seeds. The visual appeal of your dish is just as important as its taste. A sprinkle of bright green onions against the glossy orange sauce creates an attractive contrast that makes the dish even more appetizing. You can also add some additional orange zest for a pop of color and extra citrus aroma.
Consider serving your crispy orange chicken over steamed jasmine rice, which perfectly complements the flavors and helps balance the sauce. The rice absorbs some of the sauce, creating a complete and satisfying meal. For a lighter option, you might serve it over cauliflower rice or with steamed vegetables on the side.
Adapt the recipe by using tofu for a vegan version or an air fryer to reduce oil for a low-calorie alternative. The versatility of this recipe makes it suitable for various dietary preferences without sacrificing flavor or texture. No matter which variation you choose, the delicious combination of crispy coating and tangy orange sauce will remain the star of the show.

Dietary Substitutions to Customize Your Crispy Orange Chicken
One of the greatest strengths of this recipe is its adaptability. Whether you’re following a specific diet or simply working with ingredients you have on hand, there are numerous substitutions you can make without compromising the delicious results. Let’s explore the various ways you can customize this crispy orange chicken to suit your needs.
Protein and Main Component Alternatives
While chicken breast is traditional for this dish, you have several options for the main protein. Replace chicken with tofu, tempeh, or seitan for vegan or vegetarian diets. These plant-based alternatives absorb the delicious orange sauce beautifully while providing their own unique textures and nutritional benefits. For the best results with tofu, press it first to remove excess moisture, then cut into cubes and follow the same coating process.
For those who eat poultry but prefer dark meat, boneless skinless chicken thighs are an excellent alternative to chicken breasts. Thighs tend to be juicier and more flavorful, and they remain tender during frying. You can use the same preparation method and cooking times, though thighs may require slightly more time to reach an internal temperature of 165°F (75°C).
Use gluten-free flours or coating mixes to accommodate gluten sensitivities. A blend of rice flour, tapioca starch, and cornstarch can create a crispy coating that rivals the traditional version. Be sure to check all your ingredients, including sauces and seasonings, to ensure they are certified gluten-free if that’s a concern for you or your family members.
Vegetable, Sauce, and Seasoning Modifications
Swap out garlic for garlic-infused oil for low-FODMAP diets. This substitution provides garlic flavor without the fructans that can cause digestive issues for some people. Similarly, fresh ginger can be replaced with ginger powder if fresh isn’t available, though the flavor will be slightly less vibrant.
Use tamari or coconut aminos instead of soy sauce for gluten-free needs. Tamari has a similar flavor profile to soy sauce but is made without wheat, making it naturally gluten-free. Coconut aminos offer a slightly sweeter alternative with less sodium, which might be preferable for those watching their salt intake.
Incorporate seasonal vegetables like bell peppers or snap peas to add variety and nutrition. Simply stir-fry these vegetables until crisp-tender, then add them to the sauce along with the chicken. This addition not only boosts the nutritional value but also adds color and texture to the dish, making it a more complete meal.
Adjust sweetness by substituting brown sugar with honey, maple syrup, or a sugar substitute for lower-calorie or diabetic-friendly versions. Natural sweeteners like honey and maple syrup add their own subtle flavor notes that can enhance the overall taste of the sauce. For a sugar-free version, erythritol or monk fruit sweetener can be used in equal amounts to sugar without significantly altering the consistency of the sauce.
The balsamic chicken breast recipe on our site shares this adaptability, showing how simple ingredient swaps can create entirely different flavor profiles while maintaining ease of preparation.
Mastering Crispy Orange Chicken: Advanced Tips and Variations
Once you’ve mastered the basic recipe, you might want to explore some professional techniques and creative variations to take your crispy orange chicken to the next level. These tips and tricks will help you achieve restaurant-quality results and customize the dish to your specific taste preferences.
Pro Cooking Techniques
Double-fry the chicken pieces for extra crunch; use a thermometer to monitor oil temperature precisely. The double-frying technique is a professional secret used in many restaurants. First fry the chicken at a slightly lower temperature (around 325°F) until cooked through, then remove and let rest while increasing the oil temperature to 375°F. Fry the chicken a second time for just 1-2 minutes until the exterior becomes incredibly crispy. This two-step method ensures the chicken is fully cooked inside while achieving an exterior crunch that stays crisp even after saucing.
Maintaining the correct oil temperature is crucial for perfect results. Invest in a good kitchen thermometer and check the temperature frequently, adjusting the heat as needed. When adding cold chicken to hot oil, the temperature will naturally drop be prepared to increase the heat slightly to compensate. This attention to detail is what separates home cooks from professionals and can make a significant difference in your final results.
Flavor Variations
Incorporate chili flakes or Szechuan peppercorns for a spicy twist; add fresh orange zest to the sauce for enhanced citrus aroma. The amount of heat can be adjusted to your preference, starting with 1/2 teaspoon of red chili flakes and increasing if you enjoy spicier food. For those who love authentic Szechuan flavors, toasting Szechuan peppercorns in a dry pan before grinding them adds a unique numbing sensation and citrusy aroma that elevates the dish to something truly special.
Fresh orange zest is more than just a garnish it contains the essential oils that carry the most intense orange flavor. Add the zest towards the end of cooking to preserve these volatile oils. For an even more pronounced citrus flavor, try adding a tablespoon of fresh orange juice concentrate along with the regular orange juice. This small addition can make a noticeable difference in the brightness of the sauce.
Presentation Tips
Serve over steamed jasmine rice and garnish with chopped cilantro and toasted sesame seeds for visual appeal. Taking a few extra minutes with presentation transforms a simple weeknight dinner into something worthy of a dinner party. Fluff the rice with a fork before serving to create individual grains rather than clumps. Use a large, shallow platter to showcase the glossy, sauce-coated chicken, allowing guests to appreciate its appetizing appearance.
Consider adding color contrast with thinly sliced red bell peppers, carrots, or green onions as additional garnishes. Not only do these vegetables look beautiful, but they also provide different textures and flavors that complement the main dish. Toast your sesame seeds in a dry pan until golden brown to enhance their nutty flavor before sprinkling them over the chicken.
Make-Ahead Options
Prepare the sauce and marinate the chicken ahead of time; freeze cooked chicken pieces for later reheating without losing crispiness. The sauce can be made up to three days in advance and stored in an airtight container in the refrigerator. Reheat gently before serving, adding a splash of water if it has thickened too much. Chicken pieces can be fried ahead of time and frozen in a single layer on a baking sheet before transferring to a freezer bag for long-term storage.
When you’re ready to enjoy your make-ahead orange chicken, reheat the chicken pieces in an air fryer or oven at 375°F until hot and crispy. This method helps restore the crunch that might have been lost during freezing. The sauce should be reheated separately, then combined with the chicken just before serving to maintain that perfect textural contrast we all love.
For another versatile chicken dish that pairs well with various sides, check out our crispy baked parmesan chicken, which offers a completely different flavor profile while maintaining the same commitment to quality and simplicity.
How to Store Crispy Orange Chicken: Best Practices
Nothing beats the taste of freshly made crispy orange chicken, but sometimes leftovers are inevitable. Proper storage and reheating techniques can help maintain the quality of your dish so you can enjoy it almost as much the second time around. Here’s everything you need to know about storing your orange chicken for maximum freshness and flavor retention.
Refrigeration Guidelines
Store leftover crispy orange chicken in an airtight container and keep it refrigerated for up to 3 days. Choose a container that fits your leftovers without too much excess air space, which can cause the food to dry out more quickly. If possible, store the sauce separately from the chicken to maintain the crispy texture of the coating. This simple extra step makes a significant difference when reheating, as the chicken won’t become soggy from sitting in the sauce.
When refrigerating, allow the food to cool to room temperature first, but don’t leave it out for more than two hours to prevent bacterial growth. Hot food placed directly in the refrigerator can raise the appliance’s internal temperature, potentially affecting other items stored there. Once cooled, transfer your leftovers promptly to maintain food safety standards.
Freezing for Long-Term Storage
For long-term storage, place chicken pieces separately on a baking sheet to freeze individually before transferring to airtight freezer bags; maintain up to 1 month. This method, known as flash freezing, prevents the pieces from sticking together in a solid clump, allowing you to remove only what you need for each meal. Make sure to label your freezer bags with the date so you can keep track of how long the chicken has been stored.
Freezing sauce separately is recommended for best results. The sauce can be frozen in ice cube trays for convenient portioning, then transferred to a freezer bag once solid. This approach allows you to thaw exactly the amount of sauce needed for each serving, reducing waste and ensuring the perfect chicken-to-sauce ratio every time.
Reheating Techniques
Reheat in an oven or air fryer at 350°F (175°C) for 8-10 minutes to retain crispiness and food safety. The microwave might seem convenient, but it creates steam that will make your crispy chicken soggy. The oven or air fryer, on the other hand, uses dry heat that can actually help restore some of the original crunch, especially in the air fryer.
If using the oven, spread the chicken in a single layer on a baking sheet lined with parchment paper or a wire rack. The wire rack allows hot air to circulate around the chicken, promoting even heating and crisping. For the air fryer, work in batches to avoid overcrowding, which would cause the chicken to steam rather than crisp. Heat the sauce separately in a small saucepan or microwave-safe container until warmed through.
Meal Prep Considerations
Store sauce separately from fried chicken to maintain texture; mix before serving for freshness. This approach is particularly beneficial for those who like to prepare meals in advance for the week ahead. You can fry a larger batch of chicken on the weekend and prepare the sauce, storing them separately to combine just before eating throughout the week.
For meal prep bowls, consider adding steamed rice and your favorite vegetables to create complete meals ready to grab and go. The components will maintain their individual qualities when stored separately, allowing you to assemble fresh-tasting meals even on your busiest days. Just be sure to let everything cool completely before packaging to avoid condensation that could make the food soggy.
FAQs: Frequently Asked Questions About Crispy Orange Chicken
How can I make crispy orange chicken at home?
To make crispy orange chicken, start by cutting boneless skinless chicken breasts or thighs into bite-sized pieces. Coat the chicken by dipping it in beaten eggs, then dredge in a mixture of cornstarch and flour for extra crispiness. Fry the chicken in oil heated to 350°F (175°C) until golden brown and cooked through. For the sauce, combine fresh orange juice, sugar, vinegar, soy sauce, minced garlic, grated ginger, and red chili flakes in a pan. Thicken the sauce with a cornstarch slurry, then toss the fried chicken pieces in the sauce. Garnish with fresh orange zest and chopped green onions before serving.
What ingredients do I need to prepare the orange sauce for crispy chicken?
The essential ingredients for the orange sauce include fresh orange juice, granulated sugar, rice vinegar or white vinegar, soy sauce (use tamari for gluten-free), fresh or powdered garlic, fresh ginger, red chili flakes, orange zest, and cornstarch to thicken. These ingredients create a balanced mix of sweet, tangy, and slightly spicy flavors that coat the crispy chicken perfectly.
Can I use chicken thighs instead of chicken breasts for orange chicken?
Yes, boneless skinless chicken thighs are a great alternative to chicken breasts for making orange chicken. Thighs tend to be juicier and more flavorful, and they remain tender during frying. You can use the same preparation method and cooking times, though thighs may require slightly more time to reach an internal temperature of 165°F (75°C).
How do I make gluten-free crispy orange chicken?
To prepare gluten-free crispy orange chicken, substitute regular soy sauce with tamari, which is gluten-free. Also, check that the cornstarch and any other ingredients used don’t contain gluten or cross-contamination. Using cornstarch alone for coating instead of flour will help maintain the crispiness without gluten.
What oil is best for frying orange chicken and at what temperature?
Use a neutral oil with a high smoke point for frying orange chicken, such as vegetable, canola, or peanut oil. Heat the oil to around 350°F (175°C) before adding the chicken pieces. Maintaining this temperature ensures a crispy exterior without absorbing excess oil, while cooking the chicken thoroughly inside. Use a thermometer to monitor the oil temperature for best results.

Crispy Orange Chicken
- Total Time: 35 minutes
- Yield: 4 servings 1x
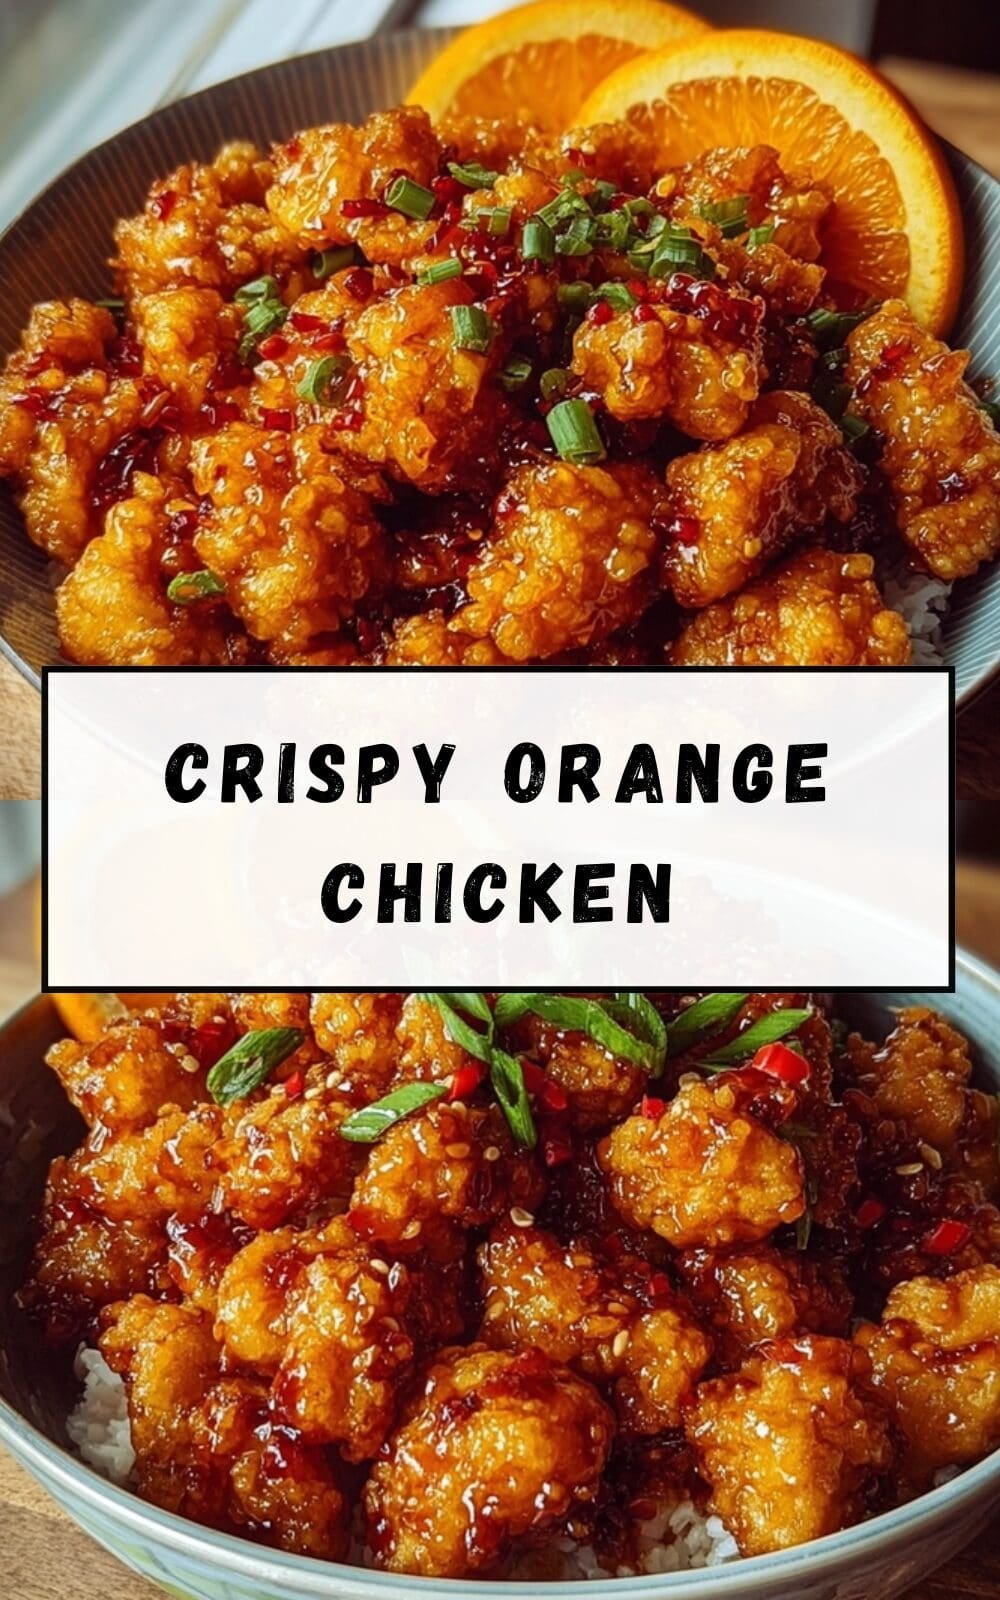
Description
🍊 Enjoy a flavorful Chinese Orange Chicken recipe featuring a crispy coating paired with a tangy, zesty sauce.
🍗 This dish offers a perfect balance of sweet and savory with a delightful crunch, ideal for a satisfying homemade meal.
Ingredients
4 boneless skinless chicken breasts cut into bite-size pieces
3 whisked eggs
1/3 cup cornstarch
1/3 cup flour
salt to taste
oil for frying
1 cup all-purpose flour for coating
2 eggs for coating binding
1/2 cup cornstarch for coating crispiness
1 cup orange juice
1/2 cup sugar
2 tablespoons rice or white vinegar
2 tablespoons soy sauce (or tamari for gluten-free option)
1/4 teaspoon ground ginger
1/4 teaspoon garlic powder or 2 finely diced garlic cloves
1/2 teaspoon red chili flakes
the zest of 1 orange
1 tablespoon cornstarch
1/4 cup soy sauce
1/3 cup brown sugar
2 cloves garlic, minced
1 tsp grated ginger
2 tbsp vegetable oil for frying
chopped green onions for garnish
additional orange zest for garnish
Instructions
1-Preparing the Chicken: The first step is to prepare all ingredients by cutting the chicken into bite-sized pieces and setting up three bowls for flour, beaten eggs, and cornstarch. This assembly-line approach makes the coating process efficient and prevents cross-contamination. Cut your chicken breasts into uniform pieces, approximately 1-inch cubes, to ensure they all cook at the same rate. Consistency in size is key to achieving evenly cooked chicken throughout the dish.
2-Preparing the Chicken: Season your chicken pieces lightly with salt before coating them. This simple step enhances flavor from the inside out. While the sauce provides plenty of seasoning, a little salt on the chicken itself ensures every bite is perfectly seasoned, not just the exterior coated in sauce.
3-Creating the Coating: Coat the chicken pieces first in flour, then dip in eggs, and finally coat evenly with cornstarch for maximum crispiness. This three-step coating process is what creates that restaurant-quality crunch that makes this dish so special. The flour provides a base layer, the egg helps the final coating adhere, and the cornstarch creates the crispy exterior we all love.
4-Creating the Coating: For the crispiest results, shake off excess flour and egg between steps. Too much coating can become heavy and soggy rather than light and crispy. Work in small batches to ensure each piece gets proper attention and coating. Set up your workstation with the bowls in order: flour first, then eggs, then cornstarch. This logical arrangement makes the process smooth and prevents confusion.
5-Frying the Chicken: Heat vegetable oil in a deep pan to 350°F (175°C) and fry the chicken pieces in batches until golden brown and cooked through, about 4-5 minutes each batch. Maintaining the correct oil temperature is crucial if it’s too low, the chicken will absorb excess oil and become greasy; if it’s too high, the outside will burn before the inside cooks through.
6-Frying the Chicken: Use a kitchen thermometer to monitor the oil temperature accurately, adjusting the heat as needed to maintain 350°F. Fry only a few pieces at a time; overcrowding the pan will lower the oil temperature dramatically and result in soggy chicken. As each batch finishes, transfer the chicken to a wire rack or paper towel-lined plate to drain excess oil. This simple step helps maintain the crispy texture until serving time.
7-Preparing the Orange Sauce: While the chicken is frying, prepare the sauce. In a separate saucepan, combine orange juice, soy sauce, brown sugar, minced garlic, and grated ginger. Simmer the sauce over medium heat until slightly thickened, approximately 5-7 minutes. Stir occasionally to prevent the sugar from burning and ensure all ingredients are well incorporated.
8-Preparing the Orange Sauce: The sauce should have a glossy appearance and coat the back of a spoon when properly thickened. If it becomes too thick, add a splash of water or orange juice to thin it slightly. The perfect consistency is somewhere between syrup and a thick glaze thick enough to coat the chicken generously but not so thick that it becomes gloppy or hard to work with.
9-Combining Chicken and Sauce: Toss the fried chicken pieces in the prepared orange sauce, ensuring each piece is fully coated. This step should be done just before serving to maintain the contrast between the crispy exterior and tender interior. If the sauce sits on the chicken too long, the coating will become soft and lose its crunch.
10-Combining Chicken and Sauce: For the best results, work in batches when combining the chicken with sauce. Add a portion of chicken to the sauce, gently toss to coat, then transfer to a serving platter. This method ensures even coating without breaking apart the crispy pieces. The residual heat from the chicken will slightly warm the sauce, creating the perfect temperature for serving.
11-Final Presentation: Serve immediately, garnished with sliced green onions or sesame seeds. The visual appeal of your dish is just as important as its taste. A sprinkle of bright green onions against the glossy orange sauce creates an attractive contrast that makes the dish even more appetizing. You can also add some additional orange zest for a pop of color and extra citrus aroma.
12-Final Presentation: Consider serving your crispy orange chicken over steamed jasmine rice, which perfectly complements the flavors and helps balance the sauce. The rice absorbs some of the sauce, creating a complete and satisfying meal. For a lighter option, you might serve it over cauliflower rice or with steamed vegetables on the side.
13-Final Presentation: Adapt the recipe by using tofu for a vegan version or an air fryer to reduce oil for a low-calorie alternative. The versatility of this recipe makes it suitable for various dietary preferences without sacrificing flavor or texture. No matter which variation you choose, the delicious combination of crispy coating and tangy orange sauce will remain the star of the show.
Notes
🍊 Use fresh orange zest and juice for the best tangy flavor.
🍗 Fry chicken in small batches to keep the oil temperature stable and ensure crispiness.
🌶 Adjust red chili flakes according to desired spice level.
- Prep Time: 15 minutes
- Cook Time: 20 minutes
- Category: Main Dish
- Method: Frying, simmering
- Cuisine: Chinese-American
Nutrition
- Serving Size: 1 serving
Keywords: Chinese Orange Chicken,Crispy Orange Chicken,Tangy Orange Chicken,Homemade Orange Chicken