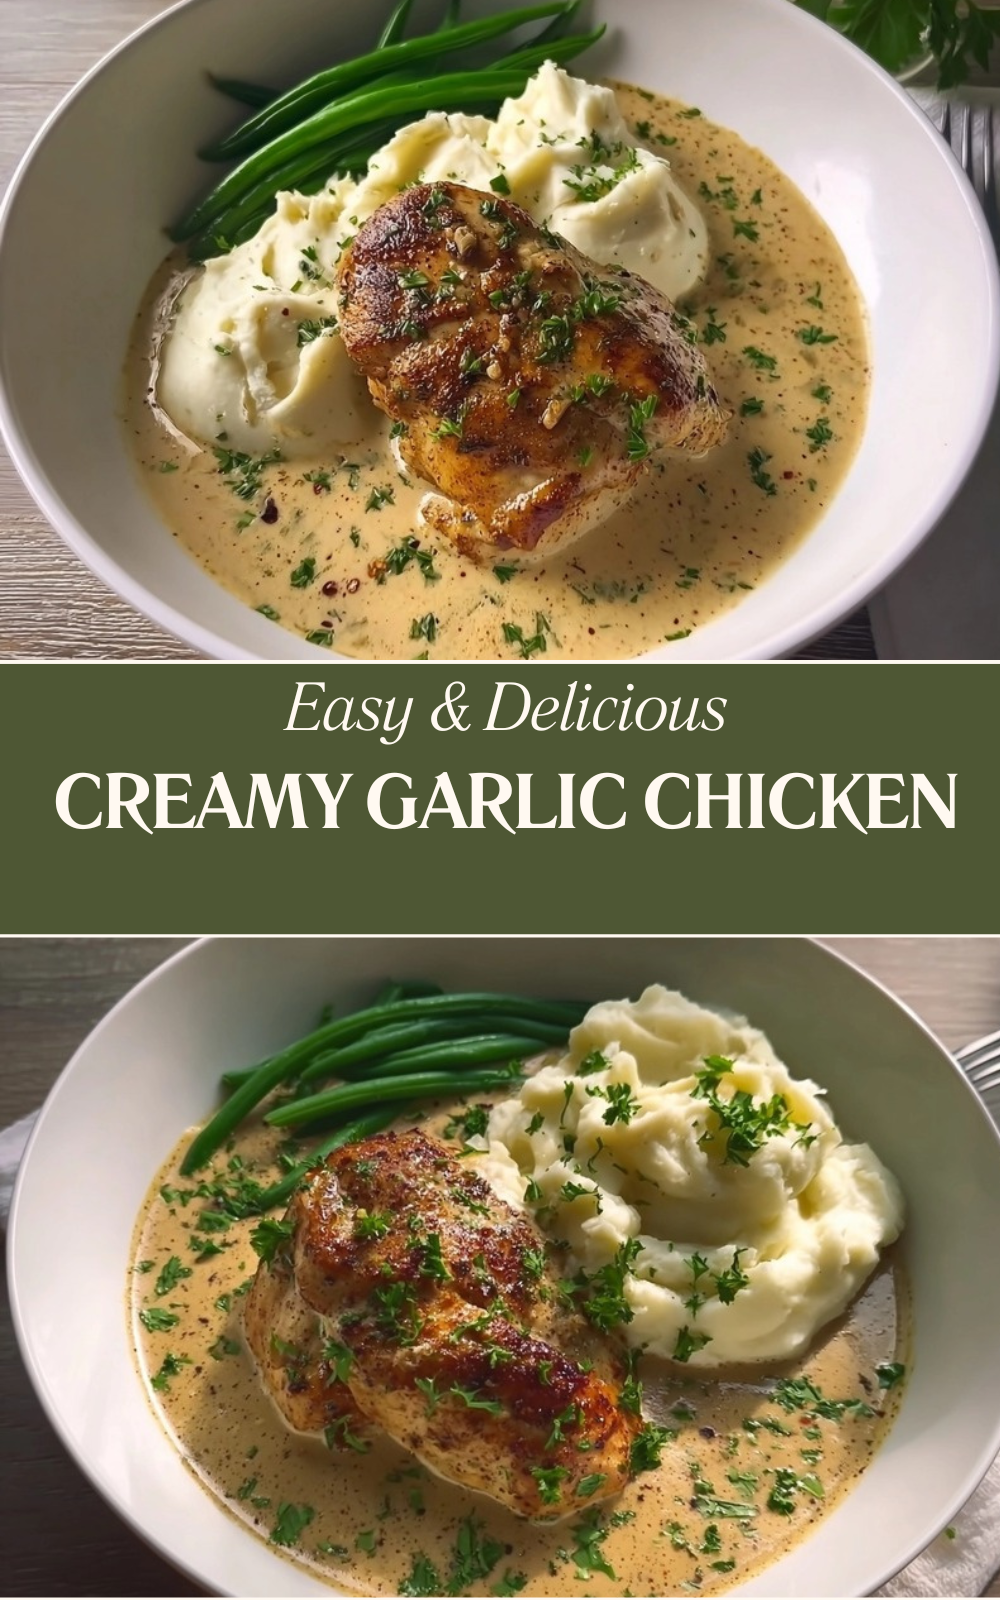
Why You’ll Love This Creamy Garlic Chicken
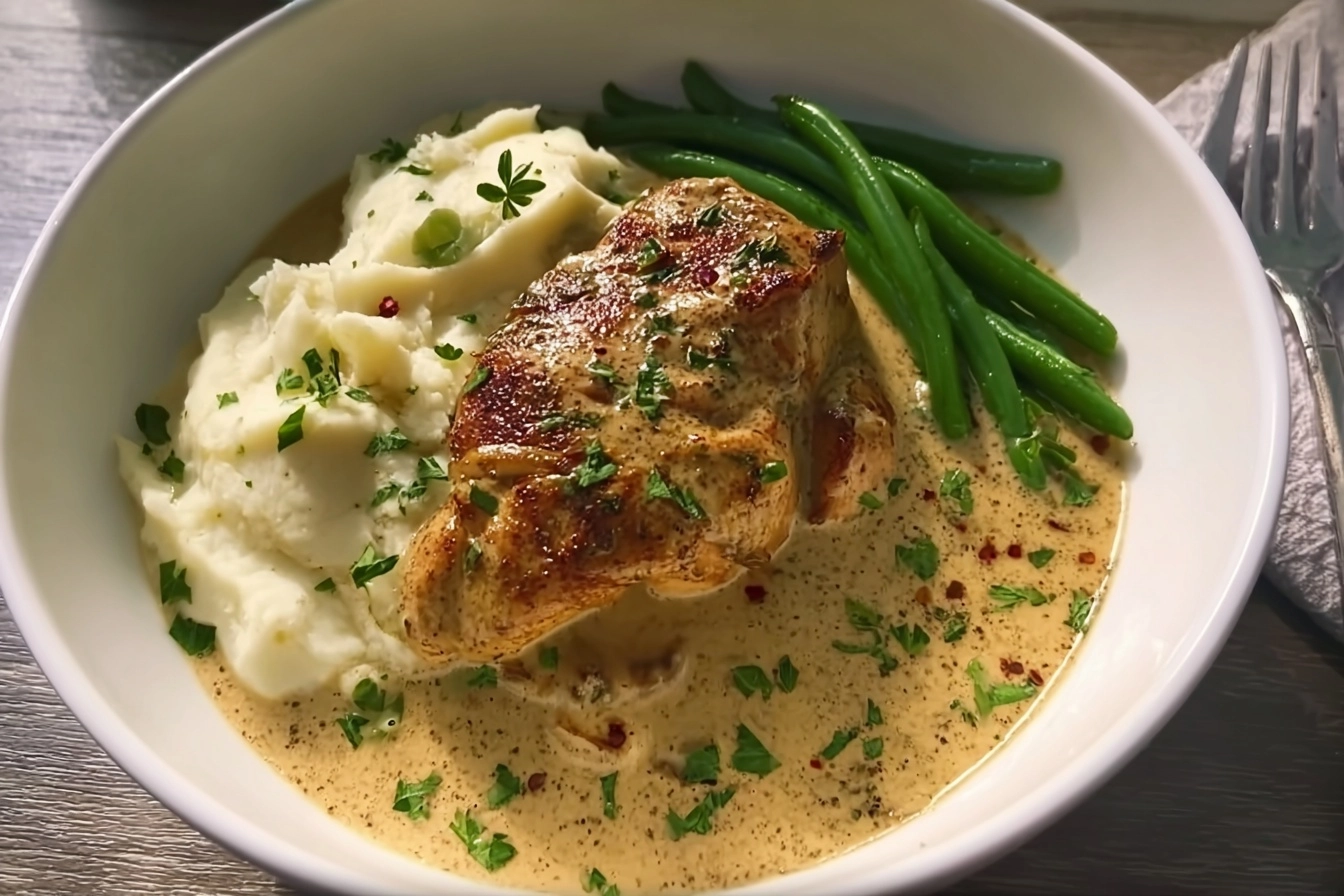
If you’re searching for a dinner that feels fancy but comes together without fuss, this creamy garlic chicken recipe is exactly what you need. Ready in just 40 minutes from start to finish, this dish delivers restaurant-quality flavor with simple ingredients you likely already have in your kitchen. The creamy sauce, infused with aromatic garlic, coats tender chicken cutlets beautifully and pairs wonderfully with your favorite sides.
Here’s why this 30 minute creamy garlic chicken will become a regular in your dinner rotation:
- Ease of preparation: With only 10 minutes of prep time and basic cooking techniques, even beginner cooks can master this recipe. The steps are straightforward, and you only need one skillet to make the entire dish.
- Budget-friendly: At approximately $2.30 per serving, this meal feeds a family of four for under $10. Chicken breasts are affordable, and the sauce ingredients are pantry staples.
- Health benefits: Each serving packs 34g of protein and garlic offers numerous health advantages, including immune support and anti-inflammatory properties. According to Healthline, garlic has been used for centuries for its medicinal qualities.
- Versatility: This dish adapts easily to different tastes and dietary preferences. You can swap ingredients, add vegetables, or serve it over various bases like pasta, rice, or mashed potatoes.
- Distinctive flavor: Using a whole bulb of garlic might seem like a lot, but slow-cooking the cloves mellows their sharpness into a sweet, buttery flavor that permeates the cream sauce without overpowering it.
Jump To
- 1. Why You’ll Love This Creamy Garlic Chicken
- 2. Essential Ingredients for Creamy Garlic Chicken
- 3. How to Prepare the Perfect Creamy Garlic Chicken: Step-by-Step Guide
- 4. Nutritional Information per Serving
- 5. Dietary Substitutions to Customize Your Creamy Garlic Chicken
- 6. Mastering Creamy Garlic Chicken: Advanced Tips and Variations
- 7. How to Store Creamy Garlic Chicken: Best Practices
- 8. FAQs: Frequently Asked Questions About Creamy Garlic Chicken
- 9. Creamy Garlic Chicken
Essential Ingredients for Creamy Garlic Chicken
Before you begin cooking this easy creamy garlic chicken recipe, gather all your ingredients. Having everything measured and ready makes the cooking process smooth and enjoyable. Here’s everything you’ll need:
Main Ingredients
- 2 boneless, skinless chicken breasts (about 1.3 lbs.) – The star protein that stays tender and juicy when cooked properly.
- 1/2 teaspoon Italian seasoning – A blend of dried herbs that adds classic Mediterranean flavor to the chicken.
- 1/2 teaspoon salt – Enhances all the flavors and helps season the chicken evenly.
- 1/4 teaspoon freshly cracked black pepper – Adds mild heat and depth to the seasoning blend.
- 1/4 cup all-purpose flour – Creates a light coating on the chicken for better browning and helps thicken the sauce slightly.
- 2 tablespoons olive oil – Provides the cooking fat for achieving a golden crust on the chicken.
- 2 tablespoons butter, divided – Adds richness to both the chicken cooking and the garlic sautéing.
- 1 whole garlic bulb (about 8-9 cloves) – The key ingredient that gives this dish its signature aromatic flavor.
- 1 cup chicken broth – Forms the savory base of the cream sauce and adds depth of flavor.
- 3/4 cup heavy cream – Creates the luscious, velvety texture that makes this sauce irresistible.
- 1/2 teaspoon garlic powder – Reinforces the garlic flavor throughout the sauce.
- Additional salt and pepper to taste – For final seasoning adjustments before serving.
Special Dietary Options
For those with dietary restrictions, here are some simple substitutions:
- Gluten-free: Replace all-purpose flour with cornstarch or a gluten-free flour blend for coating the chicken.
- Lower fat: Substitute heavy cream with half-and-half for a lighter version that still maintains creaminess.
- Dairy-free: Use full-fat coconut milk instead of heavy cream and replace butter with additional olive oil.
How to Prepare the Perfect Creamy Garlic Chicken: Step-by-Step Guide
Making this creamy garlic chicken is simpler than you might think. Follow these detailed instructions, and you’ll have a delicious dinner on the table in no time.
Step 1: Prepare the Chicken Cutlets
Start by preparing your chicken properly. Fillet each chicken breast into two thinner cutlets by slicing horizontally through the center. This technique ensures even cooking and reduces the time needed to cook through. If you prefer, you can purchase thin-cut chicken breasts from the store to save time. The thinner cutlets cook faster and absorb more flavor from the sauce.
Pat the chicken dry with paper towels before seasoning. Moisture on the surface prevents proper browning, so this step is crucial for achieving that golden color.
Step 2: Season and Coat the Chicken
In a shallow dish or directly on the chicken, sprinkle 1/2 teaspoon Italian seasoning, 1/2 teaspoon salt, and 1/4 teaspoon freshly cracked black pepper evenly over both sides of each cutlet. The Italian seasoning blend typically includes dried basil, oregano, rosemary, and thyme, which complement the garlic beautifully.
Next, coat the seasoned chicken with 1/4 cup all-purpose flour. Place the flour in a shallow plate and dredge each cutlet, shaking off any excess. The flour coating serves two purposes: it creates a beautiful golden crust when seared, and it helps thicken the sauce later as the chicken simmers in it.
Step 3: Sear the Chicken to Golden Perfection
Heat 2 tablespoons olive oil and 1 tablespoon butter in a large skillet over medium heat. Wait until the butter melts and begins to foam slightly, indicating the pan is ready. The combination of oil and butter gives you the best of both worlds: the oil prevents the butter from burning, while the butter adds flavor.
Carefully place the floured chicken cutlets in the hot skillet, making sure not to overcrowd the pan. Cook for approximately 4 minutes per side until the chicken develops a golden-brown crust and is cooked through. The internal temperature should reach 165°F when checked with a meat thermometer.
Remove the cooked chicken from the skillet and keep warm on a plate covered with foil. This resting period allows the juices to redistribute throughout the meat.
Step 4: Prepare the Garlic
While the chicken rests, prepare the garlic. Peel all the cloves from one whole bulb, which should give you about 8-9 cloves. Place each clove under the flat side of a chef’s knife and press down firmly to smash them. Smashed garlic releases more flavorful oils than sliced or minced garlic and creates a beautiful aromatic base for your sauce.
Pro Tip: To peel garlic quickly, place the whole bulb on your cutting board and press down firmly with the palm of your hand to separate the cloves. Then use the side of your knife to crush each clove slightly, which loosens the skin and makes peeling effortless.
Step 5: Build the Garlic Cream Sauce
In the same skillet used for the chicken, add the remaining 1 tablespoon butter and the smashed garlic cloves. Sauté on medium-low heat for about 3 minutes, stirring frequently to prevent burning. The garlic should become lightly browned and fragrant. This slow cooking process mellows the garlic’s sharp bite and brings out its natural sweetness.
Pour in 1 cup chicken broth and 3/4 cup heavy cream. Add 1/2 teaspoon garlic powder and stir well, scraping up all the browned bits from the bottom of the pan. Those browned bits, called fond, contain concentrated flavor that will enrich your sauce.
Step 6: Simmer and Reduce the Sauce
Let the sauce simmer for 8-10 minutes until it reduces and thickens by about half. You’ll know it’s ready when it coats the back of a spoon and leaves a clear trail when you run your finger through it. Stir occasionally to prevent the sauce from sticking or scorching.
The reduction concentrates the flavors and creates a velvety texture that clings beautifully to the chicken. Be patient during this step, as rushing it will result in a thin, watery sauce.
Step 7: Finish and Serve
Taste the sauce and adjust the seasoning with additional salt and pepper as needed. Every palate is different, so trust your taste buds. Return the chicken cutlets to the skillet, spooning the sauce over them to coat completely. Let everything heat through for about 2 minutes.
Serve immediately, optionally garnished with fresh chopped parsley for a pop of color and fresh flavor. This dish pairs wonderfully with creamy chicken and broccoli pasta or simple sides like mashed potatoes, rice, or steamed vegetables.
Nutritional Information per Serving
Understanding the nutritional content of your meals helps you make informed decisions about your diet. Here’s a breakdown of what each serving of this creamy garlic chicken provides:
| Nutrient | Amount per Serving |
|---|---|
| Calories | 518 kcal |
| Carbohydrates | 9g |
| Protein | 34g |
| Fat | 38g |
| Sodium | 741mg |
| Fiber | 0.4g |
This recipe provides a substantial amount of protein per serving, making it a satisfying main course. According to the USDA Chicken Nutrition Facts, chicken breast is an excellent source of lean protein with essential vitamins and minerals.

Dietary Substitutions to Customize Your Creamy Garlic Chicken
One of the best things about this garlic chicken recipe is how easily it adapts to different dietary needs and preferences. Whether you’re cooking for someone with specific restrictions or simply want to switch things up, these substitutions will help you customize the dish.
Protein and Main Component Alternatives
While boneless, skinless chicken breasts are the traditional choice for this recipe, several other proteins work beautifully:
- Chicken thighs: Boneless, skinless chicken thighs offer more flavor and stay juicier due to their higher fat content. They require the same cooking time and method.
- Pork chops: Thin-cut pork chops can replace chicken for a different flavor profile. Adjust cooking time slightly, as pork cooks faster than chicken.
- Shrimp: For a seafood twist, use large shrimp. Reduce cooking time to 2-3 minutes per side to avoid overcooking.
- Tofu: Pressed firm tofu, cut into cutlet shapes, creates a vegetarian version. Coat and cook the same way, but add nutritional yeast to the flour for extra savory flavor.
Vegetable, Sauce, and Seasoning Modifications
Add nutrition and variety by incorporating vegetables directly into the dish:
- Spinach: Stir in fresh baby spinach during the last minute of cooking. It wilts quickly and adds vibrant color and nutrients.
- Mushrooms: Sauté sliced mushrooms with the garlic for an earthy addition. Cremini or button mushrooms work best.
- Sun-dried tomatoes: Add chopped sun-dried tomatoes with the broth for tangy sweetness that complements the cream.
- Parmesan cheese: Stir in grated Parmesan at the end for an Italian-inspired variation similar to what you’d find in balsamic chicken breast recipes.
- Lemon juice: A squeeze of fresh lemon juice brightens the rich sauce and balances the creaminess.
- Bacon: Top with cooked crumbled bacon for smoky, salty crunch that contrasts with the creamy sauce.
Mastering Creamy Garlic Chicken: Advanced Tips and Variations
Once you’ve mastered the basic creamy chicken recipe, these expert tips and creative variations will help you take it to the next level.
Pro Cooking Techniques
Professional chefs use specific techniques that make their dishes stand out. Here are some insider tips:
- Dry your chicken thoroughly: Before seasoning, pat the chicken completely dry. This ensures proper browning and prevents steaming.
- Don’t flip too soon: Let the chicken develop a proper crust before flipping. If it sticks to the pan, it’s not ready to turn.
- Use room temperature cream: Cold cream can cause the sauce to separate. Let it sit on the counter for 15 minutes before adding.
- Never boil cream sauces: Keep the heat at a gentle simmer. Boiling causes cream to break and become grainy.
- Rest your meat: Always let cooked meat rest before serving. This redistributes juices throughout the protein.
Flavor Variations
Try these delicious variations to keep the recipe fresh:
Herb-Crusted Variation: Add 1 tablespoon fresh chopped thyme, rosemary, and parsley to the flour coating for an aromatic crust that infuses every bite with herbal goodness.
- Mushroom Garlic Chicken: Add 8 ounces sliced mushrooms when sautéing the garlic for a hearty, earthy variation.
- Lemon Garlic Chicken: Add 1 tablespoon lemon zest and 2 tablespoons fresh lemon juice to brighten the creamy sauce.
- Spicy Garlic Chicken: Add 1/2 teaspoon red pepper flakes to the seasoning mix for a subtle kick.
- Mediterranean Style: Add kalamata olives, artichoke hearts, and sun-dried tomatoes for a Mediterranean-inspired version.
Presentation Tips
Make your dish look as good as it tastes with these plating suggestions:
- Plate strategically: Place the chicken off-center and spoon sauce around the edges rather than drowning the meat.
- Color contrast: Garnish with bright green parsley, chives, or basil to pop against the creamy white sauce.
- Serve family-style: Present the skillet at the table for a rustic, inviting presentation that lets everyone serve themselves.
- Side arrangement: Place mashed potatoes or rice alongside the chicken, letting the sauce flow naturally onto the sides.
Make-Ahead Options
For busy weeknights, these prep strategies save time:
- Prep the chicken: Slice and season the chicken up to 24 hours ahead. Store covered in the refrigerator.
- Peel the garlic: Peel and smash garlic cloves in advance. Store in an airtight container in the refrigerator for up to 3 days.
- Make the sauce: Prepare the sauce without chicken up to 2 days ahead. Reheat gently before adding cooked chicken.
How to Store Creamy Garlic Chicken: Best Practices
Proper storage keeps your creamy garlic chicken fresh and safe to eat. Follow these guidelines to maintain quality and flavor.
Refrigeration
Store leftover creamy garlic chicken in an airtight container in the refrigerator for up to 3 days. The sauce may thicken as it cools, which is normal. Before storing, let the dish cool to room temperature, but don’t leave it out for more than 2 hours to prevent bacterial growth.
For best results, store the chicken and sauce together, as the sauce helps keep the meat moist during storage. The flavors often improve after a day as they continue to meld together.
Freezing
While you can freeze creamy garlic chicken, the texture may change slightly due to the dairy content. For best results:
- Use freezer-safe containers or heavy-duty freezer bags.
- Remove as much air as possible before sealing.
- Label with the date and contents.
- Freeze for up to 3 months for best quality.
- Thaw overnight in the refrigerator before reheating.
Reheating
To maintain quality when reheating:
- Stovetop method: Reheat gently in a skillet over low heat. Add a splash of chicken broth or cream if the sauce has thickened too much. Stir occasionally until heated through.
- Microwave method: Place in a microwave-safe dish and cover loosely. Heat on 50% power in 1-minute intervals, stirring between each, until warmed through.
- Oven method: Transfer to a baking dish, cover with foil, and bake at 350°F for about 20 minutes or until heated through.
Never reheat more than once, as this affects both texture and food safety.
Meal Prep Considerations
For efficient meal prep:
- Prepare double batches and freeze half for future meals.
- Portion into individual containers for grab-and-go lunches.
- Prep side dishes like mashed potatoes or rice while the chicken cooks.
- Keep salad ingredients ready for quick accompaniment.
FAQs: Frequently Asked Questions About Creamy Garlic Chicken
What kind of chicken is best for creamy garlic chicken recipe?
Boneless, skinless chicken breasts or thighs work best for creamy garlic chicken—they cook evenly and stay juicy in the sauce. Breasts offer a leaner option with a tender texture, while thighs add more flavor and moisture due to higher fat content. Cut them into even pieces, about 1-inch thick, for quick cooking (4-5 minutes per side). Pat dry before seasoning with salt, pepper, and paprika for a golden sear. Avoid bone-in chicken as it takes longer to cook and can make the sauce watery. This choice keeps the dish simple and restaurant-quality. (78 words)
Can I use jarred minced garlic instead of fresh cloves in creamy garlic chicken?
Yes, jarred minced garlic is a great time-saver for creamy garlic chicken—use about 2-3 tablespoons to replace 6-8 fresh cloves, as it’s milder and already chopped. It blends smoothly into the sauce without altering flavor much. For best results, add it after searing the chicken to avoid burning. Fresh garlic gives a sharper taste, but jarred keeps things convenient for weeknights. Taste and adjust; if needed, add a pinch of garlic powder for extra punch. Store leftovers in the fridge up to 3 days. (92 words)
How do I thicken the sauce for creamy garlic chicken?
To thicken creamy garlic chicken sauce, make a quick slurry with 1 tablespoon cornstarch mixed in 2 tablespoons cold water—stir it in after adding cream and simmer 2-3 minutes until it coats the back of a spoon. Or, whisk 2 tablespoons flour into 1 tablespoon melted butter for a roux, then blend into the sauce off-heat. Reduce simmering time by 5 minutes for natural thickening. Avoid overcooking cream to prevent curdling. This fixes a thin sauce without changing flavor, yielding a velvety texture perfect over pasta or rice. (96 words)
What can I use instead of heavy cream in creamy garlic chicken for less fat?
Swap heavy cream for half-and-half or full-fat coconut milk in creamy garlic chicken to cut fat while keeping creaminess—use a 1:1 ratio. Half-and-half lightens calories by about 50% per cup; coconut milk works for dairy-free with a subtle tropical note. Stir in at the end and simmer gently. For even lighter, mix evaporated milk with 1 teaspoon cornstarch. These maintain rich sauce without separation. Pair with veggies for a balanced meal under 400 calories per serving. Check labels for no-added-sugar options. (89 words)
What sides go well with creamy garlic chicken?
Creamy garlic chicken pairs perfectly with mashed potatoes, fettuccine pasta, or white rice to soak up the sauce. Add roasted broccoli, green beans, or asparagus for color and crunch—roast at 425°F for 15 minutes. A crisp Caesar salad balances richness. For low-carb, serve over cauliflower mash or zucchini noodles. These options stretch the dish into a full meal for 4. Reheat leftovers with a splash of broth to revive sauce. Try it with crusty bread for dipping too. (82 words)
Creamy Garlic Chicken
- Total Time: 40 minutes
- Yield: 4 servings
- Diet: Low-Carb
Description
🧄 Savor the rich, garlicky cream sauce that coats tender chicken for an indulgent yet quick meal perfect for weeknights.
🍗 Enjoy restaurant-quality flavors at home in just 40 minutes, packed with protein and low in carbs for a satisfying dinner.
Ingredients
– 2 boneless, skinless chicken breasts (about 1.3 lbs.)
– 1/2 teaspoon Italian seasoning
– 1/2 teaspoon salt
– 1/4 teaspoon freshly cracked black pepper
– 1/4 cup all-purpose flour
– 2 tablespoons olive oil
– 2 tablespoons butter, divided
– 1 whole garlic bulb (about 8-9 cloves)
– 1 cup chicken broth
– 3/4 cup heavy cream
– 1/2 teaspoon garlic powder
– Additional salt and pepper to taste
Instructions
1-Step 1: Prepare the Chicken Cutlets Start by preparing your chicken properly. Fillet each chicken breast into two thinner cutlets by slicing horizontally through the center. This technique ensures even cooking and reduces the time needed to cook through. If you prefer, you can purchase thin-cut chicken breasts from the store to save time. The thinner cutlets cook faster and absorb more flavor from the sauce. Pat the chicken dry with paper towels before seasoning. Moisture on the surface prevents proper browning, so this step is crucial for achieving that golden color.
2-Step 2: Season and Coat the Chicken In a shallow dish or directly on the chicken, sprinkle 1/2 teaspoon Italian seasoning, 1/2 teaspoon salt, and 1/4 teaspoon freshly cracked black pepper evenly over both sides of each cutlet. The Italian seasoning blend typically includes dried basil, oregano, rosemary, and thyme, which complement the garlic beautifully. Next, coat the seasoned chicken with 1/4 cup all-purpose flour. Place the flour in a shallow plate and dredge each cutlet, shaking off any excess. The flour coating serves two purposes: it creates a beautiful golden crust when seared, and it helps thicken the sauce later as the chicken simmers in it.
3-Step 3: Sear the Chicken to Golden Perfection Heat 2 tablespoons olive oil and 1 tablespoon butter in a large skillet over medium heat. Wait until the butter melts and begins to foam slightly, indicating the pan is ready. The combination of oil and butter gives you the best of both worlds: the oil prevents the butter from burning, while the butter adds flavor. Carefully place the floured chicken cutlets in the hot skillet, making sure not to overcrowd the pan. Cook for approximately 4 minutes per side until the chicken develops a golden-brown crust and is cooked through. The internal temperature should reach 165°F when checked with a meat thermometer. Remove the cooked chicken from the skillet and keep warm on a plate covered with foil. This resting period allows the juices to redistribute throughout the meat.
4-Step 4: Prepare the Garlic While the chicken rests, prepare the garlic. Peel all the cloves from one whole bulb, which should give you about 8-9 cloves. Place each clove under the flat side of a chef’s knife and press down firmly to smash them. Smashed garlic releases more flavorful oils than sliced or minced garlic and creates a beautiful aromatic base for your sauce.
5-Step 5: Build the Garlic Cream Sauce In the same skillet used for the chicken, add the remaining 1 tablespoon butter and the smashed garlic cloves. Sauté on medium-low heat for about 3 minutes, stirring frequently to prevent burning. The garlic should become lightly browned and fragrant. This slow cooking process mellows the garlic’s sharp bite and brings out its natural sweetness. Pour in 1 cup chicken broth and 3/4 cup heavy cream. Add 1/2 teaspoon garlic powder and stir well, scraping up all the browned bits from the bottom of the pan. Those browned bits, called fond, contain concentrated flavor that will enrich your sauce.
6-Step 6: Simmer and Reduce the Sauce Let the sauce simmer for 8-10 minutes until it reduces and thickens by about half. You’ll know it’s ready when it coats the back of a spoon and leaves a clear trail when you run your finger through it. Stir occasionally to prevent the sauce from sticking or scorching. The reduction concentrates the flavors and creates a velvety texture that clings beautifully to the chicken. Be patient during this step, as rushing it will result in a thin, watery sauce.
7-Step 7: Finish and Serve Taste the sauce and adjust the seasoning with additional salt and pepper as needed. Every palate is different, so trust your taste buds. Return the chicken cutlets to the skillet, spooning the sauce over them to coat completely. Let everything heat through for about 2 minutes. Serve immediately, optionally garnished with fresh chopped parsley for a pop of color and fresh flavor. This dish pairs wonderfully with creamy chicken and broccoli pasta or simple sides like mashed potatoes, rice, or steamed vegetables.
Notes
💡 Substitute heavy cream with half-and-half for a lighter version.
🥄 Make the sauce thicker by adding a slurry of 1 tablespoon cornstarch mixed with cold water.
🌿 Enhance with sautéed spinach, mushrooms, or a squeeze of lemon juice.
- Prep Time: 10 minutes
- Cook Time: 30 minutes
- Category: Main Course
- Method: Stovetop
- Cuisine: American
Nutrition
- Serving Size: 1 serving
- Calories: 518 kcal
- Sugar: 1g
- Sodium: 741 mg
- Fat: 38g
- Saturated Fat: 22g
- Unsaturated Fat: 14g
- Trans Fat: 0g
- Carbohydrates: 9g
- Fiber: 0.4g
- Protein: 34g
- Cholesterol: 150 mg
Keywords: creamy garlic chicken, quick dinner, 30 minute recipe, easy chicken skillet