Why You’ll Love This Chocolate Leaf
Trust me, this chocolate leaf recipe is a game-changer for anyone who loves fun kitchen projects. You’ll appreciate how simple it is to put together, especially if you’re new to baking or juggling a busy schedule. The steps are straightforward, turning ordinary ingredients into something magical that brightens up your desserts.
Plus, it’s packed with goodies that make you feel good inside. Think antioxidants from dark chocolate that support your health without the guilt, making it a smart pick for those watching their diet. Whether you’re a parent looking for family activities or someone exploring new flavors, this treat fits right in and adds a nutritious twist to your day.
What’s even better is how versatile it can be. You can tweak it for different diets like vegan or gluten-free, so everyone at the table enjoys it. I always get excited sharing this with friends because the rich taste of chocolate mixed with other elements creates a standout flavor that keeps people coming back for more. As someone who bakes with my family on weekends, it’s my go-to for creating happy moments.
The Joy of Easy and Healthy Baking
When you try this chocolate leaf, you’ll see why it shines in simplicity and health benefits. It’s not just about the taste; it’s about enjoying a recipe that fits into your life. I remember making these with my kids, and their faces lit up as we shaped the leaves, turning a quick project into a fun adventure. That personal touch makes baking feel less like a chore and more like playtime.
This recipe also stands out for its adaptability. If you’re into fall themes, you can add autumn colors for a festive vibe, making it perfect for holiday gatherings. Overall, it’s a creative way to explore new tastes while keeping things light and wholesome, which is why I keep coming back to it myself.
Jump To
- 1. Why You’ll Love This Chocolate Leaf
- 2. Essential Ingredients for Chocolate Leaf
- 3. How to Prepare the Perfect Chocolate Leaf: Step-by-Step Guide
- 4. Dietary Substitutions to Customize Your Chocolate Leaf
- 5. Mastering Chocolate Leaf: Advanced Tips and Variations
- 6. How to Store Chocolate Leaf: Best Practices
- 7. FAQs: Frequently Asked Questions About Chocolate Leaf
- 8. Chocolate Leaf
Essential Ingredients for Chocolate Leaf
Gathering the right ingredients is the first step to nailing this chocolate leaf recipe. I’ll walk you through everything you need in a clear list so you can shop easily and get started. Remember, fresh items make a big difference in the final result, so pick the best you can find.
Here’s the full list of ingredients for the main recipe. I’ve pulled together all the essentials mentioned, including those for the chocolate leaves decoration. Each one is listed with its precise measurement where provided to keep things simple and accurate.
- Dark chocolate (200g) – This brings the rich flavor and those helpful antioxidants
- Coconut oil (2 tbsp) – It adds healthy fats and helps with a smooth texture
- Almond flour (1 cup) – Gives a nutty taste and keeps it gluten-free
- Maple syrup (3 tbsp) – A natural way to sweeten things up just right
- Sea salt (1/4 tsp) – Brings out the depth of the chocolate flavor
- Chocolate candy melts (amount not specified) – Used for coating the leaves, so melt it carefully for the best results
- Clean and dry leaves such as dahlia leaves (amount not specified) – Choose ones that are firm and glossy with prominent veins
- Edible shimmer luster dust in autumn shades (gold, orange, yellow, brown) (amount not specified) – Adds a fun, colorful sparkle to your finished leaves
- A clean brush (1) – For applying the chocolate evenly
- Parchment paper or a silicone baking mat (as needed) – Lays the foundation for your setup
- A baking sheet or jelly roll pan (1) – Holds everything in place while it sets
For special dietary tweaks, here are some easy swaps. If you’re going vegan, stick with coconut oil and maple syrup as they are. For gluten-free options, almond flour keeps it on track, or try other flours if needed.
How to Prepare the Perfect Chocolate Leaf: Step-by-Step Guide
Let’s dive into making your chocolate leaf, and it’s easier than you think. First, gather all your ingredients, including any swaps for dietary needs like vegan versions. This sets you up for success right from the start, just like I do when I’m in the kitchen with my family.
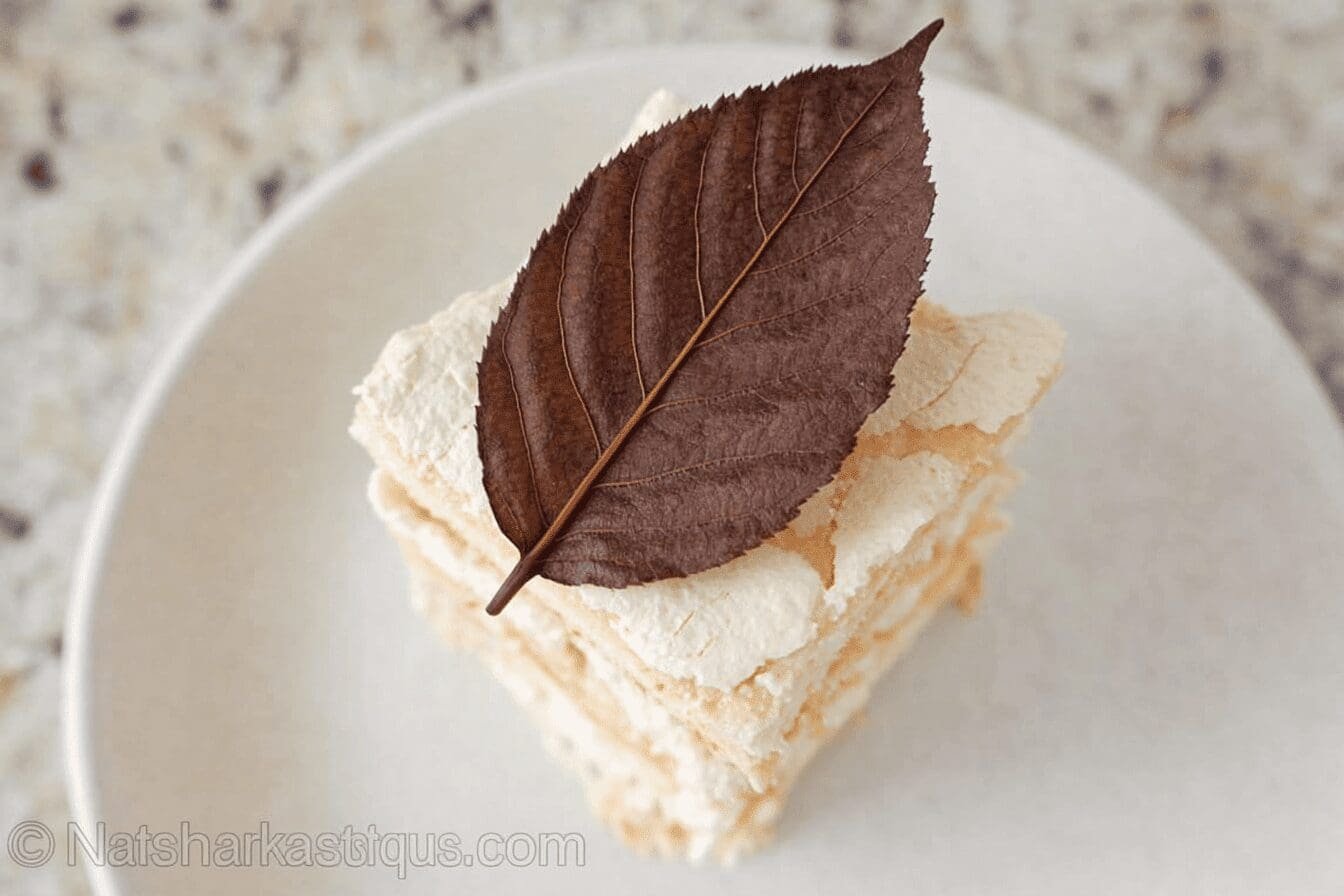
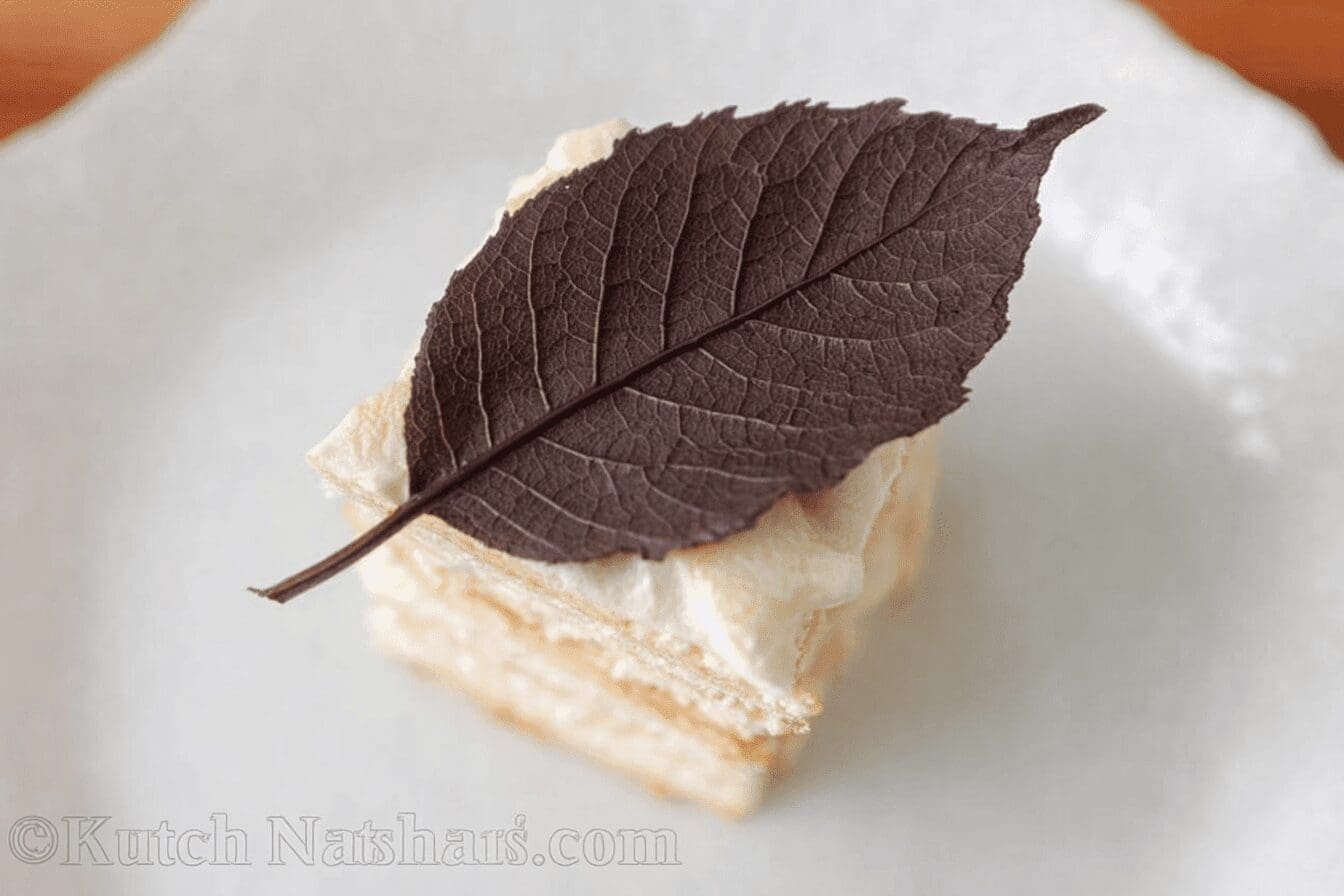
Next, start by selecting leaves with prominent veins that are firm and glossy, making sure they’re not too thin or brittle. Wash them thoroughly in soapy water, rinse well, and dry them completely to avoid any moisture issues. Arrange the leaves upside down on parchment paper placed on a baking sheet.
Now, melt the chocolate candy melts in the microwave at 50% power in 30-second intervals. Stir frequently until it’s smooth and fully melted, but don’t let it overheat. Once ready, use a clean brush to apply a generous, even layer of the melted chocolate on the back of each leaf, covering up to the edges while keeping it thin to prevent breakage.
After that, mix the dark chocolate and coconut oil in a heatproof bowl over simmering water until smooth and glossy. Stir in the almond flour, maple syrup, and sea salt to make a consistent batter. Pour this mixture onto a lined baking tray, spreading it into a thin layer that resembles a leaf shape.
Place the chocolate-coated leaves in the refrigerator to set briefly until firm. Once they’re ready, carefully peel the leaves away to reveal the chocolate shapes, then use a brush to add edible shimmer luster dust in those autumn colors for a decorative touch. Finally, refrigerate your main mixture for at least 2 hours until it’s solid, then break it into leaf-like shards.
Tips for Smooth Preparation
This whole process takes about 15 minutes of active time, making it a quick family-friendly project. Always choose firmer leaves with distinct veins for a better imprint, and ensure they’re completely dry since water can mess with the chocolate’s grip. Melt the chocolate carefully to avoid overheating, and keep the layers thin to stop them from breaking. It’s a creative way to garnish your desserts, perfect for fall baking.

Dietary Substitutions to Customize Your Chocolate Leaf
One of the best parts of this recipe is how you can make it your own. If nuts aren’t your thing, swap almond flour with ground oats or coconut flour for a nut-free version. For a caffeine-free twist, trade dark chocolate for carob chips and see how it changes the flavor.
You can also play with extras like adding dried fruits such as cranberries or orange zest for a burst of taste. Try agave nectar instead of maple syrup if you’re after a different sweetness, or tweak the sea salt with spices like cinnamon for a unique kick. These changes let you adapt the recipe to fit your preferences, whether you’re cooking for a crowd or just yourself.
Mastering Chocolate Leaf: Advanced Tips and Variations
Once you’re comfortable with the basics, let’s level up your chocolate leaf game. Temper the chocolate properly for that shiny finish and crisp bite, which makes a big difference in how it looks and feels. I love adding fun flavors like chili powder or espresso powder for an exciting twist that surprises everyone. Check out my triple chocolate cake recipe for more ideas on layering flavors.
For presentation, sprinkle on crushed nuts or use edible gold leaf to make your leaves pop. If you’re prepping ahead, mix the base and freeze it in portions so you can grab and go on busy days. It’s all about making baking fun and tailored to your style, just like when I experiment in my kitchen.
| Tip Category | Description |
|---|---|
| Technique | Temper chocolate for gloss and texture |
| Flavor Ideas | Add spices or extracts for variety |
| Presentation | Garnish with nuts or dust |
| Storage | Freeze in advance for convenience |
How to Store Chocolate Leaf: Best Practices
Keeping your chocolate leaf fresh is key to enjoying it later. Pop it in an airtight container and store it in the fridge for up to a week so it stays tasty. If you want it to last longer, freeze the pieces in a sealed bag, which makes portioning easy without losing quality.
When you’re ready to eat, let it thaw at room temperature instead of using heat, as that keeps the texture just right. For meal prep, divide it into servings before storing to avoid handling it too much and keep things simple for your daily routine.
FAQs: Frequently Asked Questions About Chocolate Leaf
How do you make chocolate leaves for decoration?
To make chocolate leaves, start by selecting fresh, sturdy leaves with prominent veins. Wash and dry the leaves thoroughly. Melt high-quality chocolate until smooth, then use a spoon or pastry brush to coat the backside of the leaf with a thin layer of chocolate. Let the chocolate set slightly before adding a second layer for durability. Once fully coated, carefully peel the leaf away to reveal the chocolate replica. Chill the chocolate leaves in the refrigerator until firm. This simple process creates elegant edible decorations for cakes and desserts.
Which types of leaves are best for making edible chocolate leaves?
Choose leaves that are non-toxic, glossy, and have distinct vein patterns for the best chocolate impressions. Examples include magnolia, dahlia, rose, and grape leaves. Avoid thin or brittle leaves as they can tear during removal, and steer clear of leaves with pesticides or heavy dirt. Make sure to wash and dry the leaves thoroughly before use to create clean, detailed chocolate decorations.
Can I eat the leaves used to make chocolate leaves?
Generally, the leaves are not meant to be eaten and should be removed before consumption. Many leaves used for chocolate molds are non-toxic but not edible, such as magnolia or dahlia. Always verify that leaves are safe and pesticide-free. For fully edible chocolate leaves, consider using herb leaves like mint or shiso, which can safely be eaten along with the chocolate.
How long do chocolate leaves last and how should I store them?
Chocolate leaves keep best when stored in a cool, dry place away from moisture and heat. Ideally, place them in an airtight container in the refrigerator if you plan to keep them longer than a day or two. Properly stored, they can last up to one week without losing shape or flavor. Avoid freezing as this can cause condensation and affect texture.
What are some creative uses for chocolate leaves in desserts?
Chocolate leaves add natural elegance to cakes, cupcakes, and plated desserts. Use them as toppers on mousse, whipped cream, or fruit tarts for a complimenting texture and look. They can also be grouped decoratively on cheesecakes or layered in parfaits. Additionally, combining chocolate leaves with fresh edible flowers creates eye-catching presentations for special occasions.
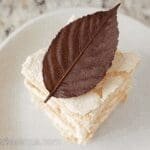
Chocolate Leaf
- Total Time: 15 minutes
- Yield: Depends on quantity of leaves used
- Diet: Vegetarian, Gluten-Free
Description
🍫 Edible Chocolate Leaves offer a creative way to add elegant, natural-looking decorations to your desserts using simple ingredients.
🍂 This fun and easy recipe captures autumn hues and textures, perfect for enhancing the visual appeal of fall-themed baking and celebrations.
Ingredients
– 200g Dark chocolate This brings the rich flavor and those helpful antioxidants
– 2 tbsp Coconut oil It adds healthy fats and helps with a smooth texture
– 1 cup Almond flour Gives a nutty taste and keeps it gluten-free
– 3 tbsp Maple syrup A natural way to sweeten things up just right
– 1/4 tsp Sea salt Brings out the depth of the chocolate flavor
– Chocolate candy melts Used for coating the leaves, so melt it carefully for the best results
– Clean and dry leaves such as dahlia leaves Choose ones that are firm and glossy with prominent veins
– Edible shimmer luster dust in autumn shades (gold, orange, yellow, brown) Adds a fun, colorful sparkle to your finished leaves
Instructions
1-Let’s dive into making your chocolate leaf, and it’s easier than you think. First, gather all your ingredients, including any swaps for dietary needs like vegan versions. This sets you up for success right from the start, just like I do when I’m in the kitchen with my family.
2-Next, start by selecting leaves with prominent veins that are firm and glossy, making sure they’re not too thin or brittle. Wash them thoroughly in soapy water, rinse well, and dry them completely to avoid any moisture issues. Arrange the leaves upside down on parchment paper placed on a baking sheet.
3-Now, melt the chocolate candy melts in the microwave at 50% power in 30-second intervals. Stir frequently until it’s smooth and fully melted, but don’t let it overheat. Once ready, use a clean brush to apply a generous, even layer of the melted chocolate on the back of each leaf, covering up to the edges while keeping it thin to prevent breakage.
4-After that, mix the dark chocolate and coconut oil in a heatproof bowl over simmering water until smooth and glossy. Stir in the almond flour, maple syrup, and sea salt to make a consistent batter. Pour this mixture onto a lined baking tray, spreading it into a thin layer that resembles a leaf shape.
5-Place the chocolate-coated leaves in the refrigerator to set briefly until firm. Once they’re ready, carefully peel the leaves away to reveal the chocolate shapes, then use a brush to add edible shimmer luster dust in those autumn colors for a decorative touch. Finally, refrigerate your main mixture for at least 2 hours until it’s solid, then break it into leaf-like shards.
Notes
🍃 Choose firmer leaves with distinct veins for better imprint and durability.
💧 Ensure leaves are completely dry as moisture can prevent chocolate from adhering properly.
🔥 Melt chocolate carefully using intervals to avoid overheating and maintain smooth texture.
- Prep Time: 15 minutes
- Category: Decoration, Dessert Garnish
- Method: Melting, Coating, Setting
- Cuisine: International
Nutrition
- Serving Size: 1 chocolate leaf
Keywords: Edible Chocolate Leaves,Chocolate Decorations,Fall Dessert Garnish,Creative Baking