
Why You’ll Love This Chocolate Covered Strawberries
There’s something truly magical about chocolate covered strawberries that makes them one of the most beloved treats for any occasion. Whether you’re preparing a romantic Valentine’s Day surprise, a stunning dessert for a dinner party, or simply treating yourself to something sweet, this recipe delivers on every front. These gourmet chocolate dipped berries come together in just 20 minutes, making them perfect for busy home cooks who want impressive results without spending hours in the kitchen.
Here’s why this recipe will become your go-to for chocolate covered strawberries:
- Ease of Preparation: With only two main ingredients and about 20 minutes total time, this recipe is incredibly simple to master. The prep time is approximately 10 minutes, and the melting process takes another 10 minutes. Even if you’ve never worked with chocolate before, the straightforward steps make success practically guaranteed. No special equipment is required beyond a microwave or double boiler setup.
- Health Benefits: Strawberries pack a powerful nutritional punch. Each berry contains only 40 calories while delivering 17.8 mg of Vitamin C, making them an excellent source of immune-boosting nutrients. They also provide potassium (71mg per berry), calcium (11mg), and iron (0.3mg). Combined with dark chocolate’s antioxidants, these treats offer genuine health benefits while satisfying your sweet tooth.
- Versatility: This recipe adapts beautifully to different preferences and dietary needs. You can use bittersweet, semi-sweet, or milk chocolate depending on your taste. Toppings can range from crushed nuts and toasted coconut to sprinkles and cookie crumbs. For those seeking vegan options, simply choose dairy-free chocolate chips and you’re all set.
- Distinctive Flavor: The combination of juicy, slightly tart strawberries with rich, smooth chocolate creates an irresistible contrast that tastes far more luxurious than the simple preparation suggests. High-quality chocolate makes all the difference, delivering a glossy finish and satisfying snap that rivals any gourmet confectionery.
If you enjoy strawberry-based desserts, you might also love our strawberry cream cheese chill pie for another refreshing treat that’s perfect for warm weather gatherings.
Jump To
- 1. Why You’ll Love This Chocolate Covered Strawberries
- 2. Essential Ingredients for Chocolate Covered Strawberries
- 3. How to Prepare the Perfect Chocolate Covered Strawberries: Step-by-Step Guide
- 4. Dietary Substitutions to Customize Your Chocolate Covered Strawberries
- 5. Mastering Chocolate Covered Strawberries: Advanced Tips and Variations
- 6. How to Store Chocolate Covered Strawberries: Best Practices
- 7. FAQs: Frequently Asked Questions About Chocolate Covered Strawberries
- 8. Chocolate Covered Strawberries
Essential Ingredients for Chocolate Covered Strawberries
Creating perfect chocolate covered strawberries starts with gathering the right ingredients. Quality matters significantly in this recipe, so choose your ingredients carefully for the best results.
Main Ingredients
- 10 ounce (285 g) package of bittersweet, semi-sweet, or milk chocolate – This forms the coating for your strawberries. Choose high-quality baking chocolate or baking chocolate chips for smoother melting and better taste. Semi-sweet chocolate offers the perfect balance of sweetness, while bittersweet (60-70% cacao) provides a more intense chocolate flavor that pairs beautifully with the natural sweetness of ripe strawberries.
- 2 pounds fresh strawberries with stems attached – Look for firm, ripe berries without bruises, preferably red all the way up to the stem. The stems serve as convenient handles for dipping, so make sure they’re intact. This amount yields approximately 20-24 strawberries, depending on size.
Optional Toppings
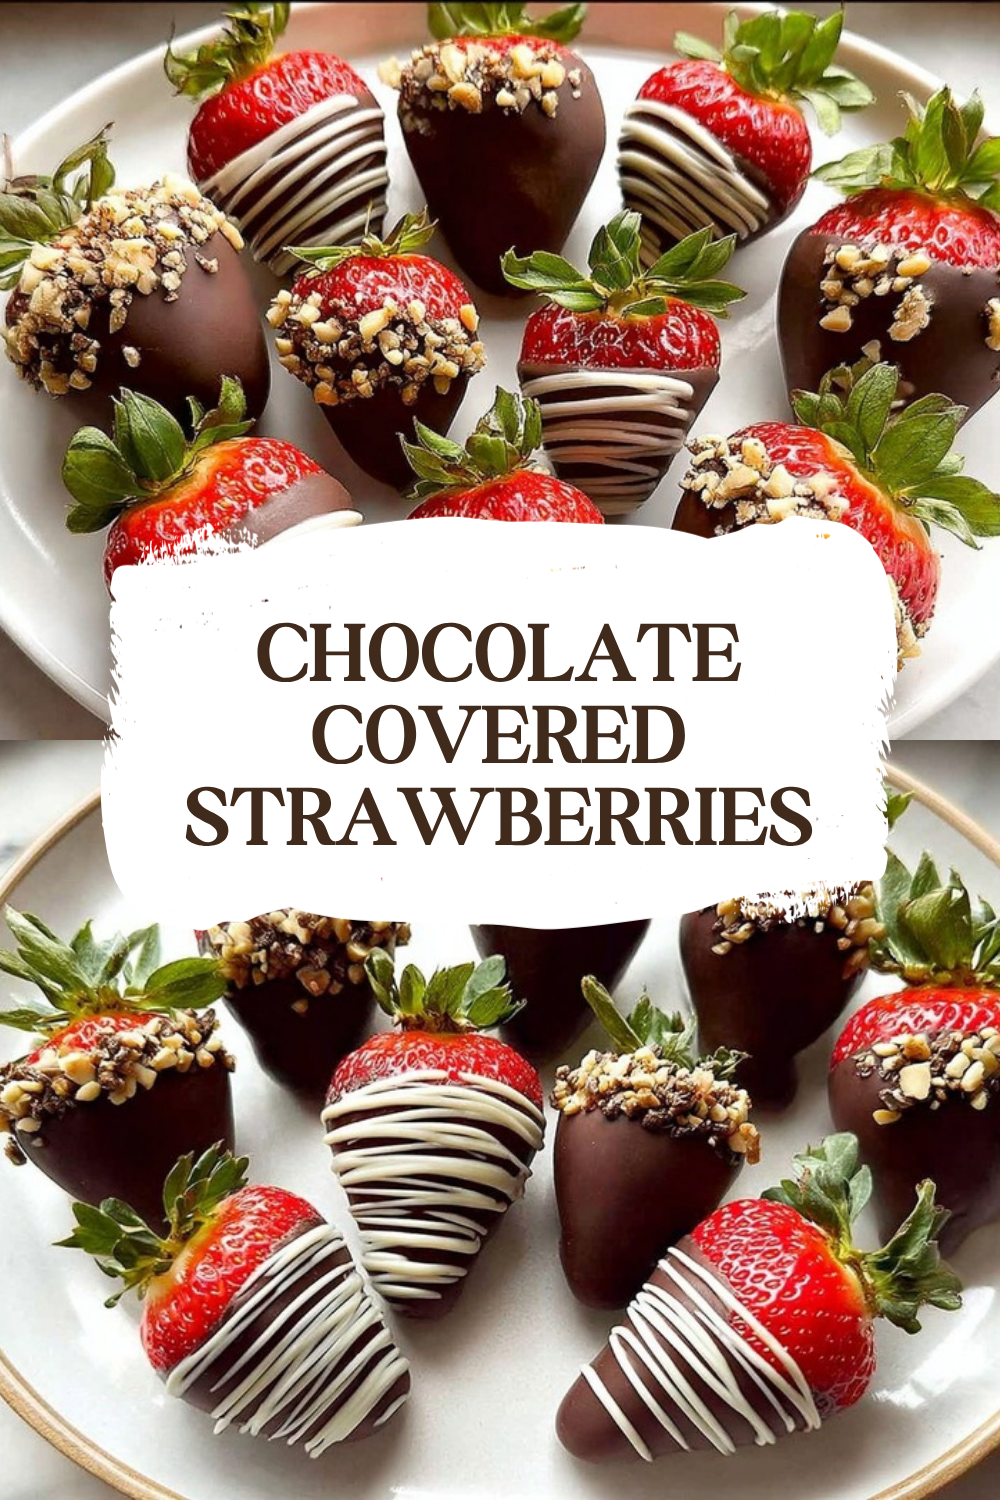
- Crushed nuts (pistachios, pecans, peanuts)
- Toasted coconut
- Colorful sprinkles
- Mini chocolate chips
- Graham cracker crumbs
- Crushed cookies (like Oreos)
- Crushed candy canes (for holiday variations)
- Crushed pretzels
Special Dietary Options
| Dietary Need | Substitution |
|---|---|
| Vegan | Use dairy-free chocolate chips (check labels for milk derivatives) |
| Gluten-free | Verify chocolate is certified gluten-free; most pure chocolate is naturally gluten-free |
| Lower Sugar | Choose dark chocolate with higher cacao percentage (70% or above) |
| Dairy-free | Select dark chocolate without milk fat or milk powder in ingredients |
How to Prepare the Perfect Chocolate Covered Strawberries: Step-by-Step Guide
Making chocolate covered strawberries at home is easier than you might think. Follow these detailed steps to achieve professional-looking results that taste as good as they look. For inspiration on gourmet techniques, check out this excellent guide on gourmet chocolate covered strawberries from Tastes Better From Scratch.
Step 1: Prepare the Strawberries
Start by washing your strawberries thoroughly under cool running water. This removes any dirt, pesticides, or residues from the surface. After washing, the most critical step is drying them completely. Moisture is the enemy of good chocolate adhesion, so take your time with this step.
Important Tip: Chocolate will not stick to wet strawberries, and any water that gets into your melted chocolate can cause it to seize, becoming grainy and unusable. Pat each strawberry gently with paper towels and let them air dry for 15-20 minutes before dipping.
Bring your strawberries to room temperature before dipping. Cold strawberries straight from the refrigerator can cause the warm chocolate to harden too quickly, resulting in uneven coating and potential cracking.
Step 2: Set Up Your Workspace
While your strawberries are drying, prepare your workspace. Line a sheet pan with parchment paper or waxed paper where you’ll place the dipped strawberries. This prevents sticking and makes cleanup incredibly easy.
Prepare your desired toppings by placing them on small plates. If you plan to use multiple toppings, arrange them in a line for easy access during the dipping process. Keep in mind that you’ll need to apply toppings immediately after dipping while the chocolate is still wet and tacky.
Step 3: Melt the Chocolate
There are two reliable methods for melting chocolate. Choose whichever works best for your setup:
Double Boiler Method:
Fill a saucepan with about 1/4 inch of water and bring it to a gentle simmer. Place a heatproof bowl over the saucepan, making sure the bottom of the bowl doesn’t touch the water. Add your chocolate to the bowl and stir occasionally until completely melted, which takes about 5 minutes. This gentle heating method prevents burning and produces smooth, glossy chocolate.
Microwave Method:
Place chocolate in a microwave-safe bowl. Heat at 50% power in 30-second intervals, stirring well between each interval. Continue until the chocolate is mostly melted with a few small lumps remaining. Remove from the microwave and stir until smooth. The residual heat will melt the remaining pieces. This typically takes 2-3 minutes total.
Pro Tip for Tempering: Hold back about one tablespoon of chocolate chips during melting. After the chocolate is melted, stir in the reserved chips off the heat until they’re completely incorporated. This technique helps temper the chocolate, resulting in a smooth, glossy coating that resists streakiness and has a satisfying snap when you bite into it.
Step 4: Dip the Strawberries
Now comes the fun part! Hold each strawberry by its stem and dip it into the melted chocolate. Submerge about 3/4 of the berry, leaving a small rim of red showing near the stem for an attractive appearance. As you lift the strawberry out, give it a gentle twist and let the excess chocolate drip back into the bowl. This creates a smooth, even coating.
If you’re adding toppings, immediately dip the chocolate-covered strawberry into your prepared toppings while the chocolate is still wet. Roll gently to coat, then place on your prepared parchment-lined pan.
Step 5: Set the Chocolate
Place each dipped strawberry on the parchment-lined sheet pan. If you want to create decorative drizzles, melt some white chocolate and use a fork to drizzle it over the finished strawberries once they’ve set slightly. This adds a professional bakery-style touch that looks impressive but takes only seconds.
Chill the strawberries in the refrigerator until the chocolate sets completely, which takes about 15 minutes. Avoid leaving them in longer than necessary, as prolonged refrigeration can cause the strawberries to release moisture and make the chocolate sweat.
Step 6: Serve and Enjoy
Once the chocolate has hardened, your chocolate covered strawberries are ready to serve! Arrange them on a pretty platter for presentation, or if you’re giving them as a gift, place them in a shallow box with ventilation. These treats are best enjoyed within 12-24 hours for optimal freshness and texture.
For more chocolate-based dessert inspiration, check out our Hershey’s chocolate cake recipe that’s equally impressive for special occasions.

Dietary Substitutions to Customize Your Chocolate Covered Strawberries
Chocolate Alternatives for Different Dietary Needs
The beauty of chocolate covered strawberries lies in their adaptability. Whether you’re accommodating dietary restrictions or simply prefer different flavors, there are plenty of options to customize this treat.
For vegans or those avoiding dairy, many excellent dairy-free chocolate options exist. Look for dark chocolate with 70% or higher cacao content, as these typically contain no milk products. Brands like Enjoy Life and Hu Kitchen make specifically vegan chocolate chips that melt beautifully and taste delicious. Always check labels carefully, as some dark chocolates still contain milk fat or milk powder.
If you’re watching your sugar intake, opt for sugar-free chocolate chips sweetened with stevia or erythritol. Lily’s brand offers excellent sugar-free options that still melt smoothly. Keep in mind that sugar-free chocolates may set slightly differently than traditional chocolate, so the texture might vary slightly.
Those following a keto diet can enjoy this treat by using 85% or higher dark chocolate, which contains minimal net carbs. The strawberries themselves are relatively low-carb, making this a keto-friendly dessert when portioned appropriately.
Topping and Flavor Modifications
The toppings you choose can dramatically change the flavor profile and nutritional content of your chocolate covered strawberries. Here are some creative variations to try:
- Protein-boosted: Roll dipped strawberries in chopped peanuts or almonds for an extra 2g of protein per serving.
- Lower calorie: Skip the toppings entirely or use a light dusting of cocoa powder.
- Decadent: Drizzle with caramel sauce or peanut butter after the chocolate sets.
- Spicy: Add a pinch of cayenne pepper to melted chocolate for Mexican-style chocolate strawberries.
- Citrus: Add orange or lemon zest to melted white chocolate for a bright, fresh flavor.
Seasonal modifications make this recipe perfect year-round. Use crushed candy canes during winter holidays, pastel sprinkles for Easter, or red, white, and blue decorations for Independence Day celebrations.
Mastering Chocolate Covered Strawberries: Advanced Tips and Variations
Once you’ve mastered the basic technique, there are numerous ways to take your chocolate covered strawberries to the next level. These professional tips and creative variations will help you create truly stunning treats.
Pro Techniques for Perfect Results
Selecting the right strawberries makes a tremendous difference. Look for berries that are firm, plump, and fully red all the way to the stem. Avoid any with soft spots, bruises, or white shoulders. Medium-sized strawberries work best for dipping, as very large berries can be unwieldy and may not have the ideal chocolate-to-fruit ratio.
Temperature control is crucial throughout the process. Your strawberries should be at room temperature (not cold from the refrigerator) when you dip them. Cold berries cause the chocolate to harden too quickly, which can lead to cracking or an uneven finish. Similarly, your melted chocolate should be warm and fluid, but not hot enough to cook the berry.
Working quickly and confidently yields the best results. Hesitation leads to thick, uneven chocolate coating. Dip with purpose, give a gentle twist, and place on the parchment without fussing. If you make a mistake, simply set it aside and move on, the taste will still be wonderful!
Creative Presentation Ideas
For a stunning strawberry bouquet, skewer your finished chocolate covered strawberries on bamboo sticks of varying lengths. Arrange them in a vase or jar filled with floral foam for a dramatic presentation that makes an impressive gift or centerpiece.
Consider creating a dessert board featuring chocolate covered strawberries alongside other treats. Pair them with chocolate-dipped pretzels, cookies, and fresh fruit for a varied and visually appealing spread that guests can graze from.
Flavor Variations to Try
- Tuxedo strawberries: Dip strawberries in white chocolate first, let set, then dip the sides in dark chocolate to create a tuxedo effect.
- Double chocolate: Use both milk and dark chocolate for a layered effect, or drizzle contrasting chocolate over the base coat.
- Cookie-crusted: Roll in crushed Oreos, graham crackers, or shortbread cookies for added texture and flavor.
- Nutty delight: Toast your nuts before using them as toppings to intensify their flavor significantly.
Make-Ahead Strategies
While chocolate covered strawberries are best made fresh, you can do some advance preparation. Wash and dry your strawberries the night before, storing them uncovered in the refrigerator. Bring them to room temperature before dipping. Measure out your toppings and prepare your workspace ahead of time to streamline the process on serving day.
How to Store Chocolate Covered Strawberries: Best Practices
Proper storage is essential for maintaining the quality and appearance of your chocolate covered strawberries. These delicate treats require specific handling to stay fresh and beautiful.
Short-Term Storage
The ideal storage method is to keep chocolate covered strawberries uncovered in a cool place or the refrigerator for up to 24 hours. The refrigerator provides the cool environment needed to keep the chocolate firm, but covering them traps moisture that causes the chocolate to sweat and lose its glossy appearance.
Place your finished strawberries on the parchment-lined baking sheet and refrigerate uncovered. If you’re concerned about them absorbing refrigerator odors, position them away from strong-smelling foods. The optimal refrigerator temperature is between 35-40°F.
What to Avoid
Never freeze chocolate covered strawberries. While this might seem like a good way to extend their life, thawing releases moisture from the berries that damages the chocolate coating, resulting in a mushy, unappealing texture and appearance. The chocolate may also develop freezer burn or bloom (white streaks) from temperature fluctuations.
Avoid storing chocolate covered strawberries in airtight containers. The moisture released by the berries will cause the chocolate to sweat, become sticky, and lose its satisfying snap. Condensation forming inside the container can also make the berries spoil faster.
Serving Day Guidelines
Chocolate covered strawberries are best consumed within 12-24 hours of making them. Over time, strawberries naturally release moisture that eventually makes the chocolate coating sweat. For the absolute best experience, serve them the same day they’re made.
If you’re serving them at room temperature, remove them from the refrigerator about 30 minutes before serving. This allows the chocolate to soften slightly for the best texture and brings out the full flavor of both the chocolate and the strawberries.
FAQs: Frequently Asked Questions About Chocolate Covered Strawberries
How do you make chocolate covered strawberries at home?
Start with fresh, firm strawberries—wash them gently under cool water and pat completely dry with paper towels; moisture causes the chocolate to seize. Line a baking sheet with parchment or wax paper. Melt 12 ounces of high-quality semi-sweet or bittersweet chocolate using a double boiler or microwave (stir every 30 seconds on half power). Hold each strawberry by the stem or leaves and dip into the melted chocolate, letting excess drip off. For toppings like chopped nuts, sprinkles, or crushed cookies, roll the dipped berry immediately. Place on the sheet to set at room temperature for 30 minutes, or refrigerate uncovered for 15 minutes. Drizzle with melted white chocolate for extra flair. Makes about 2 dozen; perfect for Valentine’s Day or parties. Total time: 45 minutes. (92 words)
What type of chocolate is best for chocolate covered strawberries?
Opt for high-quality baking chocolate or chocolate chips like Ghirardelli or Guittard—they melt smoothly without additives that cause graininess. Semi-sweet or bittersweet (60-70% cacao) delivers balanced flavor and a glossy finish that pairs perfectly with tart strawberries. Milk chocolate works for milder taste, while white chocolate adds creaminess. Avoid cheap candy melts or compound chocolate, as they taste waxy and don’t set properly. Use 12 ounces for 1 pound of berries. Pro tip: Reserve 1 tablespoon unmelted to stir in for tempering, preventing dull streaks. This ensures a professional snap and shine. (98 words)
How do you melt chocolate for dipping strawberries?
Double boiler method: Simmer ¼-inch water in a saucepan, place a heatproof bowl over (no water contact), add chopped chocolate, and stir until melted (about 5 minutes). Microwave option: Use high-quality chips in a microwave-safe bowl at 50% power, stirring every 30 seconds for 2-3 minutes total—never overheat. For both, add reserved chocolate chips after melting to temper: stir until smooth at 88-90°F for dark chocolate. Keep bowl over warm water to maintain dipping temperature. This prevents blooming (gray streaks) and ensures even coating. Yields glossy results every time. (102 words)
What are the best toppings for chocolate covered strawberries?
Elevate plain dipped berries with these easy add-ons: chopped toasted nuts (pistachios, pecans, peanuts for crunch), shredded coconut, colorful sprinkles, mini chocolate chips, graham cracker crumbs for s’mores vibe, or crushed Oreos for cookies-and-cream. For holidays, try crushed candy canes or pretzel bits. Dip first, then roll in toppings while chocolate is tacky. Drizzle melted white or dark chocolate on set berries for stripes. Use 1-2 tablespoons per type. These keep berries fresh-looking up to 24 hours and add texture—nuts alone boost protein by 2g per serving. Experiment for themed treats! (96 words)
How do you store chocolate covered strawberries and how long do they last?
Store uncovered on the parchment-lined baking sheet in the fridge for up to 24 hours to avoid moisture buildup, which makes chocolate sweat. For same-day serving, keep at cool room temperature (below 70°F), away from direct sun or heat. Never cover tightly or freeze—thawing releases berry juices that ruin the coating. Best eaten within 12 hours for peak freshness and crunch. If gifting, pack loosely in a shallow box with ventilation. Pro tip: Make them the day of your event. Yields 20-24 berries that stay stunning. (92 words)

Chocolate Covered Strawberries
- Total Time: 35 minutes
- Yield: 40 strawberries
- Diet: Vegetarian, Gluten-Free
Description
🍓🍫 Indulge in gourmet chocolate-covered strawberries blending juicy, vitamin C-packed fruit with silky melted chocolate for an elegant treat.
🎁 Quick 20-minute recipe yields stunning results perfect for gifts, dates, or parties – glossy finish impresses every time!
Ingredients
– 10 ounce (285 g) package of bittersweet, semi-sweet, or milk chocolate for coating
– 2 pounds fresh strawberries with stems attached
– Crushed nuts (pistachios, pecans, peanuts)
– Toasted coconut
– Colorful sprinkles
– Mini chocolate chips
– Graham cracker crumbs
– Crushed cookies (like Oreos)
– Crushed candy canes (for holiday variations)
– Crushed pretzels
Instructions
1-Step 1: Prepare the Strawberries Start by washing your strawberries thoroughly under cool running water. This removes any dirt, pesticides, or residues from the surface. After washing, the most critical step is drying them completely. Moisture is the enemy of good chocolate adhesion, so take your time with this step. Bring your strawberries to room temperature before dipping. Cold strawberries straight from the refrigerator can cause the warm chocolate to harden too quickly, resulting in uneven coating and potential cracking.
2-Step 2: Set Up Your Workspace While your strawberries are drying, prepare your workspace. Line a sheet pan with parchment paper or waxed paper where you’ll place the dipped strawberries. This prevents sticking and makes cleanup incredibly easy. Prepare your desired toppings by placing them on small plates. If you plan to use multiple toppings, arrange them in a line for easy access during the dipping process. Keep in mind that you’ll need to apply toppings immediately after dipping while the chocolate is still wet and tacky.
3-Step 3: Melt the Chocolate There are two reliable methods for melting chocolate. Choose whichever works best for your setup: Double Boiler Method: Fill a saucepan with about 1/4 inch of water and bring it to a gentle simmer. Place a heatproof bowl over the saucepan, making sure the bottom of the bowl doesn’t touch the water. Add your chocolate to the bowl and stir occasionally until completely melted, which takes about 5 minutes. This gentle heating method prevents burning and produces smooth, glossy chocolate. Microwave Method: Place chocolate in a microwave-safe bowl. Heat at 50% power in 30-second intervals, stirring well between each interval. Continue until the chocolate is mostly melted with a few small lumps remaining. Remove from the microwave and stir until smooth. The residual heat will melt the remaining pieces. This typically takes 2-3 minutes total.
4-Step 4: Dip the Strawberries Now comes the fun part! Hold each strawberry by its stem and dip it into the melted chocolate. Submerge about 3/4 of the berry, leaving a small rim of red showing near the stem for an attractive appearance. As you lift the strawberry out, give it a gentle twist and let the excess chocolate drip back into the bowl. This creates a smooth, even coating. If you’re adding toppings, immediately dip the chocolate-covered strawberry into your prepared toppings while the chocolate is still wet. Roll gently to coat, then place on your prepared parchment-lined pan.
5-Step 5: Set the Chocolate Place each dipped strawberry on the parchment-lined sheet pan. If you want to create decorative drizzles, melt some white chocolate and use a fork to drizzle it over the finished strawberries once they’ve set slightly. This adds a professional bakery-style touch that looks impressive but takes only seconds. Chill the strawberries in the refrigerator until the chocolate sets completely, which takes about 15 minutes. Avoid leaving them in longer than necessary, as prolonged refrigeration can cause the strawberries to release moisture and make the chocolate sweat.
6-Step 6: Serve and Enjoy Once the chocolate has hardened, your chocolate covered strawberries are ready to serve! Arrange them on a pretty platter for presentation, or if you’re giving them as a gift, place them in a shallow box with ventilation. These treats are best enjoyed within 12-24 hours for optimal freshness and texture. For more chocolate-based dessert inspiration, check out our Hershey’s chocolate cake recipe that’s equally impressive for special occasions.
Notes
🍓 Choose firm, ripe strawberries dry at room temp for best adhesion.
🔥 Temper chocolate by stirring in reserved chips off heat for glossy shine.
❄️ Refrigerate uncovered up to 1 day; enjoy within 2 days to avoid sweating.
- Prep Time: 10 minutes
- Chill: 15 minutes
- Cook Time: 10 minutes
- Category: Dessert
- Method: Dip
- Cuisine: American
Nutrition
- Serving Size: 1 strawberry
- Calories: 40
- Sugar: 2g
- Sodium: 2mg
- Fat: 2g
- Saturated Fat: 1g
- Unsaturated Fat: 1g
- Trans Fat: 0g
- Carbohydrates: 4g
- Fiber: 1g
- Protein: 1g
- Cholesterol: 0mg
Keywords: chocolate covered strawberries, gourmet chocolate strawberries, homemade chocolate dipped strawberries, chocolate strawberry recipe