
Why You’ll Love This Chocolate Blossom Cookies
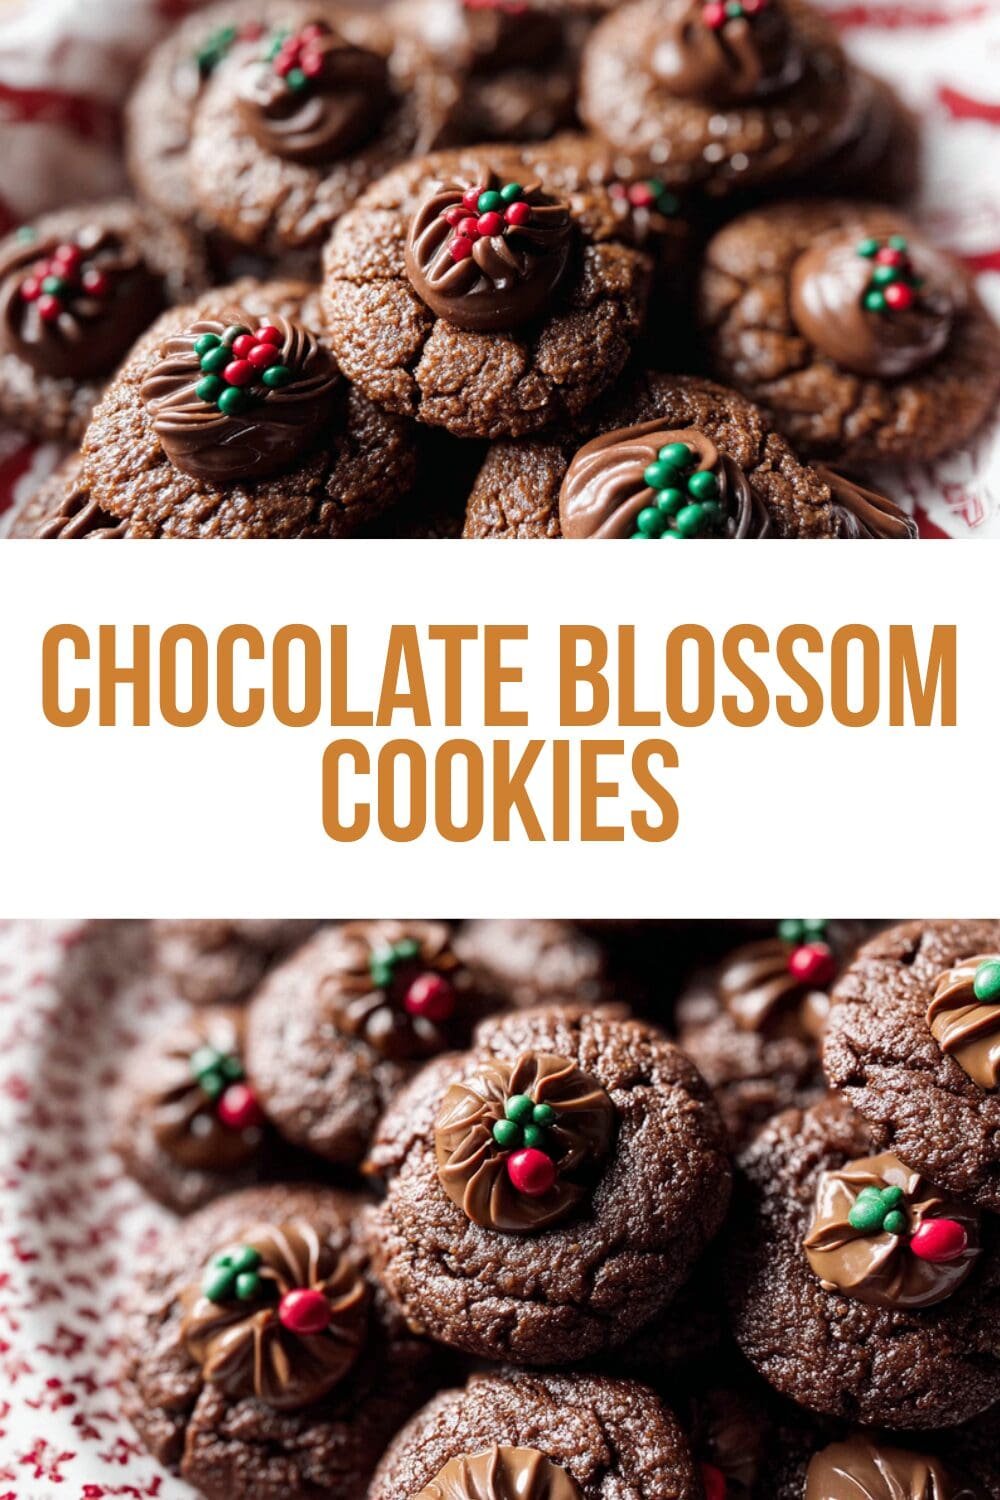
Chocolate Blossom Cookies are soft, pillowy chocolate cookies topped with a chocolate candy in the center, making them a fun twist on traditional blossom cookies. These treats offer a chocolate cookie base that’s easy to whip up, perfect for anyone from home cooks to baking enthusiasts looking for something special. With their rich flavor and simple preparation, they can become a go-to recipe for busy parents or students wanting a quick dessert.
What makes these cookies stand out is their ease of preparation, taking just about 15 minutes before baking and a short 9 minutes in the oven. You’ll appreciate the nutritional perks too, like antioxidants from the cocoa powder that add a wholesome touch without sacrificing taste. Plus, this recipe adapts well for various needs, whether you’re going vegan or gluten-free, ensuring everyone from diet-conscious individuals to seniors can enjoy them.
The unique blend of chocolate and that delightful candy topping creates a standout flavor that’s not too sweet but incredibly satisfying. Imagine pulling fresh cookies from the oven, with their soft centers and that added crunch from the candy it’s a hit for food enthusiasts and newlyweds hosting a cozy night in. Baking these can bring joy to your kitchen, inspiring moments around the table just like Isabella Hayes shares on her blog.
This recipe yields about 24 cookies, making it versatile for sharing or snacking throughout the week. If you’re a working professional with little time, these cookies fit right in, offering big rewards with minimal effort. Overall, they’re a simple way to explore new flavors and create lasting memories.
Key Benefits Highlighted
- Simple and quick preparation for busy lifestyles.
- Nutritional advantages from ingredients like cocoa.
- Easy adaptations for different dietary preferences.
- A delicious chocolate taste that appeals to all.
As you try this recipe, remember it’s all about enjoying the process. For more chocolatey inspiration, check out our triple chocolate cake recipe on the blog.
Jump To
- 1. Why You’ll Love This Chocolate Blossom Cookies
- 2. Essential Ingredients for Chocolate Blossom Cookies
- 3. How to Prepare the Perfect Chocolate Blossom Cookies: Step-by-Step Guide
- 4. Dietary Substitutions to Customize Your Chocolate Blossom Cookies
- 5. Mastering Chocolate Blossom Cookies: Advanced Tips and Variations
- 6. How to Store Chocolate Blossom Cookies: Best Practices
- 7. FAQs: Frequently Asked Questions About Chocolate Blossom Cookies
- 8. Chocolate Blossom Cookies
Essential Ingredients for Chocolate Blossom Cookies
Gathering the right ingredients is the first step to baking perfect Chocolate Blossom Cookies. This recipe focuses on a simple mix that creates those soft centers and sweet crunchy tops everyone loves. Below, you’ll find a structured list of all the ingredients needed, based on the exact measurements provided. Each one plays a key role in making the dough come together just right.
Main Ingredients List
- 3/4 cup softened butter (usually salted) – Adds moisture and richness to the dough.
- 1/2 cup granulated sugar – Provides sweetness and helps with browning.
- 1/2 cup brown sugar – Contributes to the soft texture and deeper flavor.
- 1 egg – Binds the ingredients for a cohesive dough.
- 1 tablespoon vanilla extract – Enhances the overall chocolate taste.
- 1 1/2 cups all-purpose flour – Gives structure to the cookies.
- 1/2 cup cocoa powder – Delivers that rich chocolate flavor.
- 1 teaspoon baking soda – Helps the cookies rise and get puffy.
- 1/4 teaspoon salt – Balances the sweetness and brings out flavors.
- 24 chocolate candies for topping (any variety, caramel-flavored recommended) – Adds the signature crunchy top once pressed in.
This list covers everything you need for about 24 cookies. For special dietary options, you can swap items like using a flax egg for vegans or a gluten-free flour blend. Remember, sticking to these measurements keeps the cookies soft and delicious.
| Ingredient Category | Examples | Purpose |
|---|---|---|
| Dry Ingredients | All-purpose flour, cocoa powder, baking soda, salt | Builds the base and structure |
| Wet Ingredients | Softened butter, sugars, egg, vanilla extract | Adds moisture and flavor |
| Toppings | Chocolate candies | Creates the crunchy finish |
For more ideas on chocolate treats, visit our chocolate peanut butter poke cake recipe.
How to Prepare the Perfect Chocolate Blossom Cookies: Step-by-Step Guide
Ready to make your own Chocolate Blossom Cookies with those irresistible soft centers and crunchy tops? This guide walks you through each step, using the exact directions provided for the best results. Start by preheating your oven, and you’ll have fresh cookies in no time it’s that straightforward for home bakers.
Gathering and Prepping
First, preheat the oven to 350°F (175°C) to get everything set for baking. Make sure you have all your ingredients measured out, as this keeps things smooth and fun. The dough for these cookies is soft, so don’t worry if it feels a bit sticky at first; that’s normal and leads to those pillowy centers.
Mixing the Dough
Next, cream together the softened butter, granulated sugar, and brown sugar until the mixture is fluffy and light. This step is key for the cookie’s texture, so take a moment to mix it well. Then, add the egg and vanilla extract, blending until everything is creamy and combined. In another bowl, mix the flour, cocoa powder, baking soda, and salt before gradually adding it to the wet ingredients.
Stir until fully combined, and remember the dough will be soft no need to add extra flour. For a link to a similar baking technique, check out blossom cookies recipe for more tips on handling dough.
Shaping and Baking
Once your dough is ready, scoop or roll it into equal-sized balls and place them on a cookie sheet. This part is easy and lets you get creative with sizes, but keep them uniform for even baking. Pop them in the oven for 7 to 9 minutes, watching until they’re puffy and no longer glossy on top.
Right after you take them out, gently press a chocolate candy into the center of each cookie. Let them cool completely on the pan before you move or store them this helps the candy set and keeps the shape. If you’re baking for a group, this recipe makes about 24 cookies, perfect for sharing with family or friends.
Tips for Success
To avoid spreading too much, chill the dough balls for 30 minutes before baking; it really helps. Unwrap your candies ahead of time so you can add them quickly. These steps ensure your cookies turn out with that sweet crunch you love, and they’re great for busy parents experimenting in the kitchen.
Expanding on the process, if you’re new to baking, practice makes perfect try doubling the batch for more practice. For the health side, remember that cocoa offers antioxidants, as noted in benefits of chocolate. This recipe’s versatility means you can tweak it for dietary needs, like using substitutes, while keeping the soft centers intact.
- Bake in batches if you have a small oven.
- Use a cookie scoop for even balls.
- Adjust time based on your oven’s heat.

Dietary Substitutions to Customize Your Chocolate Blossom Cookies
Chocolate Blossom Cookies are versatile, allowing you to tweak them for different needs while keeping that soft center and crunchy top. Whether you’re vegan, gluten-free, or watching calories, simple swaps keep the fun alive. This section covers options to make the recipe work for you, drawing from the provided details.
For protein sources, use flax or chia seeds mixed with water instead of eggs for a vegan twist. Switch butter for coconut oil to suit dairy-free diets, maintaining the rich flavor. These changes help travelers or seniors adapt the recipe easily without losing the chocolatey goodness.
Fresh ingredients make all the difference try these swaps to create cookies that fit your lifestyle.
Flavor and Additional Modifications
Add spices like cinnamon for extra zest, or use almond milk if you’re lactose intolerant. These adjustments keep the cookies tasty and accessible for food enthusiasts exploring new flavors.
Mastering Chocolate Blossom Cookies: Advanced Tips and Variations
Once you’re comfortable with the basic recipe, dive into advanced tips to elevate your Chocolate Blossom Cookies. Chilling the dough before baking improves texture, preventing spreading and enhancing flavor. For variations, mix in orange zest or nuts to add a unique twist, making them perfect for special occasions.
Presentation is key dust with powdered sugar or add sea salt sprinkles for an elegant look. Prepare dough ahead and freeze it for easy baking later, ideal for working professionals. These techniques ensure your cookies impress every time.
How to Store Chocolate Blossom Cookies: Best Practices
Proper storage keeps your Chocolate Blossom Cookies fresh and tasty. Keep them in an airtight container at room temperature for up to a week. Freezing is great too seal cooled cookies in a bag and thaw when needed.
Reheat briefly in the oven to restore softness, and consider baking in batches for meal prep. This method works well for busy schedules, ensuring you always have a treat ready.
FAQs: Frequently Asked Questions About Chocolate Blossom Cookies
What ingredients do I need to make Chocolate Blossom Cookies?
To make Chocolate Blossom Cookies, you’ll need butter (preferably salted), granulated sugar, brown sugar, eggs, all-purpose flour, cocoa powder, baking soda, salt, and Hershey’s Kisses. These ingredients combine to create a soft, chocolatey cookie base topped with a melty chocolate candy, giving the cookies their signature look and taste.
How do I bake Chocolate Blossom Cookies so the Hershey Kiss stays in place?
For best results, bake the cookies until they are just set and soft—usually 8 to 10 minutes at 350°F (175°C). Right after taking the cookies out of the oven, immediately press an unwrapped Hershey Kiss into the center of each cookie. The residual heat will soften the cookie surface enough to hold the candy without it sinking.
Can I make the cookie dough ahead of time for Chocolate Blossom Cookies?
Yes, you can prepare the dough up to 24 hours in advance. Store it tightly covered in the refrigerator to prevent drying out. Chilling the dough can actually improve the cookie’s texture and flavor. Just bring the dough back to room temperature for about 10 minutes before rolling into balls and baking.
What is the best way to store Chocolate Blossom Cookies to keep them fresh?
Once the cookies have cooled completely, store them in an airtight container at room temperature. Using a Ziploc bag or cookie jar will keep them soft for up to 5 days. Avoid refrigeration as it can dry out the cookies. For longer storage, freezing cooled cookies in a sealed bag is effective; just thaw for about 10 minutes before serving.
Are there any common substitutions for ingredients in Chocolate Blossom Cookies?
Yes, you can substitute salted butter with unsalted butter plus a pinch of salt. If you prefer, use dark or semi-sweet chocolate kisses instead of milk chocolate. For a gluten-free version, use a gluten-free all-purpose flour blend. These substitutions can customize the cookie while maintaining its classic flavor and texture.

Chocolate Blossom Cookies
- Total Time: 54 minutes
- Yield: 24 cookies
- Diet: Vegetarian
Description
🍫 These Chocolate Blossom Cookies offer a perfect balance of soft centers and sweet, crunchy tops with chocolate candy.
🌟 Ideal for chocolate lovers craving a delicious, easy-to-make treat with a delightful texture contrast.
Ingredients
– 3/4 cup softened butter for moisture and richness to the dough
– 1/2 cup granulated sugar for sweetness and helps with browning
– 1/2 cup brown sugar for soft texture and deeper flavor
– 1 egg for binding the ingredients
– 1 tablespoon vanilla extract for enhancing the chocolate taste
– 1 1/2 cups all-purpose flour for structure
– 1/2 cup cocoa powder for rich chocolate flavor
– 1 teaspoon baking soda for helping the cookies rise and get puffy
– 1/4 teaspoon salt for balancing sweetness and bringing out flavors
– 24 chocolate candies for topping for signature crunchy top
Instructions
1-Gathering and Prepping: First, preheat the oven to 350°F (175°C) to get everything set for baking. Make sure you have all your ingredients measured out, as this keeps things smooth and fun. The dough for these cookies is soft, so don’t worry if it feels a bit sticky at first; that’s normal and leads to those pillowy centers.
2-Mixing the Dough: Next, cream together the softened butter, granulated sugar, and brown sugar until the mixture is fluffy and light. This step is key for the cookie’s texture, so take a moment to mix it well. Then, add the egg and vanilla extract, blending until everything is creamy and combined. In another bowl, mix the flour, cocoa powder, baking soda, and salt before gradually adding it to the wet ingredients.
3-Mixing the Dough: Stir until fully combined, and remember the dough will be soft no need to add extra flour. For a link to a similar baking technique, check out blossom cookies recipe for more tips on handling dough.
4-Shaping and Baking: Once your dough is ready, scoop or roll it into equal-sized balls and place them on a cookie sheet. This part is easy and lets you get creative with sizes, but keep them uniform for even baking. Pop them in the oven for 7 to 9 minutes, watching until they’re puffy and no longer glossy on top.
5-Shaping and Baking: Right after you take them out, gently press a chocolate candy into the center of each cookie. Let them cool completely on the pan before you move or store them this helps the candy set and keeps the shape. If you’re baking for a group, this recipe makes about 24 cookies, perfect for sharing with family or friends.
6-Tips for Success: To avoid spreading too much, chill the dough balls for 30 minutes before baking; it really helps. Unwrap your candies ahead of time so you can add them quickly. These steps ensure your cookies turn out with that sweet crunch you love, and they’re great for busy parents experimenting in the kitchen.
7-Tips for Success: Expanding on the process, if you’re new to baking, practice makes perfect try doubling the batch for more practice. For the health side, remember that cocoa offers antioxidants, as noted in benefits of chocolate. This recipe’s versatility means you can tweak it for dietary needs, like using substitutes, while keeping the soft centers intact.
8-Tips for Success: Bake in batches if you have a small oven.
9-Tips for Success: Use a cookie scoop for even balls.
10-Tips for Success: Adjust time based on your oven’s heat.
Notes
🍪 Do not add extra flour if the dough feels overly soft, it’s normal.
🔄 Roll dough into smooth balls for a uniform appearance.
❄️ Chill dough balls about 30 minutes before baking to prevent excessive spreading.
🍫 Unwrap candies before baking to insert immediately after.
❄️ Cookies freeze well; store in a sealed bag and thaw before eating.
- Prep Time: 15 minutes
- Chilling time: 30 minutes
- Cook Time: 9 minutes
- Category: Dessert
- Method: Baking
- Cuisine: American
Nutrition
- Serving Size: 1 cookie
- Calories: 120 kcal
- Sugar: 14 g
- Sodium: 90 mg
- Fat: 6 g
- Saturated Fat: 3.5 g
- Unsaturated Fat: 2 g
- Trans Fat: 0 g
- Carbohydrates: 18 g
- Fiber: 2 g
- Protein: 1 g
- Cholesterol: 20 mg
Keywords: Chocolate, Blossom Cookies, Soft Centers, Sweet Crunchy Tops