Why You’ll Love This Chocolate Babka
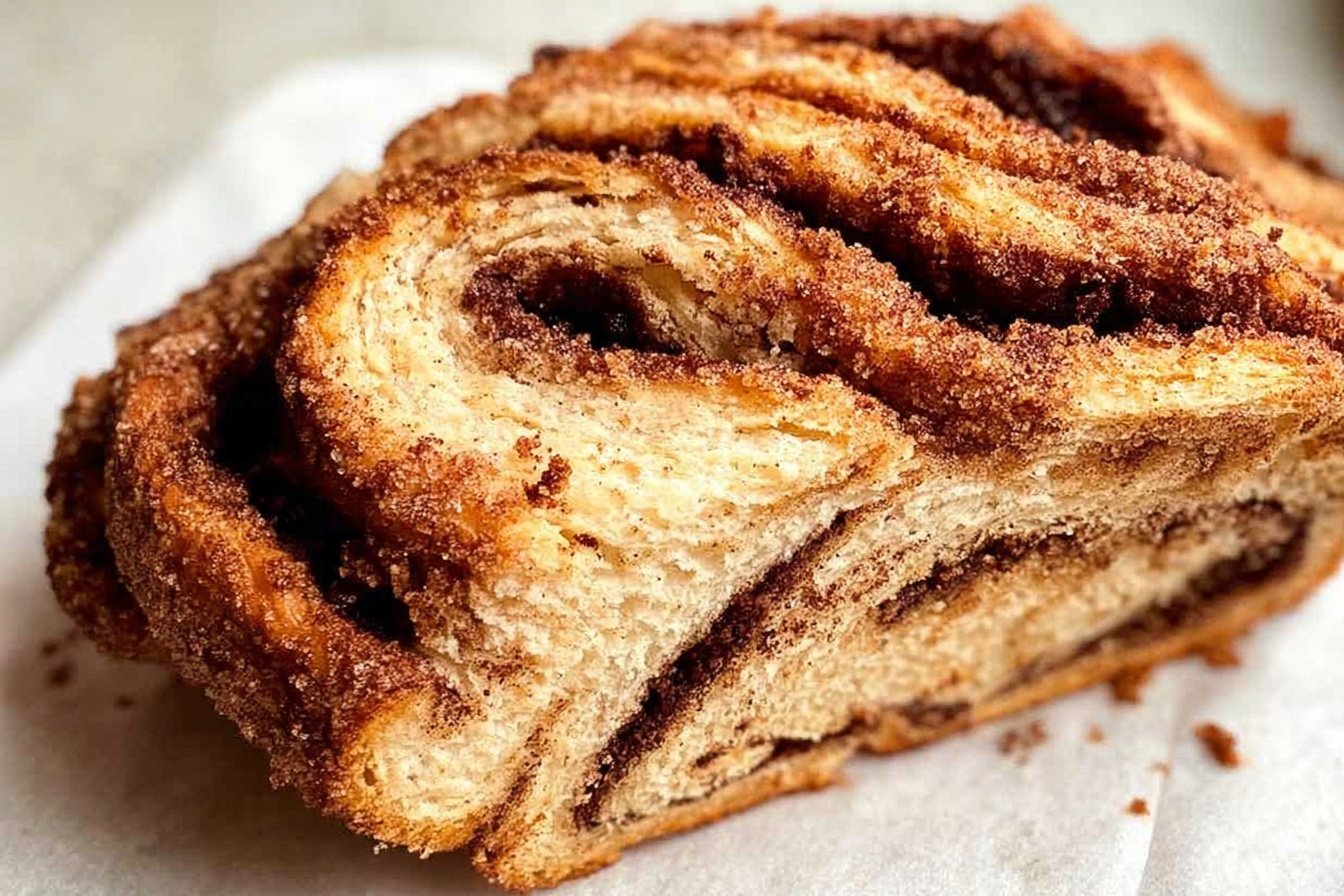
There’s something truly magical about pulling a freshly baked chocolate babka from the oven. The golden-brown crust, the intoxicating aroma of cocoa and butter, and those beautiful swirls of rich chocolate filling make every bite feel like a warm embrace from the inside out. This recipe brings the beloved Eastern European Jewish treat right into your home kitchen, and I’m thrilled to share all the reasons it will become a permanent fixture in your baking rotation.
- Ease of preparation: While babka looks impressively intricate, the process is surprisingly approachable for home bakers of all skill levels. The stand mixer does most of the heavy lifting, and the twisting technique is easier than it appears. The dough comes together in about 20 minutes of active work, with the overnight rest handling the flavor development while you sleep.
- Health benefits: This enriched dough contains eggs and whole milk, providing quality protein (8g per serving) and essential nutrients like calcium, iron, and Vitamin A. The dark chocolate filling contributes antioxidants, and using high-quality cocoa powder adds depth without excessive sweetness. Each slice delivers satisfying richness, making smaller portions feel indulgent.
- Versatility: Chocolate babka shines at breakfast with coffee, as an afternoon snack with tea, or as an elegant dessert after dinner. You can customize the filling with cinnamon, nuts, or even fruit preserves. The recipe yields two loaves, perfect for sharing or freezing one for later enjoyment.
- Distinctive flavor: The combination of buttery brioche-like dough and fudgy dark chocolate creates an unforgettable taste experience. Using Dutch-processed cocoa and chopped dark chocolate bars rather than chips ensures a smoother, more intense chocolate flavor that sets this babka apart from bakery versions.
What makes this chocolate babka recipe truly special is how it transforms simple ingredients into something extraordinary. The dough, enriched with eggs and butter, develops a tender crumb that practically melts on your tongue, while the chocolate filling creates those signature gooey ribbons that pull apart in the most satisfying way.
Jump To
- 1. Why You’ll Love This Chocolate Babka
- 2. Essential Ingredients for Chocolate Babka
- 3. How to Prepare the Perfect Chocolate Babka: Step-by-Step Guide
- 4. Dietary Substitutions to Customize Your Chocolate Babka
- 5. Mastering Chocolate Babka: Advanced Tips and Variations
- 6. How to Store Chocolate Babka: Best Practices
- 7. FAQs: Frequently Asked Questions About Chocolate Babka
- 8. Chocolate Babka
Essential Ingredients for Chocolate Babka
Creating the perfect chocolate babka requires quality ingredients working together. Understanding what each component brings to this sweet bread helps ensure success every time you bake.
Dough Ingredients
- 4 ½ cups all-purpose flour (540g) – Forms the structure of the bread; provides the perfect balance of protein for a tender yet stable crumb
- ½ cup granulated sugar (100g) – Adds subtle sweetness and helps feed the yeast for proper fermentation
- 2 ¼ teaspoons instant yeast (1 .25-ounce packet) – The leavening agent that creates the light, airy texture; instant yeast doesn’t require proofing
- 4 large eggs, room temperature – Essential for enrichment; creates that signature brioche-like tenderness and beautiful golden color
- ½ cup whole milk, room temperature – Adds moisture and richness; whole milk’s fat content creates a softer crumb than lower-fat alternatives
- 1 ½ teaspoons kosher salt – Balances sweetness and strengthens gluten structure for better dough elasticity
- 10 tablespoons unsalted butter, room temperature (142g) – The key to enrichment; creates tender layers and adds luxurious flavor throughout
Chocolate Filling Ingredients
- ½ cup unsalted butter, cubed (113g) – Creates the spreadable base for the filling; cubed butter melts evenly for smooth consistency
- ½ cup heavy cream (120mL) – Adds richness and helps achieve that fudgy, spreadable texture
- 8 ounces chopped dark chocolate (225g) – The star of the filling; use bars chopped finely for the smoothest melt and most intense flavor
- ¾ cup powdered sugar (90g) – Sweetens without graininess; dissolves smoothly into the warm chocolate mixture
- ⅓ cup unsweetened cocoa powder (30g) – Intensifies chocolate flavor and creates that deep, dark color; Dutch-processed works best
Syrup Ingredients
- ⅓ cup granulated sugar (66g) – Creates the glossy, sweet glaze that keeps the crust soft and adds shine
- ⅓ cup water (80mL) – Dissolves the sugar for brushing; evaporates during baking leaving a beautiful sheen
Special Dietary Options
While this traditional homemade chocolate babka contains gluten, dairy, and eggs, you can make modifications for specific needs:
- Gluten-free adaptation: Use a high-quality gluten-free all-purpose flour blend designed for yeast baking. Note that the texture will be slightly denser and the dough less elastic, so handle gently during shaping.
- Dairy-free version: Substitute the butter with vegan butter sticks (not tub margarine) and use full-fat coconut milk instead of whole milk and heavy cream. The chocolate can be replaced with dairy-free dark chocolate bars.
- Lower-sugar option: Reduce the granulated sugar in the dough by half and use a sugar alternative like erythritol in the filling. Keep the syrup as is since the small amount brushed on each loaf provides essential moisture.
How to Prepare the Perfect Chocolate Babka: Step-by-Step Guide
Making chocolate babka from scratch is a rewarding process that unfolds over two days. The overnight rest develops flavor and makes the dough easier to work with, while the next day brings everything together with the filling, shaping, and baking. Follow these detailed steps for bakery-quality results.
Day One: Making the Dough
Step 1: Combine dry ingredients
In the bowl of a stand mixer, whisk together the all-purpose flour, granulated sugar, and instant yeast until evenly combined. This initial mixing ensures the yeast distributes throughout the flour, promoting even rising throughout the dough.
Step 2: Add wet ingredients
Add the four room-temperature eggs, the room-temperature whole milk, and kosher salt to the dry mixture. Attach the dough hook and mix on low speed for approximately 2 minutes. The mixture will look shaggy and slightly sticky at this stage, but continue mixing until all ingredients come together into a rough dough ball.
Step 3: Incorporate butter gradually
This step is crucial for proper dough development. Add the softened butter one tablespoon at a time, waiting for each addition to fully incorporate before adding the next. This gradual incorporation prevents the butter from pooling and ensures even distribution throughout the dough. The mixture will initially look broken, but continue mixing and it will come together beautifully.
Step 4: Knead to develop gluten
Increase the mixer speed to medium-low and knead for about 10 minutes. The dough should become sticky but noticeably stretchy and elastic. To test readiness, perform the windowpane test: stretch a small piece of dough between your fingers. It should stretch thin enough to see light through without tearing. This elasticity is essential for trapping air bubbles during rising.
Step 5: Rest and refrigerate overnight
Transfer the kneaded dough to a large bowl that has been lightly oiled to prevent sticking. Cover tightly with plastic wrap or a clean kitchen towel. Place in the refrigerator for at least 8 hours or overnight. This cold fermentation slows yeast activity while developing flavor and making the dough firmer and easier to roll out the next day.
Day Two: Filling, Shaping, and Baking
Step 6: Prepare the chocolate filling
While the dough chills, make the filling by combining the cubed unsalted butter and heavy cream in a saucepan over medium heat. Once the butter melts and the mixture begins to simmer slightly, remove from heat and add the chopped dark chocolate. Stir gently until completely melted and smooth. Whisk in the powdered sugar and unsweetened cocoa powder until no lumps remain. Allow the filling to cool for about 1 hour until it reaches a spreadable consistency, similar to soft peanut butter.
Step 7: Prepare pans and preheat oven
Preheat your oven to 350°F. Generously butter or spray two 8×4-inch loaf pans with non-stick spray. Line each pan with parchment paper, leaving overhang on the long sides for easy removal after baking. The parchment creates a sling that protects the delicate babka during removal.
Step 8: Divide and roll the dough
Remove the chilled dough from the refrigerator and divide it in half. Keep one half refrigerated while working with the other. On a lightly floured surface, roll out one portion into a rectangle measuring approximately 12×16 inches. Aim for even thickness throughout, about ¼ inch thick.
Step 9: Apply the filling
Spread half of the cooled chocolate filling evenly across the dough surface, leaving a 1-inch border on one short side. This clean border helps seal the roll and prevents filling from oozing out during baking. Use an offset spatula for the most even application.
Step 10: Roll and shape the babka
Starting from the short side opposite the clean border, roll the dough into a tight log. Pinch the seam and ends firmly to seal. Using a sharp knife or bench scraper, cut the log in half lengthwise, creating two long strips with the cut sides facing up.
Step 11: Create the signature twist
This step creates the beautiful swirled pattern chocolate babka is known for. Take the two halves and twist them together with the cut sides facing outward, keeping the filling visible. Tuck the ends underneath and place the twisted loaf gently into the prepared pan. Repeat the entire process with the remaining dough and filling.
Step 12: Final rise
Cover both loaf pans loosely with plastic wrap or clean kitchen towels. Place in a warm, draft-free location and allow to rise for 1.5 to 2 hours. The dough should look noticeably puffy, though it won’t double in size like regular bread dough. This slower rise is normal for enriched dough.
Step 13: Bake to golden perfection
Remove the covers and place both loaves in the preheated 350°F oven. Bake for 40 minutes, rotating the pans halfway through for even browning. The babka is done when deeply golden brown on top and an instant-read thermometer inserted into the center registers 190°F. A toothpick inserted should come out clean or with just a few moist crumbs.
Step 14: Apply the syrup glaze
While the loaves bake, combine the granulated sugar and water in a small saucepan. Simmer over medium heat until the sugar completely dissolves. As soon as the babkas come out of the oven, brush the hot syrup generously over the tops. This step is essential for creating that bakery-style shine and keeping the bread incredibly moist.
Step 15: Cool and serve
Allow the loaves to cool in their pans for 30 minutes before attempting to remove them. The babka needs this time to set properly. Use the parchment overhangs to lift the loaves out carefully. Serve warm or at room temperature. Each loaf makes approximately 8 servings, for a total of 16 servings from the full recipe.

Dietary Substitutions to Customize Your Chocolate Babka
Protein and Main Component Alternatives
The eggs in easy chocolate babka serve multiple functions: binding the dough, adding richness, and creating that signature tender crumb. For those with egg allergies or following plant-based diets, several alternatives can achieve similar results.
For each egg in the recipe, you can substitute with a flax egg (1 tablespoon ground flaxseed mixed with 3 tablespoons water, left to thicken for 5 minutes). This works particularly well for binding, though the dough will be slightly less rich. Commercial egg replacers designed for baking also work well and often produce a texture closer to traditional babka.
The butter can be replaced with vegan butter sticks for a dairy-free version. Look for brands specifically formulated for baking, as they have a higher fat content and better melting properties than tub spreads. Coconut oil works in a pinch but creates a different flavor profile that pairs surprisingly well with chocolate.
Vegetable, Sauce, and Seasoning Modifications
While chocolate is the traditional filling, adventurous bakers have discovered wonderful variations over the years. A cinnamon-sugar filling creates a warm, spiced alternative perfect for autumn mornings. Simply mix ¾ cup brown sugar with ¼ cup cinnamon and sprinkle over melted butter spread on the dough.
For fruit lovers, thin layers of apricot or raspberry preserves under the chocolate filling add brightness and complexity. The fruit’s acidity cuts through the richness beautifully. Just be sure to spread preserves very thinly to prevent soggy spots.
Nut enthusiasts might enjoy adding a layer of finely chopped walnuts or pecans over the chocolate filling. Toast the nuts first for deeper flavor. Some bakers even mix ground nuts directly into the filling for added texture and protein.
If you enjoy experimenting with flavors, try adding a teaspoon of orange zest to the dough or a pinch of cardamom to the filling. These subtle additions complement the chocolate without overpowering it.
Mastering Chocolate Babka: Advanced Tips and Variations
Pro Cooking Techniques
The difference between good chocolate babka bread and exceptional babka often comes down to technique. Here are professional tips that will transform your home baking results:
Temperature matters enormously when working with enriched dough. Your eggs and milk should be at room temperature (about 70°F) to help the yeast activate properly. Cold ingredients can shock the yeast, resulting in slower rising and denser bread. Let refrigerated items sit on the counter for 30 minutes before beginning.
The milk temperature for activating yeast should be between 110°F and 120°F if you’re using active dry yeast instead of instant. Too hot will kill the yeast, while too cool won’t activate it properly. An instant-read thermometer removes the guesswork.
Don’t skip weighing your ingredients. Baking by weight (grams) is far more accurate than volume measurements. A digital kitchen scale is an affordable investment that dramatically improves consistency. The measurements provided in this recipe give you the precision needed for perfect results every time.
Flavor Variations
While this recipe produces classic swirled chocolate bread, creative bakers have developed exciting variations worth exploring:
Nutella babka: Replace the chocolate filling with warmed Nutella spread. The hazelnut flavor creates a delicious twist on the traditional recipe. For an even more intense experience, spread a thin layer of Nutella first, then add the traditional chocolate filling on top.
Double chocolate: Add ½ cup mini chocolate chips over the filling before rolling for extra chocolate bursts throughout. This works beautifully if you’re a serious chocoholic looking for even more intensity.
Cinnamon walnut: A beloved alternative combines ½ cup brown sugar, 2 tablespoons cinnamon, and 1 cup finely chopped toasted walnuts. Brush the dough with melted butter before sprinkling the mixture evenly.
Presentation Tips
Beautiful presentation turns homemade babka into a gift-worthy treat. After brushing with syrup, consider dusting with powdered sugar just before serving for a snowy, bakery-style appearance. A light sprinkle of flaky sea salt over the chocolate filling before rolling creates sophisticated salted chocolate babka that balances sweetness beautifully.
For holiday gifting, wrap cooled loaves in parchment paper tied with baker’s twine. Add a personalized tag with serving suggestions. Homemade babka makes a thoughtful hostess gift or holiday treat that recipients will remember.
Make-Ahead Options
Busy schedules shouldn’t prevent you from enjoying homemade babka bread. The recipe is designed for make-ahead convenience. After shaping the twisted loaves, you can cover and refrigerate them for up to 24 hours before the final rise and baking. Remove from refrigeration 2 hours before you plan to bake to allow the dough to come to room temperature and complete its rise.
Alternatively, freeze shaped, unbaked loaves wrapped tightly in plastic. Thaw overnight in the refrigerator, then proceed with the rise and bake as directed. This method works beautifully for batch baking when you want fresh babka for multiple occasions.
How to Store Chocolate Babka: Best Practices
Proper storage keeps your chocolate babka fresh and delicious for days, or even months, after baking. Understanding the best methods ensures none of your hard work goes to waste.
Room Temperature Storage
Freshly baked babka stays moist at room temperature for up to 3 days when properly stored. Wrap the cooled loaf tightly in plastic wrap or place in an airtight container. The high butter and egg content means it stays softer longer than lean breads. Keep away from direct sunlight and heat sources, which can cause the chocolate filling to soften too much.
Refrigeration
For storage beyond 3 days, refrigeration extends freshness up to 5-7 days. However, cold temperatures firm up the butter, making the bread seem denser. Always bring refrigerated babka to room temperature before serving, or warm gently in a 300°F oven for 5-10 minutes to restore that fresh-baked texture.
Freezing
Freezing chocolate babka works exceptionally well and preserves quality for up to 2 months. For best results, cool the loaf completely before wrapping. Wrap tightly in plastic wrap, then aluminum foil or place in a freezer bag with air removed. Label with the date for easy tracking.
Slice before freezing for grab-and-go convenience. Individually wrapped slices thaw faster and allow you to enjoy a single portion without defrosting the entire loaf. Thaw overnight in the refrigerator, then bring to room temperature or warm briefly before enjoying.
Reheating
To restore that fresh-baked experience, warm individual slices in a 300°F oven for 5-10 minutes. The microwave works in a pinch (15-20 seconds), but can create hot spots and slightly soggy texture. For the best experience, avoid microwaving when possible.
A toaster oven set to low heat works wonderfully for single servings. Watch carefully to prevent burning, as the sugar content caramelizes quickly under direct heat.
FAQs: Frequently Asked Questions About Chocolate Babka
What is chocolate babka?
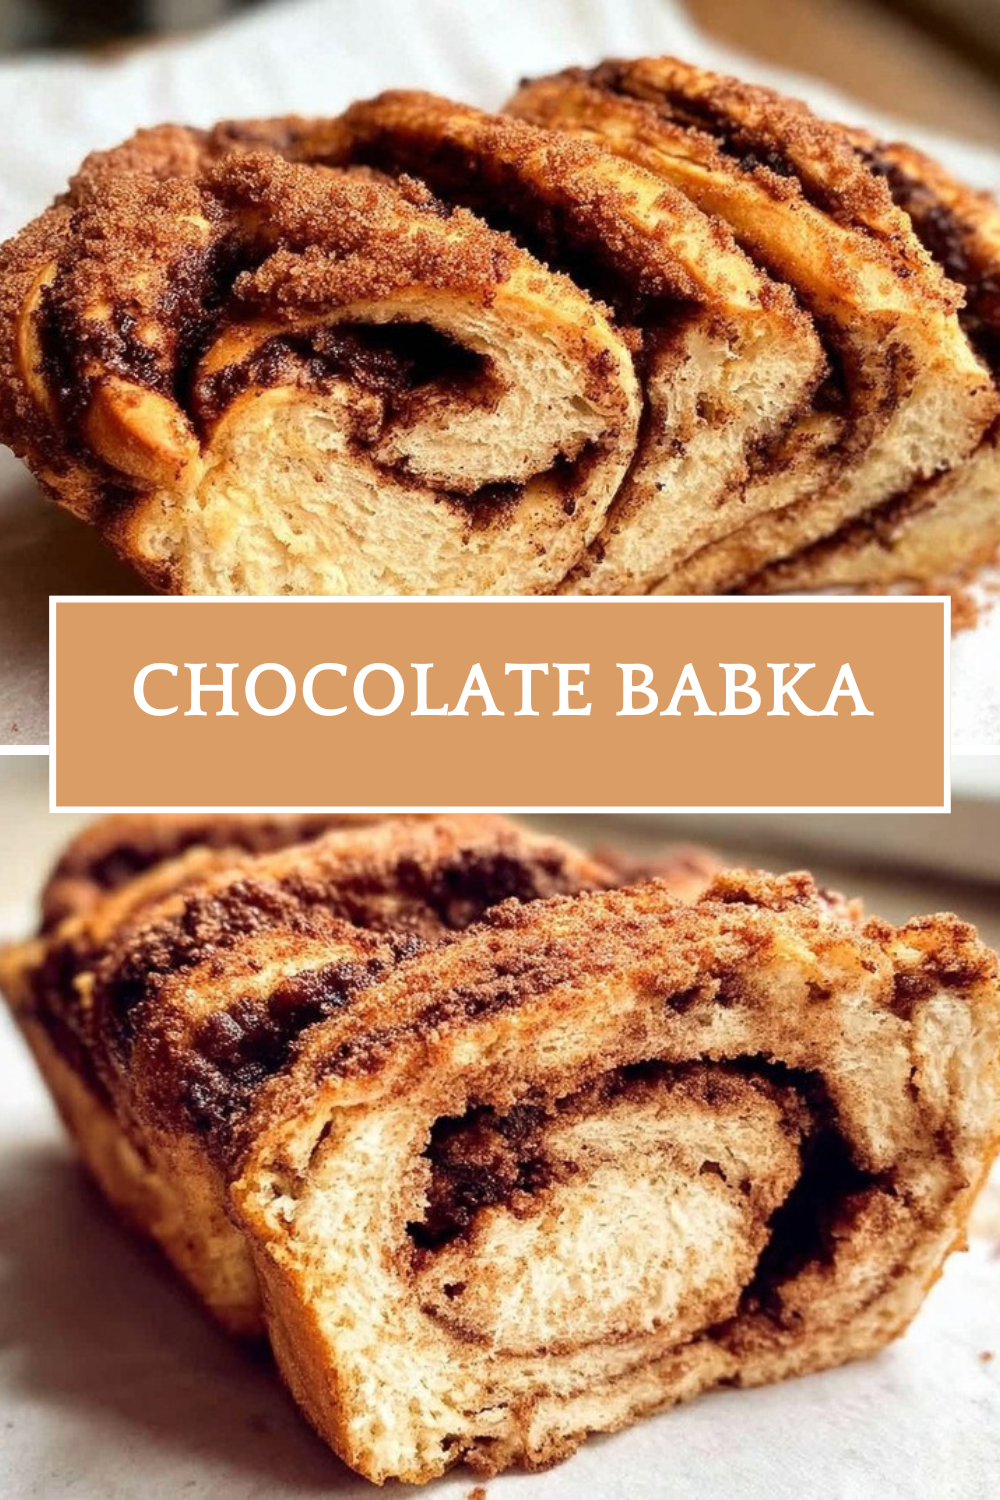
Chocolate babka is a sweet, yeast-leavened bread with Eastern European Jewish roots, often called a cake-bread hybrid. It starts with an enriched dough similar to brioche, filled with layers of chocolate spread, rolled, twisted, and baked in a loaf pan for its signature swirled interior. Unlike plain breads, the chocolate filling—typically made from melted chocolate, cocoa, butter, and sugar—creates gooey, fudgy layers that pull apart beautifully. Originating in Poland and Ukraine, it gained popularity in the U.S. through delis like New York’s Russ & Daughters. Slice it thick for breakfast with coffee, or enjoy as dessert. A standard 9×5-inch loaf serves 10-12 people and takes about 4-5 hours total with rising time. For best results, use high-quality dark chocolate (60-70% cacao) to balance the dough’s richness.
What’s the difference between babka and challah?
Babka and challah both come from Jewish baking traditions but differ in dough, shape, filling, and purpose. Challah is a braided egg bread made with flour, water, yeast, eggs, sugar, and salt, baked free-form for holidays like Shabbat—it’s leaner and more bread-like. Babka uses a richer dough with extra eggs, butter, and sometimes milk, baked in a loaf pan as a sweet treat. The key distinction is babka’s swirled chocolate or cinnamon filling inside twisted layers, making it part cake. Challah toasts well plain or with toppings; babka shines when pulled apart warm. If you’re new to baking, start with babka for its forgiving dough that yields 12 slices per loaf. Both freeze well, but thaw challah at room temp while babka benefits from a quick oven warm-up at 300°F for 10 minutes.
Is babka the same as brioche?
Babka is not the same as brioche, though it uses a similar enriched dough base of flour, yeast, eggs, butter, sugar, and milk for a soft, pull-apart texture. Brioche is a versatile French bread that can be shaped into buns, loaves, or rolls without filling. What defines babka is its preparation: the dough is rolled out thin, spread with chocolate (melted with cocoa, powdered sugar, and butter), rolled into a log, twisted, and placed in a loaf pan for even baking. This creates distinct swirled layers absent in plain brioche. Adding chocolate to brioche doesn’t make babka—the shaping technique does. Bake at 350°F for 45-55 minutes until golden. Cool fully before slicing to avoid crumbling. A 2-pound babka loaf yields about 12 servings and pairs perfectly with coffee.
How do you serve chocolate babka?
Serve chocolate babka warm or at room temperature as a breakfast treat, brunch star, or after-dinner dessert—its sweet, chocolatey swirls make it versatile. For breakfast, slice 1-inch thick and toast lightly under the broiler for 1-2 minutes, then top with butter or powdered sugar. Pair with coffee, tea, or milk to cut the richness. At brunch, add fresh berries, whipped cream, or ice cream for contrast. For dessert, warm slices in a 300°F oven for 5-10 minutes to revive the gooey center. Avoid microwaving to prevent sogginess. One 9×5-inch loaf serves 10-12; portion generously. In delis, it’s often sold by the pound—about 1/2 pound per person. Experiment with toppings like sea salt or nuts for crunch.
How do you store chocolate babka and can you freeze it?
Store chocolate babka at room temperature for up to 3 days in plastic wrap or an airtight container to keep it moist without drying out. For longer freshness, refrigerate up to 5 days, but bring to room temp before eating to restore texture. To freeze, wrap individual slices or the whole loaf tightly in plastic wrap, then aluminum foil or a freezer bag— it lasts 2-3 months without quality loss. Thaw overnight in the fridge, then warm in a 300°F oven for 10 minutes. Avoid refreezing. Freezing preserves the chocolate swirls’ fudginess; label with date for easy tracking. Pro tip: slice before freezing for grab-and-go portions. A full loaf weighs about 2 pounds post-baking.
Chocolate Babka
- Total Time: 10 hours
- Yield: 2 loaves (16 servings)
- Diet: Vegetarian
Description
🍫 Rich chocolate babka with gooey swirled filling and shiny syrup glaze – decadent, pull-apart homemade bread for breakfast or dessert!
🥖 Easy overnight dough chills while you sleep – bakery-fresh results with minimal active time!
Ingredients
– 4 ½ cups all-purpose flour (540g) Forms the structure of the bread; provides the perfect balance of protein for a tender yet stable crumb
– ½ cup granulated sugar (100g) Adds subtle sweetness and helps feed the yeast for proper fermentation
– 2 ¼ teaspoons instant yeast (1.25-ounce packet) The leavening agent that creates the light, airy texture; instant yeast doesn’t require proofing
– 4 large eggs, room temperature Essential for enrichment; creates that signature brioche-like tenderness and beautiful golden color
– ½ cup whole milk, room temperature Adds moisture and richness; whole milk’s fat content creates a softer crumb than lower-fat alternatives
– 1 ½ teaspoons kosher salt Balances sweetness and strengthens gluten structure for better dough elasticity
– 10 tablespoons unsalted butter, room temperature (142g) The key to enrichment; creates tender layers and adds luxurious flavor throughout
– ½ cup unsalted butter, cubed (113g) Creates the spreadable base for the filling; cubed butter melts evenly for smooth consistency
– ½ cup heavy cream (120mL) Adds richness and helps achieve that fudgy, spreadable texture
– 8 ounces chopped dark chocolate (225g) The star of the filling; use bars chopped finely for the smoothest melt and most intense flavor
– ¾ cup powdered sugar (90g) Sweetens without graininess; dissolves smoothly into the warm chocolate mixture
– ⅓ cup unsweetened cocoa powder (30g) Intensifies chocolate flavor and creates that deep, dark color; Dutch-processed works best
– ⅓ cup granulated sugar (66g) Creates the glossy, sweet glaze that keeps the crust soft and adds shine
– ⅓ cup water (80mL) Dissolves the sugar for brushing; evaporates during baking leaving a beautiful sheen
Instructions
1-Step 1: Combine dry ingredients In the bowl of a stand mixer, whisk together the all-purpose flour, granulated sugar, and instant yeast until evenly combined. This initial mixing ensures the yeast distributes throughout the flour, promoting even rising throughout the dough.
2-Step 2: Add wet ingredients Add the four room-temperature eggs, the room-temperature whole milk, and kosher salt to the dry mixture. Attach the dough hook and mix on low speed for approximately 2 minutes. The mixture will look shaggy and slightly sticky at this stage, but continue mixing until all ingredients come together into a rough dough ball.
3-Step 3: Incorporate butter gradually This step is crucial for proper dough development. Add the softened butter one tablespoon at a time, waiting for each addition to fully incorporate before adding the next. This gradual incorporation prevents the butter from pooling and ensures even distribution throughout the dough. The mixture will initially look broken, but continue mixing and it will come together beautifully.
4-Step 4: Knead to develop gluten Increase the mixer speed to medium-low and knead for about 10 minutes. The dough should become sticky but noticeably stretchy and elastic. To test readiness, perform the windowpane test: stretch a small piece of dough between your fingers. It should stretch thin enough to see light through without tearing. This elasticity is essential for trapping air bubbles during rising.
5-Step 5: Rest and refrigerate overnight Transfer the kneaded dough to a large bowl that has been lightly oiled to prevent sticking. Cover tightly with plastic wrap or a clean kitchen towel. Place in the refrigerator for at least 8 hours or overnight. This cold fermentation slows yeast activity while developing flavor and making the dough firmer and easier to roll out the next day.
6-Step 6: Prepare the chocolate filling While the dough chills, make the filling by combining the cubed unsalted butter and heavy cream in a saucepan over medium heat. Once the butter melts and the mixture begins to simmer slightly, remove from heat and add the chopped dark chocolate. Stir gently until completely melted and smooth. Whisk in the powdered sugar and unsweetened cocoa powder until no lumps remain. Allow the filling to cool for about 1 hour until it reaches a spreadable consistency, similar to soft peanut butter.
7-Step 7: Prepare pans and preheat oven Preheat your oven to 350°F. Generously butter or spray two 8×4-inch loaf pans with non-stick spray. Line each pan with parchment paper, leaving overhang on the long sides for easy removal after baking. The parchment creates a sling that protects the delicate babka during removal.
8-Step 8: Divide and roll the dough Remove the chilled dough from the refrigerator and divide it in half. Keep one half refrigerated while working with the other. On a lightly floured surface, roll out one portion into a rectangle measuring approximately 12×16 inches. Aim for even thickness throughout, about ¼ inch thick.
9-Step 9: Apply the filling Spread half of the cooled chocolate filling evenly across the dough surface, leaving a 1-inch border on one short side. This clean border helps seal the roll and prevents filling from oozing out during baking. Use an offset spatula for the most even application.
10-Step 10: Roll and shape the babka Starting from the short side opposite the clean border, roll the dough into a tight log. Pinch the seam and ends firmly to seal. Using a sharp knife or bench scraper, cut the log in half lengthwise, creating two long strips with the cut sides facing up.
11-Step 11: Create the signature twist This step creates the beautiful swirled pattern chocolate babka is known for. Take the two halves and twist them together with the cut sides facing outward, keeping the filling visible. Tuck the ends underneath and place the twisted loaf gently into the prepared pan. Repeat the entire process with the remaining dough and filling.
12-Step 12: Final rise Cover both loaf pans loosely with plastic wrap or clean kitchen towels. Place in a warm, draft-free location and allow to rise for 1.5 to 2 hours. The dough should look noticeably puffy, though it won’t double in size like regular bread dough. This slower rise is normal for enriched dough.
13-Step 13: Bake to golden perfection Remove the covers and place both loaves in the preheated 350°F oven. Bake for 40 minutes, rotating the pans halfway through for even browning. The babka is done when deeply golden brown on top and an instant-read thermometer inserted into the center registers 190°F. A toothpick inserted should come out clean or with just a few moist crumbs.
14-Step 14: Apply the syrup glaze While the loaves bake, combine the granulated sugar and water in a small saucepan. Simmer over medium heat until the sugar completely dissolves. As soon as the babkas come out of the oven, brush the hot syrup generously over the tops. This step is essential for creating that bakery-style shine and keeping the bread incredibly moist.
15-Step 15: Cool and serve Allow the loaves to cool in their pans for 30 minutes before attempting to remove them. The babka needs this time to set properly. Use the parchment overhangs to lift the loaves out carefully. Serve warm or at room temperature. Each loaf makes approximately 8 servings, for a total of 16 servings from the full recipe.
Notes
🥛 Use room temperature eggs, milk, and butter for smooth, elastic dough.
🌡️ Check internal temp reaches 190°F for perfectly baked babka.
🍯 Never skip syrup brush – keeps crust shiny and bread moist!
- Prep Time: 40 minutes
- Chill & Rise: 9 hours
- Cook Time: 40 minutes
- Category: Breads
- Method: Oven
- Cuisine: Eastern European
Nutrition
- Serving Size: 1 slice
- Calories: 444
- Sugar: 20g
- Sodium: 247mg
- Fat: 24g
- Saturated Fat: 14g
- Unsaturated Fat: 9g
- Trans Fat: 1g
- Carbohydrates: 52g
- Fiber: 4g
- Protein: 8g
- Cholesterol: 86mg
Keywords: chocolate babka, homemade babka recipe, swirled chocolate bread, easy babka bread