Why You’ll Love This Chicken Tenders
Imagine whipping up a batch of golden, crispy chicken tenders that everyone in your family will rave about these tasty bites are a total crowd-pleaser! This recipe is super simple, taking just about 30 minutes from start to finish, so it’s ideal for busy nights when you want something satisfying without fuss. Whether you’re a parent juggling after-school activities or a student cooking on a budget, these tenders deliver that perfect crunch and flavor that makes meals fun and exciting.
One of the best things about this recipe is how easy it makes healthy eating feel. You’ll use lean chicken breast for a boost of protein, and by baking instead of frying, you cut down on extra fats while keeping things delicious. Folks watching their diet will appreciate how adaptable it is, like swapping ingredients for gluten-free options or lighter coatings. Plus, the mix of seasonings gives these tenders a zesty kick that stands out from store-bought versions, making every bite feel special and homemade.
Beyond the basic appeal, this chicken tenders recipe fits into so many lifestyles, from quick dinners for busy professionals to fun snacks for food enthusiasts. You’ll love how versatile it is you can pair it with salads for a light meal or dunk it in sauces for a treat. Let’s dive into what makes this dish a go-to favorite, with preparation that’s straightforward and results that wow every time. The total time of just 30 minutes means you can enjoy more family time without spending hours in the kitchen, perfect for newlyweds or seniors looking for simple joys.
Reasons It Fits Your Life
For home cooks and busy parents, the ease of preparation shines through with quick steps that anyone can follow. Diet-conscious individuals will appreciate the health benefits, like using baked methods to keep calories low while packing in nutrients. Travelers and food enthusiasts might enjoy experimenting with global twists, such as adding herbs from your latest trip. This recipe’s flexibility means baking enthusiasts can tweak it for fun variations, making it a staple for working professionals who need reliable meals on the go.
To expand on ease, think about how these tenders can be prepped ahead for school lunches or picnics, saving you time without sacrificing taste. The distinctive flavor comes from toasting panko breadcrumbs, which adds a crunchy texture that’s hard to beat. Overall, this recipe inspires you to cook with joy and create those memorable moments around the table, just like Isabella aims to do on her blog.
Jump To
- 1. Why You’ll Love This Chicken Tenders
- 2. Essential Ingredients for Chicken Tenders
- 3. How to Prepare the Perfect Chicken Tenders: Step-by-Step Guide
- 4. Dietary Substitutions to Customize Your Chicken Tenders
- 5. Mastering Chicken Tenders: Advanced Tips and Variations
- 6. How to Store Chicken Tenders: Best Practices
- 7. FAQs: Frequently Asked Questions About Chicken Tenders
- 8. Chicken Tenders
Essential Ingredients for Chicken Tenders
Gathering the right ingredients is the first step to nailing these crispy oven-baked chicken tenders, and I’ve got everything laid out for you here. This recipe focuses on simple items that you might already have on hand, making it accessible for everyone from students to seniors. By using fresh, high-quality components, you’ll end up with tenders that are juicy inside and perfectly golden outside, ready in just 15 minutes of prep.
Below is a complete list of the ingredients needed, based on the exact details provided. Each one is measured out clearly so you can follow along without any guesswork. Remember, toasting the panko breadcrumbs with oil spray gives them that extra crunch, and the batter helps the coating stick just right.
- 1 1/2 cups panko breadcrumbs (with oil spray for toasting)
- 1 egg
- 1 tablespoon mayonnaise
- 1 1/2 tablespoons Dijon mustard (or other mustard)
- 2 tablespoons flour
- 1/2 teaspoon salt
- Black pepper to taste
- 500 grams (1 pound) chicken tenderloins or chicken breast sliced lengthwise into 2/3 inch (1.5 cm) thick pieces (with oil spray)
For special tweaks, if you’re going gluten-free, swap the flour and panko for alternatives like rice flour and gluten-free crumbs. Vegans can use flaxseed eggs and plant-based substitutes, while low-calorie fans might reduce oil spray for a lighter version. This setup ensures your chicken tenders turn out just as described, with precise quantities to make shopping and prepping a breeze.
Dietary Options to Consider
If you want to customize, options like using firm tofu instead of chicken can keep things exciting for different tastes. Always measure carefully to maintain the recipe’s balance, as these adjustments help it fit various needs without losing that crispy appeal.
How to Prepare the Perfect Chicken Tenders: Step-by-Step Guide
Getting these chicken tenders just right is all about following a few easy steps that lead to amazing results every time. Start by preheating your oven to 200°C (390°F), or 180°C if your oven is fan-forced, to ensure even baking. This method keeps things simple and mess-free, perfect for busy parents or working professionals who need a quick win in the kitchen.
First, lightly spray a baking tray with oil and toast the panko breadcrumbs for 3 to 5 minutes until they’re golden, then move them to a bowl for later. If you want even crispier tenders, set up a rack on another tray to let air circulate. Next, in a separate bowl, whisk together the egg, mayonnaise, mustard, flour, salt, and pepper to make a thick batter that coats the chicken beautifully.
Add the chicken slices to the batter and make sure they’re fully covered. Using tongs, dip each piece into the toasted panko breadcrumbs, pressing extra crumbs on top so they stick well, and place them on your tray or rack. Lightly spray the coated chicken with oil and add a bit more salt if you like, then bake for 15 minutes or up to 20 for larger pieces keeping an eye not to overcook. For more ideas on sides, check out our Street Corn Chicken Rice Bowl recipe for a tasty companion dish that adds flair to your meal.
Tips for Smooth Preparation
This process takes about 15 minutes to prep and 15 minutes to cook, totaling 30 minutes, so it’s ideal for quick dinners. Remember to use tongs for easy handling and serve right away with dipping sauces for the best flavor. If you’re meal prepping, these steps make it straightforward to scale up.

Dietary Substitutions to Customize Your Chicken Tenders
Making these chicken tenders your own is fun and easy with a few swaps that fit different diets. For instance, if you’re avoiding meat, try turkey strips or firm tofu to keep the texture similar while adding variety. The batter and coating work just as well with these changes, ensuring your tenders stay crispy and delicious.
Don’t forget about sauces and seasonings swap Dijon for a milder mustard or add herbs like rosemary for a fresh twist. You could even include veggies like zucchini as a side to boost nutrition, making this recipe adaptable for food enthusiasts and diet-conscious folks alike. With options for vegan, gluten-free, or low-calorie versions, you’ll have plenty of ways to enjoy this dish.
Simple Modifications
For protein alternatives, seitan works great for a plant-based vibe, and almond flour can lighten things up. Always adjust measurements to keep the balance, like using 1 cup of substitutes to match the original quantities.
Mastering Chicken Tenders: Advanced Tips and Variations
Once you’re comfortable with the basics, level up your chicken tenders with some pro tricks that make them even better. For that ultimate crunch, double-dip the chicken by going through the batter and crumbs twice before baking. Keep an eye on your oven temperature to avoid any sogginess, and try fun flavors like garlic-parmesan for a new spin.
Presentation matters too arrange your tenders on a plate with fresh herbs or colorful sauces to make them look as good as they taste. If you’re planning ahead, freeze the breaded tenders and bake them straight from the freezer for busy days. Experimenting with these tips can turn a simple recipe into something special for baking enthusiasts or travelers seeking global flavors.
Creative Ideas
Try Cajun seasoning for a kick or lemon pepper for brightness, and always use about 1 teaspoon per batch to keep flavors balanced. These variations add excitement without complicating the 30-minute total time.
How to Store Chicken Tenders: Best Practices
Keeping your chicken tenders fresh is key to enjoying them later, and it’s easier than you think. Pop them in the refrigerator in an airtight container for up to 3-4 days to lock in that crispy goodness. For longer storage, freeze them in a single layer first, then bag them up for up to 3 months without losing flavor.
When reheating, use your oven or air fryer at 350°F to bring back the crunch steer clear of the microwave to avoid a soggy mess. For meal prep, layer tenders with parchment paper and label your containers with dates to stay organized. This approach works well for anyone from students to working professionals juggling schedules.
Storage Hacks
Table 1: Storage Options for Chicken Tenders
| Method | Duration | Tips |
|---|---|---|
| Refrigeration | 3-4 days | Use airtight containers to keep moisture out |
| Freezing | Up to 3 months | Freeze individually first for easy portions |
| Reheating | N/A | Oven at 350°F for crispiness |
FAQs: Frequently Asked Questions About Chicken Tenders
What are the best methods to cook chicken tenders at home?
Chicken tenders can be cooked using several popular methods, including baking, frying, grilling, and air frying. Baking at 400°F for 15-20 minutes ensures a crispy outside with juicy meat inside, especially when coated in breadcrumbs. For frying, heat oil to 350°F and fry tenders for 3-4 minutes until golden brown. Air frying is a healthier option; cook tenders at 400°F for about 10-12 minutes with a light oil spray. Always check that the internal temperature reaches 165°F for safe consumption.
How can I make homemade chicken tenders crispy without deep frying?
To achieve crispy chicken tenders without deep frying, coat them in a mixture of breadcrumbs and a small amount of oil or cooking spray before baking or air frying. Using panko breadcrumbs adds extra crunch. Baking at a high temperature (around 425°F) on a wire rack allows hot air circulation, which helps crisp the coating. Air frying also produces a crispy texture with less oil, typically cooking tenders at 400°F for 10-12 minutes.
Are chicken tenders healthier than chicken wings?
Chicken tenders and wings differ in nutritional content. Chicken tenders are leaner white meat, typically containing less fat and fewer calories compared to wings, which have darker meat and more skin. However, the healthiness depends on preparation; baked or grilled tenders without heavy breading or frying are lower in fat and calories. Wings are often prepared fried and tossed in sauces, which can increase calorie and sodium content significantly.
Can I freeze chicken tenders before or after cooking?
Yes, chicken tenders can be frozen both before and after cooking. For raw tenders, place them in an airtight container or freezer bag and freeze for up to 9 months. To freeze cooked tenders, allow them to cool completely, then store them in a sealed container or freezer bag for up to 4 months. Reheat thoroughly to 165°F to ensure food safety, using an oven or air fryer for best texture preservation.
What are some easy dipping sauces to serve with chicken tenders?
Popular dipping sauces that pair well with chicken tenders include honey mustard, barbecue sauce, ranch dressing, buffalo sauce, and garlic aioli. For a quick homemade honey mustard, mix equal parts Dijon mustard and honey with a splash of mayonnaise or Greek yogurt. Barbecue sauce can be store-bought or homemade for a smoky flavor. These sauces add flavor variety and are simple to prepare or buy, enhancing the overall chicken tender experience.
Chicken Tenders
- Total Time: 30 minutes
- Yield: About 4 servings
- Diet: Gluten
Description
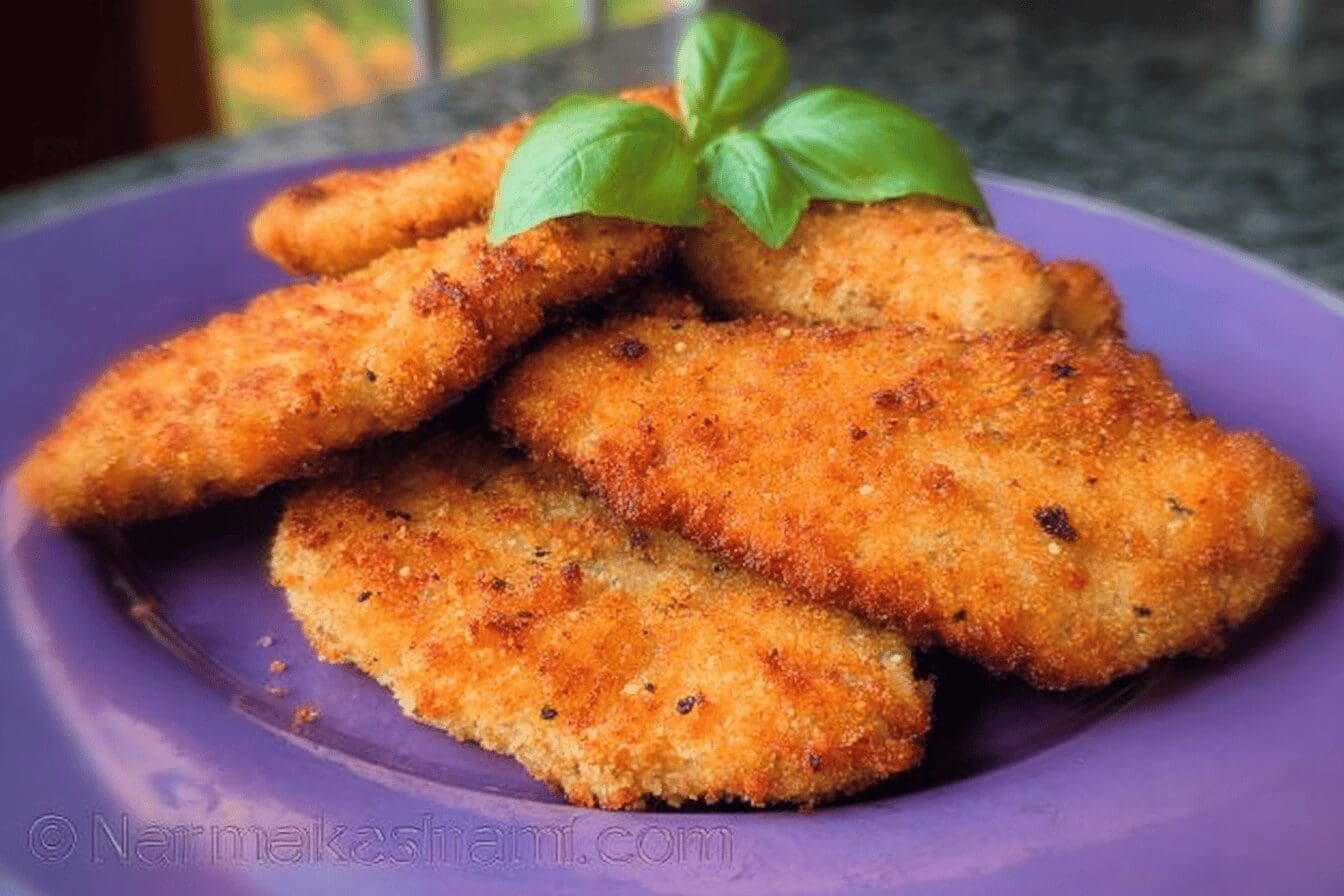
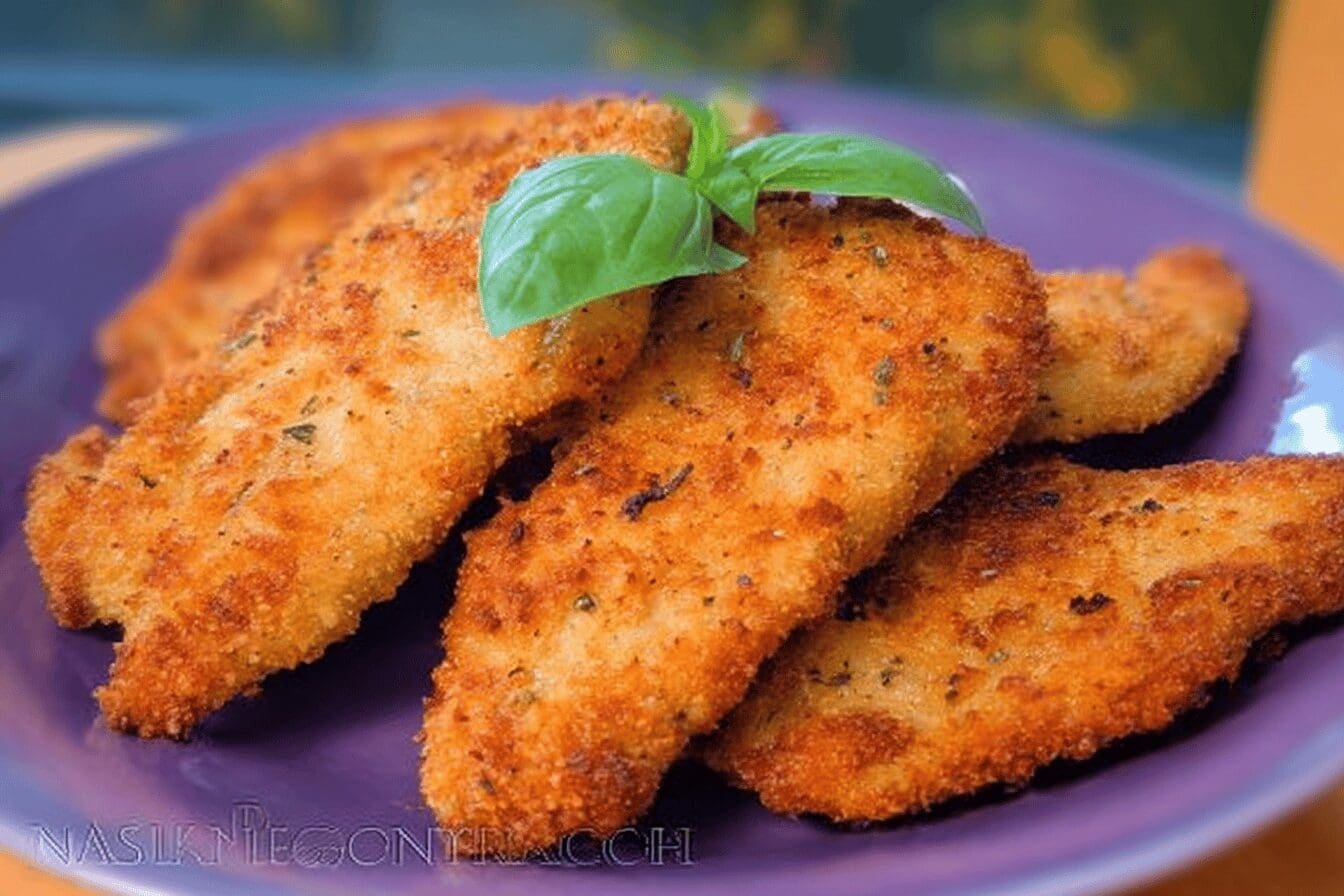
🍗 Crispy Oven Baked Chicken Tenders deliver a perfectly golden, crunchy exterior without the mess of frying.
🔥 This healthier baking method keeps chicken tender juicy on the inside while satisfying your craving for crispiness.
Ingredients
– 1 1/2 cups panko breadcrumbs with oil spray for toasting
– 1 egg
– 1 tablespoon mayonnaise
– 1 1/2 tablespoons Dijon mustard or other mustard
– 2 tablespoons flour
– 1/2 teaspoon salt
– Black pepper to taste
– 500 grams (1 pound) chicken tenderloins or chicken breast sliced lengthwise into 2/3 inch (1.5 cm) thick pieces with oil spray
Instructions
1-Preheat your oven: Start by preheating your oven to 200°C (390°F), or 180°C if your oven is fan-forced, to ensure even baking. This method keeps things simple and mess-free, perfect for busy parents or working professionals who need a quick win in the kitchen.
2-Toast the panko breadcrumbs: First, lightly spray a baking tray with oil and toast the panko breadcrumbs for 3 to 5 minutes until they’re golden, then move them to a bowl for later. If you want even crispier tenders, set up a rack on another tray to let air circulate.
3-Make the batter: Next, in a separate bowl, whisk together the egg, mayonnaise, mustard, flour, salt, and pepper to make a thick batter that coats the chicken beautifully.
4-Coat the chicken: Add the chicken slices to the batter and make sure they’re fully covered. Using tongs, dip each piece into the toasted panko breadcrumbs, pressing extra crumbs on top so they stick well, and place them on your tray or rack.
5-Bake the chicken tenders: Lightly spray the coated chicken with oil and add a bit more salt if you like, then bake for 15 minutes or up to 20 for larger pieces keeping an eye not to overcook.
6-Serve and enjoy: Remember to use tongs for easy handling and serve right away with dipping sauces for the best flavor. If you’re meal prepping, these steps make it straightforward to scale up.
Notes
🌟 Toasting panko breadcrumbs before coating enhances crispiness.
🍳 Using a rack in the oven promotes even cooking and crisp texture.
⏰ Avoid overbaking to keep chicken juicy and tender.
- Prep Time: 15 minutes
- Cook Time: 15 minutes
- Category: Main Dish
- Method: Baking
- Cuisine: American
Nutrition
- Serving Size: About 4-5 tenders
Keywords: Chicken Tenders,Oven Baked Crispy,Healthy Chicken,Golden Chicken