Why You’ll Love This Chicken Biryani
Chicken Biryani is one of those meals that feels special, but it can still fit into a normal home cooking routine. This one pot version keeps the process simple, uses easy pantry staples, and gives you a fragrant, layered rice dish with tender chicken in about the same time it takes to make many weeknight dinners.
- Easy to make: The recipe uses one pot or a pressure cooker, so cleanup stays simple. Once the chicken is marinated and the rice is soaked, the rest of the cooking follows a clear sequence.
- Good for balanced meals: Chicken adds protein, rice gives steady energy, and mint plus spices bring bold flavor without needing heavy sauces.
- Flexible for many eaters: You can adjust chili, use ghee or oil, cook in a pot or pressure cooker, and choose bone-in or boneless chicken based on what your family likes.
- Big flavor with basic ingredients: Whole spices, yogurt, ginger garlic paste, fried onions, and basmati rice create the classic biryani taste people love.
For home cooks who want a dish that feels restaurant-style without complicated steps, Chicken Biryani is a reliable choice.
If you enjoy comforting chicken dinners, you may also like this smothered chicken and rice recipe for another hearty meal idea.
Jump To
- 1. Why You’ll Love This Chicken Biryani
- 2. Essential Ingredients for Chicken Biryani
- 3. How to Prepare the Perfect Chicken Biryani: Step-by-Step Guide
- 4. Protein and Main Component Alternatives
- 5. Vegetable, Sauce, and Seasoning Modifications
- 6. Mastering Chicken Biryani: Advanced Tips and Variations
- 7. How to Store Chicken Biryani: Best Practices
- 8. FAQs: Frequently Asked Questions About Chicken Biryani
- 9. Chicken Biryani
Essential Ingredients for Chicken Biryani
Below is the full ingredient list for this Chicken Biryani recipe, written in a clear and practical way so you can prep everything before cooking.
Marinade Ingredients
- 1.1 lbs or 1/2 kg chicken, skinless bone-in or boneless, cut into large pieces such as thighs, drumsticks, legs, or a mix – gives the biryani its main protein and absorbs the spice flavor well.
- 3 tablespoons plain yogurt – helps tenderize the chicken and adds mild tang.
- 1 1/4 tablespoons ginger garlic paste – builds the base flavor and helps soften the meat.
- 1/2 to 1 tablespoon biryani masala or garam masala – adds warm spice flavor.
- 1/2 teaspoon salt – seasons the chicken from the start.
- 1/4 teaspoon turmeric powder – adds color and a light earthy note.
- 1/2 to 1 teaspoon red chili powder – adjusts the heat level to your taste.
- 1 tablespoon lemon juice, optional – adds brightness and helps balance the marinade.
Whole Spices, Optional but Recommended
- 1 bay leaf – adds a subtle woody aroma.
- 4 green cardamoms – give the rice and chicken a sweet, floral scent.
- 6 cloves – add deep warmth.
- 1 inch cinnamon piece – brings mild sweetness and depth.
- 1 star anise – gives a soft licorice-like aroma.
- 3/4 teaspoon shahi jeera or caraway seeds – adds a classic biryani fragrance.
- 1 strand mace, optional – adds a rich, delicate spice note.
Other Ingredients
- 2 cups aged basmati rice – best for long, fluffy grains.
- 2 tablespoons ghee or oil – used for frying and building flavor.
- 1 large onion, thinly sliced – adds sweetness and body to the base.
- 1/4 to 1/2 cup chopped mint leaves – gives freshness.
- 1 green chili, slit or chopped, optional – adds extra heat.
- 1/4 cup plain yogurt – adds richness in the final mix.
- 1/4 to 1/2 teaspoon red chili powder, optional – boosts color and heat.
- 1 teaspoon garam masala or biryani masala – adds a finishing spice layer.
- 3 cups water, or 3 1/2 cups for pot method, salted with about 3/4 teaspoon salt – used to cook the rice.
- 2 tablespoons fried onions, optional – adds extra flavor and garnish.
- A pinch of saffron soaked in 2 tablespoons hot milk, optional – gives aroma and a light golden touch.
Special Dietary Options
- Vegan: Replace chicken with firm tofu, soy chunks, or mixed vegetables, and use plant-based yogurt plus oil instead of ghee.
- Gluten-free: This recipe is naturally gluten-free as long as your spice blends are certified gluten-free.
- Low-calorie: Use less ghee, trim visible fat from chicken, and reduce fried onions and saffron milk garnish.
How to Prepare the Perfect Chicken Biryani: Step-by-Step Guide
First Step: Marinate the chicken
Start by making small slits in the chicken pieces so the flavors sink in better. Place the chicken in a bowl and mix in the yogurt, ginger garlic paste, biryani masala or garam masala, salt, turmeric, red chili powder, and lemon juice if using. Coat every piece well. Let it marinate for at least 1 hour, or keep it overnight in the fridge for a deeper flavor.
Second Step: Soak the rice
Rinse the aged basmati rice thoroughly three times. This step removes extra starch and helps the grains stay separate after cooking. Soak the rice in water for 30 minutes, then drain it well before cooking. If you want yellow-tinted rice, you can add 1 teaspoon turmeric powder to the rice later, but keep it optional if you prefer the traditional look.
Third Step: Toast the spices and cook the onions
Heat the ghee or oil in a wide, heavy-bottomed pot or pressure cooker. Add the whole spices, including bay leaf, cardamoms, cloves, cinnamon, star anise, shahi jeera, and mace if using. Stir for a few seconds until fragrant. Then add the sliced onion and fry on medium heat until it turns uniformly light brown. Do not let it burn, because browned onions add sweetness, while burnt onions can turn bitter.
Fourth Step: Cook the chicken base
Add the marinated chicken to the pot and sauté for about 5 minutes, just until it looks pale. Cover and cook on low heat until the chicken is tender and fully cooked. If the pot has extra moisture after the chicken is done, remove the lid and cook for a little longer so the liquid evaporates. This helps the final biryani stay fluffy instead of soggy.
Fifth Step: Finish the chicken layer
Once the chicken is cooked, adjust the salt if needed. Add the plain yogurt, garam masala or biryani masala, optional red chili powder, green chili, and half of the chopped mint leaves. Mix gently so the chicken stays intact while the flavors come together. This creates the rich base layer that supports the rice.
Sixth Step: Layer the rice on top
Spread the chicken mixture evenly across the bottom of the pot. Carefully place the drained rice over the chicken in one even layer. Do not mix at this stage. The layered method is what gives Chicken Biryani its classic look and allows the rice to steam over the spiced chicken.
Seventh Step: Add the water
Bring the salted water to a rolling boil in a separate pan. Pour 2 cups of hot water around the sides of the pot and pour the rest gently over the rice. The water amount may vary a little depending on the rice brand and the vessel you use. If you are cooking in a pot, the total amount is usually 3 1/2 cups water. If the rice looks undercooked later and the water is gone, you can add 1/4 to 1/2 cup boiling water and continue cooking.
Eighth Step: Add the final garnish layers
Sprinkle the remaining mint leaves, fried onions, and saffron milk if you are using it. Keep the layers untouched so the rice cooks softly over the chicken. This final topping adds color, aroma, and a gentle restaurant-style finish.
Ninth Step: Cook until the rice is done
If you are using a pot, cover it and cook on medium heat for about 15 minutes after the water starts boiling. Keep an eye on it, since rice quality and cookware can change the timing. If you are using a pressure cooker, cook until one whistle, then remove it from the heat and let the pressure drop naturally before opening. Avoid overcooking, because that can make the rice soft instead of fluffy.
Tenth Step: Rest and serve
When cooking is complete, leave the pot covered for 15 minutes so the steam settles and the flavors blend together. Then fluff the biryani gently with a fork. Serve from top to bottom so each portion has both rice and chicken. This gives everyone a balanced serving with the fragrant rice and the spiced chicken underneath.
For best results, do not rush the resting time. That short wait helps the grains stay firm and improves the final texture.
For another cozy chicken dinner, try this chicken spinach and mushroom bake on a night when you want something simple and comforting.
Protein and Main Component Alternatives
Chicken swaps
Chicken thighs and drumsticks are the best choices for this recipe because they stay juicy and flavorful. Bone-in pieces add more depth to the rice as they cook. If you only have boneless chicken, that also works, but it may cook faster, so watch the timing closely. Boneless thighs are a better choice than boneless breast if you want a softer result.
Other protein options
If you want to change the main protein, you can make a similar biryani-style dish with lamb, shrimp, or mixed vegetables. Lamb needs a longer cook time, so it works best when pre-cooked or simmered until tender before layering with rice. Shrimp cooks quickly, so add it near the end. For a vegetarian version, use potatoes, cauliflower, carrots, peas, paneer, or tofu with the same rice and spice base.
Ingredient availability swaps
If you do not have biryani masala, garam masala can stand in well. If ghee is not available, use neutral oil. If whole spices are missing, the dish will still taste good, though the aroma will be lighter. The important part is to keep the chicken, rice, onion, yogurt, and mint balance intact so the biryani stays recognizable.
Vegetable, Sauce, and Seasoning Modifications
Vegetable changes
Chicken Biryani is flexible, so you can adjust the add-ins based on what is in your kitchen. Peas, carrots, bell peppers, potatoes, and green beans all work well in small amounts. If you want a richer vegetable version, use potatoes and fried onions together, since both bring body and sweetness. Just avoid adding too many watery vegetables, because that can change the rice texture.
Sauce and yogurt adjustments
The recipe already uses plain yogurt in both the marinade and the final chicken mixture. If you need a lighter option, use a smaller amount of yogurt, or choose low-fat plain yogurt. If you like a creamier gravy-like base, add a little extra yogurt near the end, but keep the amount modest so the rice does not become heavy. You can also serve the dish with cooling raita on the side for balance.
Seasoning and heat level
Red chili powder and green chili are both optional, so you can keep the dish mild for children or spice-sensitive eaters. For deeper flavor, use the whole spices listed in the recipe. If you want more color, a small amount of saffron milk or turmeric can help. Still, it is best not to add tomatoes here, since leaving them out keeps the more traditional biryani flavor profile.
Mastering Chicken Biryani: Advanced Tips and Variations
Pro cooking techniques
For the best Chicken Biryani, use a wide, heavy-bottomed pot so the heat spreads evenly and the rice does not scorch. Always rinse and soak the rice because that small step keeps the grains separate. Use aged basmati rice if possible since older rice is firmer and turns out fluffier. If you are unsure about water, start carefully and add a little boiling water only if the rice still needs more cooking.
Cook the onions until light brown, not dark brown. That sweet onion base gives the dish depth and supports the spice mix. Also, let the chicken cook fully before layering the rice. That way, both parts finish at the right time.
Flavor variations
You can keep the recipe classic or adjust it to suit your taste. Add a bit more mint for freshness, or use extra fried onions for a richer flavor. If you like a brighter spice profile, increase the red chili powder slightly. For a softer, less spicy version, use only garam masala and reduce the chili. The recipe works well as a family meal because each part can be adjusted without changing the basic method.
Presentation tips
When serving, scoop from the top all the way down so each plate gets rice and chicken together. Add extra mint, fried onions, or a few saffron strands on top for a beautiful finish. A side of yogurt or raita also makes the plate look complete. For more meal inspiration, you can pair this dish with a fresh salad or a simple vegetable side.
Make-ahead options
Marinate the chicken the night before if you want an easier cooking day. You can also slice the onions, rinse the rice, and measure the spices ahead of time. If you are cooking for guests or a busy family night, these small prep steps make the whole process smoother. Leftover biryani also reheats well, which makes it a practical choice for meal planning.
Chicken Biryani often tastes even better after a short rest, because the spices settle into the rice and chicken.
How to Store Chicken Biryani: Best Practices
Refrigeration
Let the biryani cool before storing it. Place leftovers in an airtight container and keep them in the fridge for up to 3 days. For the best texture, store it in smaller portions so reheating is easier.
Freezing
Chicken Biryani can also be frozen for longer storage. Divide it into freezer-safe containers or bags, press out extra air, and freeze for up to 1 month for the best flavor. Label each container with the date so you can track freshness.
Reheating
Reheat biryani in the microwave with a splash of water to keep the rice from drying out. You can also warm it gently on the stovetop over low heat, covered, until hot. Stir only after it is heated so the grains stay intact. Make sure the chicken is steaming hot before serving.
Meal prep considerations
For batch cooking, keep the rice and chicken in portions that match your family size. This makes weekday lunches or quick dinners much easier. If possible, store raita separately so it stays fresh. For a practical meal plan, biryani is a strong choice because it tastes good fresh and still works well as leftovers.

FAQs: Frequently Asked Questions About Chicken Biryani
How do you make chicken biryani in one pot?
Start by marinating 1 kg bone-in chicken pieces with 1 cup yogurt, 2 tbsp ginger-garlic paste, 2 tbsp biryani masala, 1 tsp each salt and turmeric, 1 tsp chili powder, and juice of 1 lemon for at least 1 hour. Rinse and soak 2 cups aged basmati rice for 30 minutes. In a large pot, heat 1/4 cup ghee or oil, add whole spices (1 bay leaf, 4 cloves, 2 cardamom pods, 1 cinnamon stick), and fry 2 sliced onions until golden. Add marinated chicken, sauté 10 minutes until tender. Spread chicken evenly, top with drained rice, pour 3-4 cups boiling water (salted to taste), add chopped mint and cilantro. Cover tightly, cook on medium heat 20-25 minutes until rice absorbs water and is fluffy. Rest 10 minutes, fluff gently, and serve. This method serves 4-6 and takes about 1 hour total. Pairs well with raita. (112 words)
What is the best rice for chicken biryani?
Aged basmati rice is ideal for chicken biryani due to its long grains, fragrance, and ability to stay separate and fluffy. Look for 1-2 year old basmati for best results—fresh rice absorbs too much water and turns mushy. Alternatives include premium short-grain aged rice like jeerakasala or seeraga samba for authentic South Indian styles. Always rinse thoroughly until water runs clear to remove excess starch, then soak 30 minutes. In recipes, use a 1:1.5 to 1:2 rice-to-water ratio depending on brand. This prevents sticky texture and enhances aroma when cooked with spices. Pro tip: Test a small batch first if switching varieties. Aged basmati yields restaurant-quality separation every time. (104 words)
What type of chicken is best for biryani?
Bone-in chicken thighs, drumsticks, or leg pieces (about 1-1.5 kg for 4 servings) are best for chicken biryani—they stay juicy, tender, and infuse flavor into the rice during cooking. Skin-on adds richness, but skinless works too. Avoid boneless breast as it dries out easily unless marinated overnight. Cut into medium 2-3 inch pieces for even cooking. Marinate with yogurt, ginger-garlic, spices, and lemon to tenderize. In one-pot methods, bone-in releases gelatin for a silkier gravy. Check doneness by pricking with a fork—juices should run clear, no pink inside (internal temp 165°F/75°C). This choice cuts cooking time to 20-30 minutes post-marinade. (102 words)
How do you avoid mushy rice in chicken biryani?
To keep rice fluffy and separate in chicken biryani, use aged basmati, rinse 3-4 times to remove starch, and soak 30 minutes. Measure water precisely—start with 1.5 times rice volume in one-pot (adjust per brand; e.g., 3 cups for 2 cups rice). Cook on medium heat covered tightly to steam evenly, avoiding stirring mid-cook. Layer soaked drained rice over partially cooked chicken without mixing. If undercooked, add 1/4 cup boiling water, seal, and cook 5 more minutes. Rest 10 minutes off heat. Common mistake: over-soaking or excess water. Fry onions golden for crisp texture contrast. Results in perfect non-sticky grains. (98 words)
What are good side dishes for chicken biryani?
Complement chicken biryani with cooling cucumber raita (yogurt, grated cucumber, cumin, salt), sliced onion-lemon salad, or papads for crunch. For gravy lovers, serve shorba (biryani stock) or mild chicken kurma. Boondi raita or tomato onion chutney adds tang. Veg options: mirchi ka salan or eggplant curry. These balance spices—raita cuts heat, salads refresh. Portion: 1/2 cup raita per serving. Prep raita ahead: mix 2 cups yogurt, 1 cup cucumber, 1/2 tsp roasted cumin, salt, chill. Total meal for 4 needs 20 minutes extra. Links to full raita recipe enhance site traffic. Keeps biryani exciting for repeats. (96 words)

Chicken Biryani
- Total Time: 2 hours 10 minutes
- Yield: 4 servings
Description
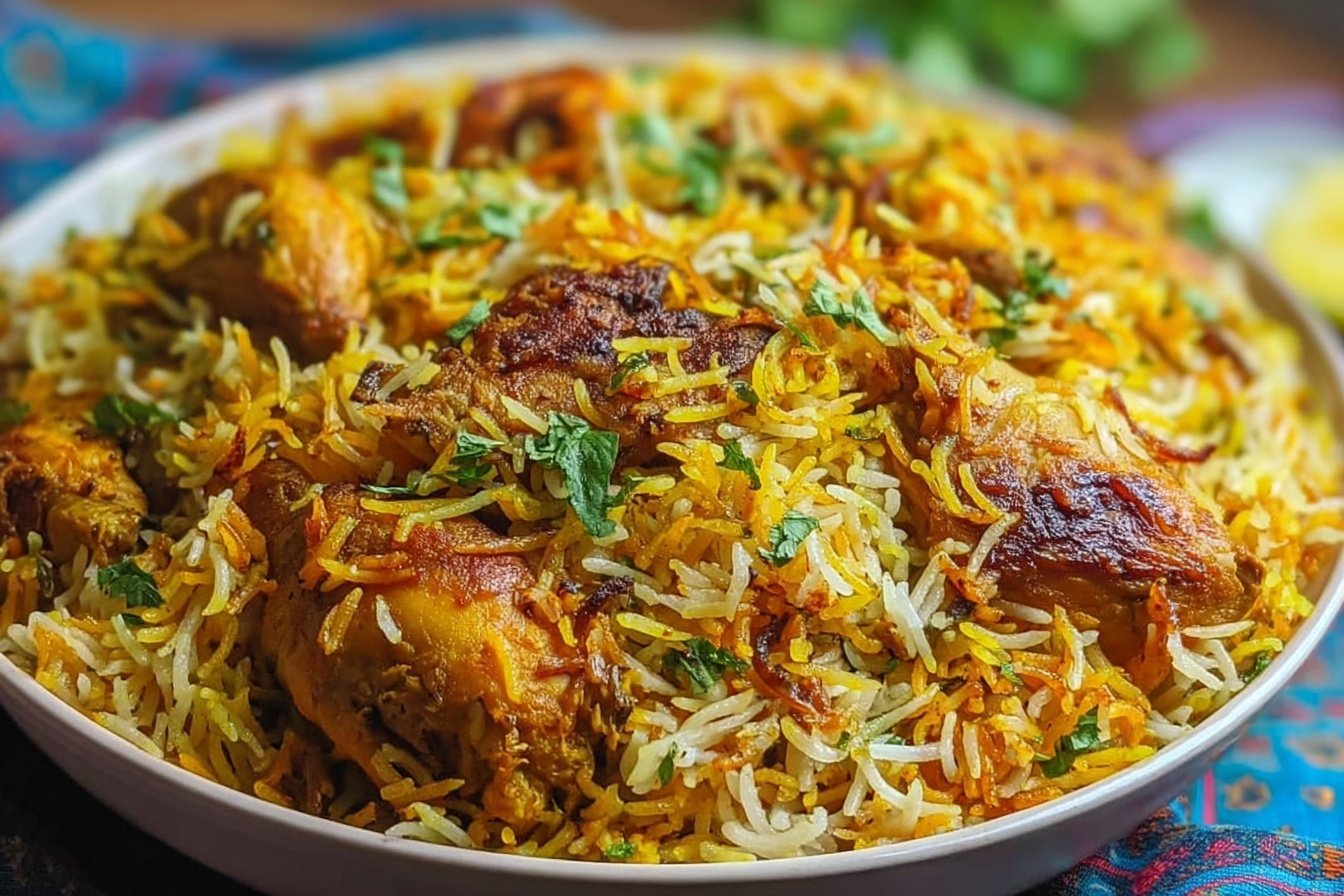
🍗 One-pot chicken biryani layers juicy spiced chicken with aromatic fluffy basmati – authentic Indian feast in simple steps.
🍚 Marinate for tender results; effortless dum cooking delivers restaurant-quality flavor without hassle.
Ingredients
– 1.1 lbs or 1/2 kg chicken, skinless bone-in or boneless, cut into large pieces such as thighs, drumsticks, legs, or a mix for main protein and spice flavor absorption
– 3 tablespoons plain yogurt for tenderizing chicken and mild tang
– 1 1/4 tablespoons ginger garlic paste for base flavor and softening meat
– 1/2 to 1 tablespoon biryani masala or garam masala for warm spice flavor
– 1/2 teaspoon salt for seasoning the chicken
– 1/4 teaspoon turmeric powder for color and light earthy note
– 1/2 to 1 teaspoon red chili powder for heat level
– 1 tablespoon lemon juice, optional for brightness and balancing marinade
– 1 bay leaf for subtle woody aroma
– 4 green cardamoms for sweet floral scent
– 6 cloves for deep warmth
– 1 inch cinnamon piece for mild sweetness and depth
– 1 star anise for soft licorice-like aroma
– 3/4 teaspoon shahi jeera or caraway seeds for classic biryani fragrance
– 1 strand mace, optional for rich delicate spice note
– 2 cups aged basmati rice for long fluffy grains
– 2 tablespoons ghee or oil for frying and building flavor
– 1 large onion, thinly sliced for sweetness and body to the base
– 1/4 to 1/2 cup chopped mint leaves for freshness
– 1 green chili, slit or chopped, optional for extra heat
– 1/4 cup plain yogurt for richness in final mix
– 1/4 to 1/2 teaspoon red chili powder, optional for color and heat
– 1 teaspoon garam masala or biryani masala for finishing spice layer
– 3 cups water, or 3 1/2 cups for pot method, salted with about 3/4 teaspoon salt for cooking the rice
– 2 tablespoons fried onions, optional for extra flavor and garnish
– A pinch of saffron soaked in 2 tablespoons hot milk, optional for aroma and light golden touch
Instructions
1-First Step: Marinate the chicken Start by making small slits in the chicken pieces so the flavors sink in better. Place the chicken in a bowl and mix in the yogurt, ginger garlic paste, biryani masala or garam masala, salt, turmeric, red chili powder, and lemon juice if using. Coat every piece well. Let it marinate for at least 1 hour, or keep it overnight in the fridge for a deeper flavor.
2-Second Step: Soak the rice Rinse the aged basmati rice thoroughly three times. This step removes extra starch and helps the grains stay separate after cooking. Soak the rice in water for 30 minutes, then drain it well before cooking. If you want yellow-tinted rice, you can add 1 teaspoon turmeric powder to the rice later, but keep it optional if you prefer the traditional look.
3-Third Step: Toast the spices and cook the onions Heat the ghee or oil in a wide, heavy-bottomed pot or pressure cooker. Add the whole spices, including bay leaf, cardamoms, cloves, cinnamon, star anise, shahi jeera, and mace if using. Stir for a few seconds until fragrant. Then add the sliced onion and fry on medium heat until it turns uniformly light brown. Do not let it burn, because browned onions add sweetness, while burnt onions can turn bitter.
4-Fourth Step: Cook the chicken base Add the marinated chicken to the pot and sauté for about 5 minutes, just until it looks pale. Cover and cook on low heat until the chicken is tender and fully cooked. If the pot has extra moisture after the chicken is done, remove the lid and cook for a little longer so the liquid evaporates. This helps the final biryani stay fluffy instead of soggy.
5-Fifth Step: Finish the chicken layer Once the chicken is cooked, adjust the salt if needed. Add the plain yogurt, garam masala or biryani masala, optional red chili powder, green chili, and half of the chopped mint leaves. Mix gently so the chicken stays intact while the flavors come together. This creates the rich base layer that supports the rice.
6-Sixth Step: Layer the rice on top Spread the chicken mixture evenly across the bottom of the pot. Carefully place the drained rice over the chicken in one even layer. Do not mix at this stage. The layered method is what gives Chicken Biryani its classic look and allows the rice to steam over the spiced chicken.
7-Seventh Step: Add the water Bring the salted water to a rolling boil in a separate pan. Pour 2 cups of hot water around the sides of the pot and pour the rest gently over the rice. The water amount may vary a little depending on the rice brand and the vessel you use. If you are cooking in a pot, the total amount is usually 3 1/2 cups water. If the rice looks undercooked later and the water is gone, you can add 1/4 to 1/2 cup boiling water and continue cooking.
8-Eighth Step: Add the final garnish layers Sprinkle the remaining mint leaves, fried onions, and saffron milk if you are using it. Keep the layers untouched so the rice cooks softly over the chicken. This final topping adds color, aroma, and a gentle restaurant-style finish.
9-Ninth Step: Cook until the rice is done If you are using a pot, cover it and cook on medium heat for about 15 minutes after the water starts boiling. Keep an eye on it, since rice quality and cookware can change the timing. If you are using a pressure cooker, cook until one whistle, then remove it from the heat and let the pressure drop naturally before opening. Avoid overcooking, because that can make the rice soft instead of fluffy.
10-Tenth Step: Rest and serve When cooking is complete, leave the pot covered for 15 minutes so the steam settles and the flavors blend together. Then fluff the biryani gently with a fork. Serve from top to bottom so each portion has both rice and chicken. This gives everyone a balanced serving with the fragrant rice and the spiced chicken underneath.
Notes
🍚 Use aged basmati; rinse/soak for non-mushy fluffy grains.
⏳ Marinate overnight for deepest flavor infusion.
🔥 Fry onions to golden (not burnt) for essential sweetness.
- Prep Time: 40 minutes
- Marinate: 1 hour
- Cook Time: 30 minutes
- Category: Main Dishes
- Method: One Pot
- Cuisine: Indian
Nutrition
- Serving Size: 1 serving
- Calories: 753
- Sugar: 2g
- Sodium: 1062mg
- Fat: 29g
- Saturated Fat: 10g
- Unsaturated Fat: 19g
- Trans Fat: 0g
- Carbohydrates: 86g
- Fiber: 4g
- Protein: 34g
- Cholesterol: 114mg
Keywords: chicken biryani recipe, one pot chicken biryani, simple biryani steps, perfect chicken biryani