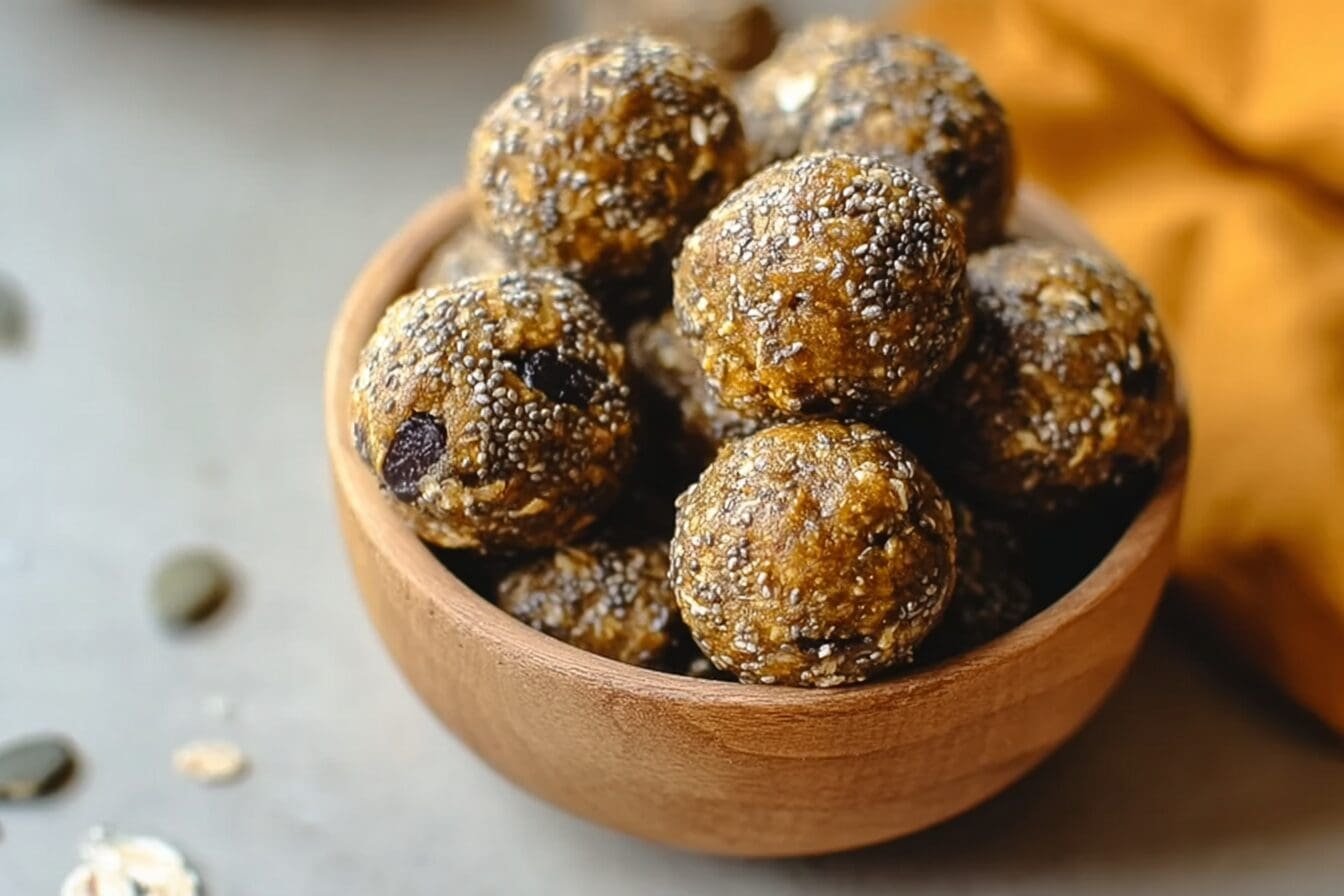
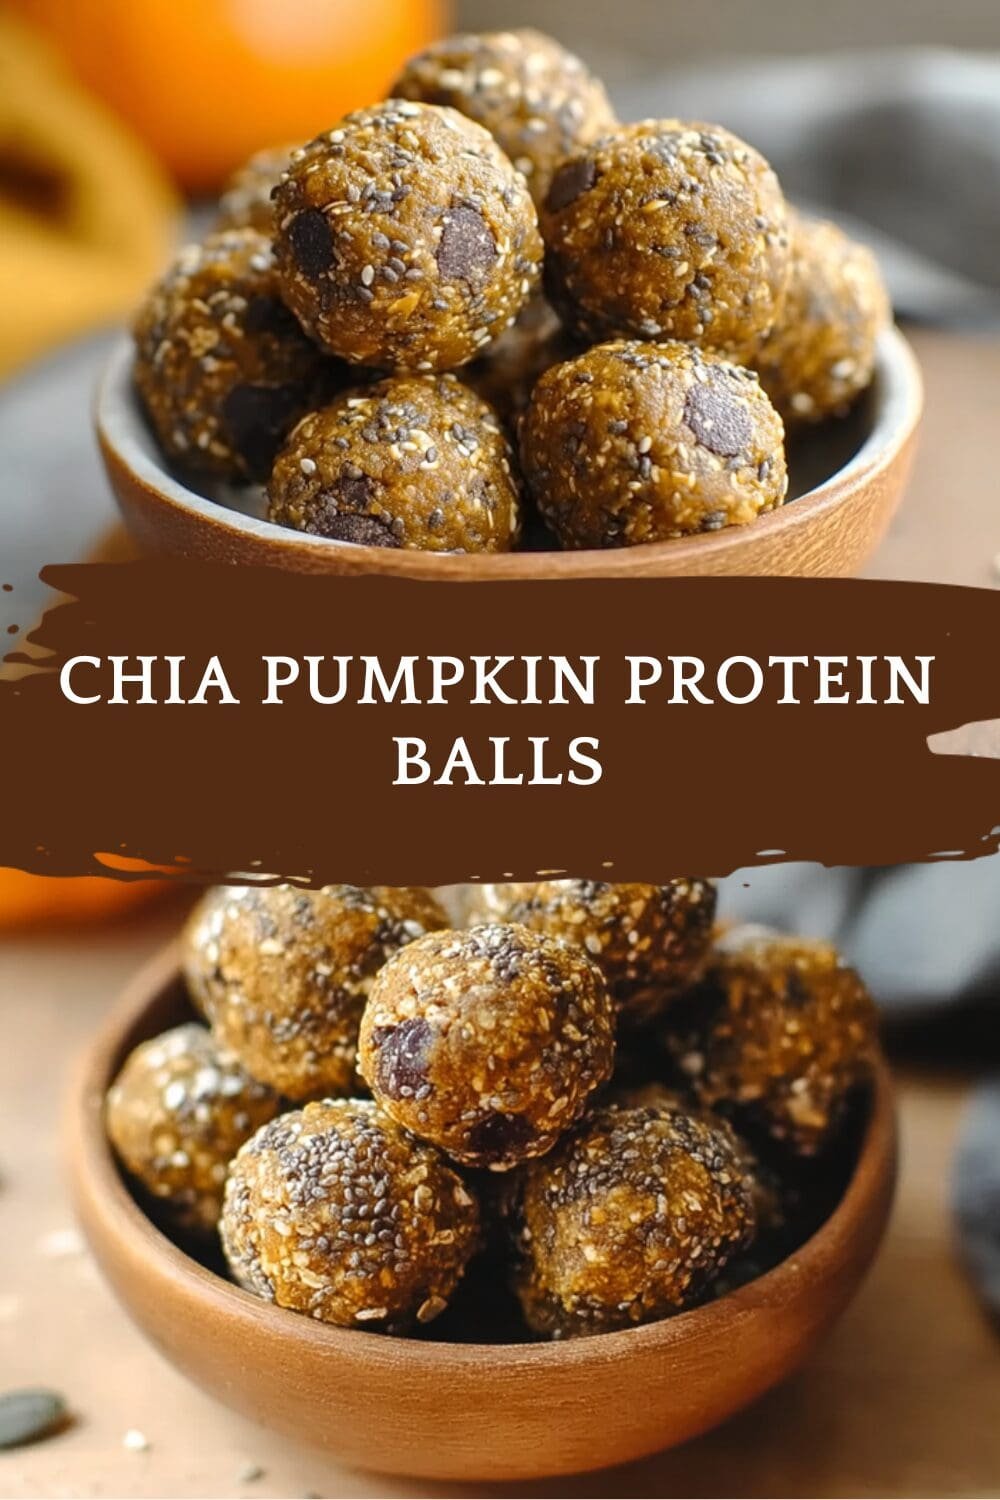
Why You’ll Love This Chia Pumpkin Protein Balls
Chia pumpkin protein balls are a fantastic choice for anyone seeking a simple yet delicious snack that fits easily into a busy day. These protein-packed bites come together with minimal effort, making them perfect for home cooks and busy parents alike. Let me share why these chia pumpkin protein balls, or pumpkin chia protein bites, stand out as a go-to option for health-conscious eaters.
- Ease of preparation: One of the best things about these chia pumpkin protein balls is how quickly they come together. With just a few minutes of mixing and rolling, you’re done, and no oven is required, which means less cleanup and more time for other tasks. This simplicity makes them ideal for students or working professionals who need a fast, no-fuss recipe that still delivers on flavor and nutrition.
- Health benefits: Packed with nutrients, these pumpkin protein balls offer a great boost of protein, fiber, and essential omega-3s from the chia seeds, while the pumpkin adds vitamins like A and C for immune support. Each ball provides a balanced mix of carbs, protein, and healthy fats to keep you energized, making them a smart choice for diet-conscious individuals or anyone looking to add more wholesome ingredients to their routine.
- Versatility: Whether you’re vegan, gluten-free, or watching calories, these chia pumpkin protein balls adapt easily to various diets. You can swap ingredients to make them fit your needs without losing that tasty pumpkin spice flavor. This flexibility appeals to food enthusiasts, travelers, and seniors who appreciate a reliable snack that travels well.
- Distinctive flavor: The nutty texture from chia seeds combined with the warm, natural sweetness of pumpkin spice creates a standout taste that’s both comforting and exciting. These pumpkin protein balls, or chia pumpkin bites, have a subtle sweetness that isn’t overpowering, allowing the fresh pumpkin flavor to shine through for a truly enjoyable treat.
Overall, these chia pumpkin protein balls make a great addition to your snack rotation, offering a blend of ease, health perks, and flavor that keeps things fresh and fun. With their straightforward prep and adaptable nature, it’s no wonder they’re becoming a favorite among home cooks looking for healthy pumpkin protein balls recipes.
Jump To
- 1. Why You’ll Love This Chia Pumpkin Protein Balls
- 2. Essential Ingredients for Chia Pumpkin Protein Balls
- 3. How to Prepare the Perfect Chia Pumpkin Protein Balls: Step-by-Step Guide
- 4. Dietary Substitutions to Customize Your Chia Pumpkin Protein Balls
- 5. Mastering Chia Pumpkin Protein Balls: Advanced Tips and Variations
- 6. How to Store Chia Pumpkin Protein Balls: Best Practices
- 7. FAQs: Frequently Asked Questions About Chia Pumpkin Protein Balls
- 8. Chia Pumpkin Protein Balls
Essential Ingredients for Chia Pumpkin Protein Balls
Creating delicious chia pumpkin protein balls starts with the right ingredients, and each one plays a key role in building flavor, texture, and nutrition. Below is a complete list based on the recipe, with exact measurements and a quick note on why each ingredient matters. This ensures you can make these pumpkin protein bites just right every time.
- 2 1/4 cups old fashioned or rolled quick oats – Provides bulk and chewiness, serving as the base for the dough and helping bind everything together.
- 1/2 teaspoon fine sea salt – Enhances the overall flavor, balancing the sweetness and making the chia pumpkin protein balls taste more vibrant.
- 1 teaspoon pumpkin spice – Adds that classic warm flavor profile to these chia pumpkin bites, evoking fall vibes with its mix of cinnamon, nutmeg, and other spices.
- 1/4 cup chia seeds – Offers binding power along with fiber and omega-3s, giving these healthy chia pumpkin balls their nutritious punch and a nice texture.
- 1/2 cup pumpkin puree – Brings moisture, beta-carotene, and a fresh taste that makes these pumpkin protein balls both healthy and flavorful.
- 1/4 cup peanut butter (or other nut butter alternatives such as sunflower seed butter) – Adds healthy fats and helps with texture and binding for a creamy finish in your chia pumpkin protein balls.
- 1/4 cup maple syrup (or similar liquid sweetener like agave nectar or date syrup) – Provides natural sweetness and extra moisture, making these chia pumpkin bites a guilt-free treat.
- 1/3 cup vegan chocolate chips (optional add-ins could include dried cranberries, pumpkin seeds, nuts, or they can be omitted) – Mix in for a bit of extra flavor and fun, though you can leave them out for a simpler version of these pumpkin protein balls.
For special dietary options, here are some easy swaps to keep your chia pumpkin protein balls versatile:
- Vegan: Use plant-based protein powder and maple syrup instead of honey to keep things fully plant-based in these healthy chia pumpkin balls recipe.
- Gluten-free: Opt for certified gluten-free oats or oat flour to ensure these pumpkin chia protein bites are safe for gluten-sensitive eaters.
- Low-calorie: Reduce the nut butter amount or use a powdered peanut protein alternative, and cut back on the sweetener to lighten up your chia pumpkin protein balls.
How to Prepare the Perfect Chia Pumpkin Protein Balls: Step-by-Step Guide
Making chia pumpkin protein balls is straightforward and fun, with each step designed for success. This no-bake recipe takes about 10 minutes to prepare, plus chilling time, so it’s perfect for beginners. Let’s break it down into clear steps to guide you through creating these tasty pumpkin protein balls.
First Step: Gather Your Ingredients
Start by getting everything ready, known as mise en place. Measure out 2 1/4 cups old fashioned oats, 1/2 teaspoon fine sea salt, 1 teaspoon pumpkin spice, 1/4 cup chia seeds, 1/2 cup pumpkin puree, 1/4 cup peanut butter, 1/4 cup maple syrup, and 1/3 cup vegan chocolate chips if using. For vegan adaptations, ensure your peanut butter is nut-free, like sunflower seed butter, and use agave for the sweetener. This step helps avoid any rush and keeps your chia pumpkin protein balls assembly smooth.
Second Step: Mix the Wet Ingredients
In a bowl, combine the wet ingredients first for even blending. Mix the 1/2 cup pumpkin puree, 1/4 cup peanut butter, and 1/4 cup maple syrup until smooth and creamy. If you’re making these pumpkin chia protein bites low-calorie, swap some peanut butter for a lighter option like powdered protein. This creates a base that’s easy to work with and ensures your chia pumpkin protein balls have the right moisture level.
Third Step: Prepare the Dry Ingredients
Now, handle the dry components by grinding the 2 1/4 cups oats in a blender or food processor until they turn into fine oat flour, which takes about 1-2 minutes. In a separate bowl, whisk together the ground oats, 1/2 teaspoon sea salt, 1 teaspoon pumpkin spice, and 1/4 cup chia seeds. For gluten-free versions, use certified gluten-free oats to keep these healthy chia pumpkin balls safe for everyone.
Fourth Step: Combine Wet and Dry Mixtures
Fold the wet mixture into the dry ingredients until a thick dough forms; this might take a minute of stirring. If the dough feels too dry, add a splash of plant milk; if it’s too wet, mix in more oats. For dietary needs, like vegan swaps, ensure all additions align with plant-based choices. This step is key for getting the perfect texture in your chia pumpkin protein balls.
Fifth Step: Add Mix-Ins and Portion the Dough
Once the dough is ready, stir in the 1/3 cup vegan chocolate chips and pulse gently if using a processor. Use a small cookie scoop to portion out 1-1.5 tablespoons per ball, then roll them between your palms to shape about 20-22 balls. For more breakfast bake ideas like this one, check out similar recipes on the site.
Sixth Step: Chill the Balls
Place the shaped balls on a plate or baking sheet and chill them in the refrigerator for at least one hour to firm up. This step helps them hold their shape and enhances the flavors in these pumpkin protein balls. If baking for a firmer texture, preheat your oven to 325°F (160°C) and bake for 8-12 minutes, then cool completely before chilling.
Final Step: Serve and Enjoy
After chilling, your chia pumpkin protein balls are ready to eat. For added flair, coat them in crushed nuts or cocoa powder. Serve as a quick snack, and remember to adjust for low-calorie needs by reducing add-ins. These homemade chia pumpkin protein balls make a great portable treat for busy days.

Dietary Substitutions to Customize Your Chia Pumpkin Protein Balls
Customizing your chia pumpkin protein balls is easy with smart substitutions that keep the texture, flavor, and nutrition intact. Below, I’ll cover two areas: protein and main component swaps, and modifications for vegetables, sauces, and seasonings. These changes help make these pumpkin protein bites adaptable for various diets while using terms like chia pumpkin energy balls naturally.
Protein and Main Component Alternatives
When swapping protein elements in chia pumpkin protein balls, focus on maintaining the dough’s bind and moisture. For vegan needs, use plant-based protein powders like pea or soy in the same quantity as traditional options to keep these pumpkin protein balls protein-rich. If you’re aiming for a non-vegan boost, try collagen or egg-white protein, adding about 1-2 tablespoons to adjust texture without making the mix too dry consider adding extra chia seeds if needed for binding. Nut butters can be replaced with seed butters like sunflower or tahini for nut-free versions, using the same 1/4 cup measure, but watch for changes in moisture and add oats if the dough gets sticky. Oats themselves can swap for almond flour in a 1:1 ratio for lower-carb pumpkin chia protein bites, though you might need to add more liquid to keep the texture just right.
Vegetable, Sauce, and Seasoning Modifications
For the vegetable and flavor aspects of chia pumpkin protein balls, small tweaks can add variety without upsetting the balance. Try adding grated apple or carrot, about 1/4 cup, for extra moisture and fiber in these healthy chia pumpkin balls, but reduce the pumpkin puree slightly to avoid a wet dough. Sweeteners like maple syrup can be swapped for date paste or agave, using the exact 1/4 cup, to suit low-calorie preferences while keeping that natural sweetness. Seasonings offer fun changes too mix in ginger or cardamom at around 1/2 teaspoon for a fresh twist on these chia pumpkin energy balls, and balance with a pinch more salt if needed. Additions like citrus zest, say 1 teaspoon of orange, brighten the flavor of pumpkin protein bites, ensuring the overall mix stays cohesive.
Mastering Chia Pumpkin Protein Balls: Advanced Tips and Variations
Taking your chia pumpkin protein balls to the next level involves a few pro techniques and creative twists. Start with hydration control by pre-soaking the chia seeds in a little water for 5 minutes before mixing; this helps the dough swell properly and improves texture. For even better results, let the dough rest for 10 minutes after combining ingredients, allowing the oats to absorb moisture and the chia to work its magic in these pumpkin chia bites.
Flavor variations can make your chia pumpkin protein balls exciting every time. Try a savory-sweet mix by adding a pinch of flaky sea salt and smoked paprika for a unique twist that pairs well with cheese. For a mocha vibe, incorporate 1 teaspoon of espresso powder and cocoa, blending it into the dough to enhance the chocolate notes in these healthy pumpkin protein balls. Another option is citrus-spiced, where adding orange zest and cardamom brings a zesty lift, or go nutty-maple by including toasted pecans and a drizzle of maple for added crunch.
Presentation is key for making these snacks look as good as they taste. Use a cookie scoop for uniform sizing to give your chia pumpkin protein balls a professional edge, then roll them in toasted coconut or crushed nuts for extra appeal. You could even drizzle melted dark chocolate on top or place them in mini cupcake liners for gifting. For make-ahead options, store in the fridge for up to 7 days or freeze batter as logs to slice and roll later, scaling batches as needed while keeping dietary swaps in mind, like using gluten-free oats.
How to Store Chia Pumpkin Protein Balls: Best Practices
Proper storage keeps your chia pumpkin protein balls fresh and tasty, extending their shelf life for convenient snacking. For short-term needs, keep them in the fridge in an airtight container, where they’ll stay firm and flavorful for 5-7 days; use parchment paper between layers to prevent sticking and maintain that perfect texture. When freezing for longer storage, first flash-freeze the balls on a tray for 1-2 hours, then move them to labeled freezer bags, where they can last up to 3 months without losing quality.
If you want to enjoy them warm, let them sit at room temperature for 10-15 minutes for a softer bite, or warm gently in the microwave for 10-20 seconds though these pumpkin protein bites are best cold. For meal prep, portion them into single-serve packs or silicone molds for easy grab-and-go options, and always label with the date to track freshness. Storing these chia pumpkin bites this way ensures they remain a reliable snack for busy lifestyles.
FAQs: Frequently Asked Questions About Chia Pumpkin Protein Balls
How many pumpkin protein balls does this recipe make, and what counts as one serving?
This recipe yields about 20 pumpkin protein balls. One serving is considered a single protein ball, making it easy to control portions and enjoy as a quick snack or post-workout energy bite.
Can I use canned pumpkin instead of fresh pumpkin for these protein balls?
Yes, canned pumpkin purée works perfectly as a substitute for fresh pumpkin in this recipe. Just make sure to use plain pumpkin purée without added sugars or spices for the best results.
What should I do if the protein ball dough is too sticky or too dry to handle?
If the dough feels sticky, chilling it in the fridge for 15-30 minutes helps firm it up for easier shaping. For dough that’s too dry, add a bit more pumpkin purée or a splash of water. If it’s too wet, mix in extra oats to balance the texture.
Can I replace peanut butter with other nut butters or alternatives in this recipe?
Absolutely. You can use any nut butter like almond, cashew, or sunflower seed butter as a substitute for peanut butter. Just be mindful of taste and consistency, as some nut butters are thinner or sweeter than others.
How should I store chia pumpkin protein balls, and how long will they stay fresh?
Store the protein balls in an airtight container in the refrigerator for up to two weeks. They also freeze well for up to three months—simply thaw them at room temperature before eating for a convenient and healthy snack.
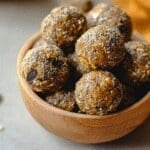
Chia Pumpkin Protein Balls
- Total Time: 1 hour 10 minutes
- Yield: 20–22 balls 1x
- Diet: Vegan
Description
🎃 These Pumpkin Protein Balls make for a healthy and convenient snack packed with nutrients and natural energy.
🍫 Combining pumpkin, oats, and protein-rich ingredients, they satisfy hunger and support active lifestyles with delicious flavors.
Ingredients
2 1/4 cups old fashioned or rolled quick oats Provides bulk and chewiness, serving as the base for the dough and helping bind everything together.
1/2 teaspoon fine sea salt Enhances the overall flavor, balancing the sweetness and making the chia pumpkin protein balls taste more vibrant.
1 teaspoon pumpkin spice Adds that classic warm flavor profile to these chia pumpkin bites, evoking fall vibes with its mix of cinnamon, nutmeg, and other spices.
1/4 cup chia seeds Offers binding power along with fiber and omega-3s, giving these healthy chia pumpkin balls their nutritious punch and a nice texture.
1/2 cup pumpkin puree Brings moisture, beta-carotene, and a fresh taste that makes these pumpkin protein balls both healthy and flavorful.
1/4 cup peanut butter (or other nut butter alternatives such as sunflower seed butter) Adds healthy fats and helps with texture and binding for a creamy finish in your chia pumpkin protein balls.
1/4 cup maple syrup (or similar liquid sweetener like agave nectar or date syrup) Provides natural sweetness and extra moisture, making these chia pumpkin bites a guilt-free treat.
1/3 cup vegan chocolate chips (optional add-ins could include dried cranberries, pumpkin seeds, nuts, or they can be omitted) Mix in for a bit of extra flavor and fun, though you can leave them out for a simpler version of these pumpkin protein balls.
Instructions
1-First Step: Gather Your Ingredients Start by getting everything ready, known as mise en place. Measure out 2 1/4 cups old fashioned oats, 1/2 teaspoon fine sea salt, 1 teaspoon pumpkin spice, 1/4 cup chia seeds, 1/2 cup pumpkin puree, 1/4 cup peanut butter, 1/4 cup maple syrup, and 1/3 cup vegan chocolate chips if using. For vegan adaptations, ensure your peanut butter is nut-free, like sunflower seed butter, and use agave for the sweetener. This step helps avoid any rush and keeps your chia pumpkin protein balls assembly smooth.
2-Second Step: Mix the Wet Ingredients In a bowl, combine the wet ingredients first for even blending. Mix the 1/2 cup pumpkin puree, 1/4 cup peanut butter, and 1/4 cup maple syrup until smooth and creamy. If you’re making these pumpkin chia protein bites low-calorie, swap some peanut butter for a lighter option like powdered protein. This creates a base that’s easy to work with and ensures your chia pumpkin protein balls have the right moisture level.
3-Third Step: Prepare the Dry Ingredients Now, handle the dry components by grinding the 2 1/4 cups oats in a blender or food processor until they turn into fine oat flour, which takes about 1-2 minutes. In a separate bowl, whisk together the ground oats, 1/2 teaspoon sea salt, 1 teaspoon pumpkin spice, and 1/4 cup chia seeds. For gluten-free versions, use certified gluten-free oats to keep these healthy chia pumpkin balls safe for everyone.
4-Fourth Step: Combine Wet and Dry Mixtures Fold the wet mixture into the dry ingredients until a thick dough forms; this might take a minute of stirring. If the dough feels too dry, add a splash of plant milk; if it’s too wet, mix in more oats. For dietary needs, like vegan swaps, ensure all additions align with plant-based choices. This step is key for getting the perfect texture in your chia pumpkin protein balls.
5-Fifth Step: Add Mix-Ins and Portion the Dough Once the dough is ready, stir in the 1/3 cup vegan chocolate chips and pulse gently if using a processor. Use a small cookie scoop to portion out 1-1.5 tablespoons per ball, then roll them between your palms to shape about 20-22 balls. For more breakfast bake ideas like this one, check out similar recipes on the site.
6-Sixth Step: Chill the Balls Place the shaped balls on a plate or baking sheet and chill them in the refrigerator for at least one hour to firm up. This step helps them hold their shape and enhances the flavors in these pumpkin protein balls. If baking for a firmer texture, preheat your oven to 325°F (160°C) and bake for 8-12 minutes, then cool completely before chilling.
7-Final Step: Serve and Enjoy After chilling, your chia pumpkin protein balls are ready to eat. For added flair, coat them in crushed nuts or cocoa powder. Serve as a quick snack, and remember to adjust for low-calorie needs by reducing add-ins. These homemade chia pumpkin protein balls make a great portable treat for busy days.
Notes
❄️ Chill sticky dough for 15-30 minutes to firm up before rolling.
💧 Add more pumpkin puree or water if dough is too dry.
🌾 Add more oats if dough feels too wet or crumbly.
- Prep Time: 10 minutes
- Chill time: 1 hour
- Category: Snack
- Method: No-Bake Mixing
- Cuisine: American
Nutrition
- Serving Size: 1 ball
- Calories: 92
- Sugar: 4g
- Sodium: 75mg
- Fat: 4g
- Saturated Fat: 1g
- Carbohydrates: 13g
- Fiber: 2g
- Protein: 3g
- Cholesterol: 0mg
Keywords: pumpkin protein balls, healthy snack, vegan energy balls, pumpkin spice snack