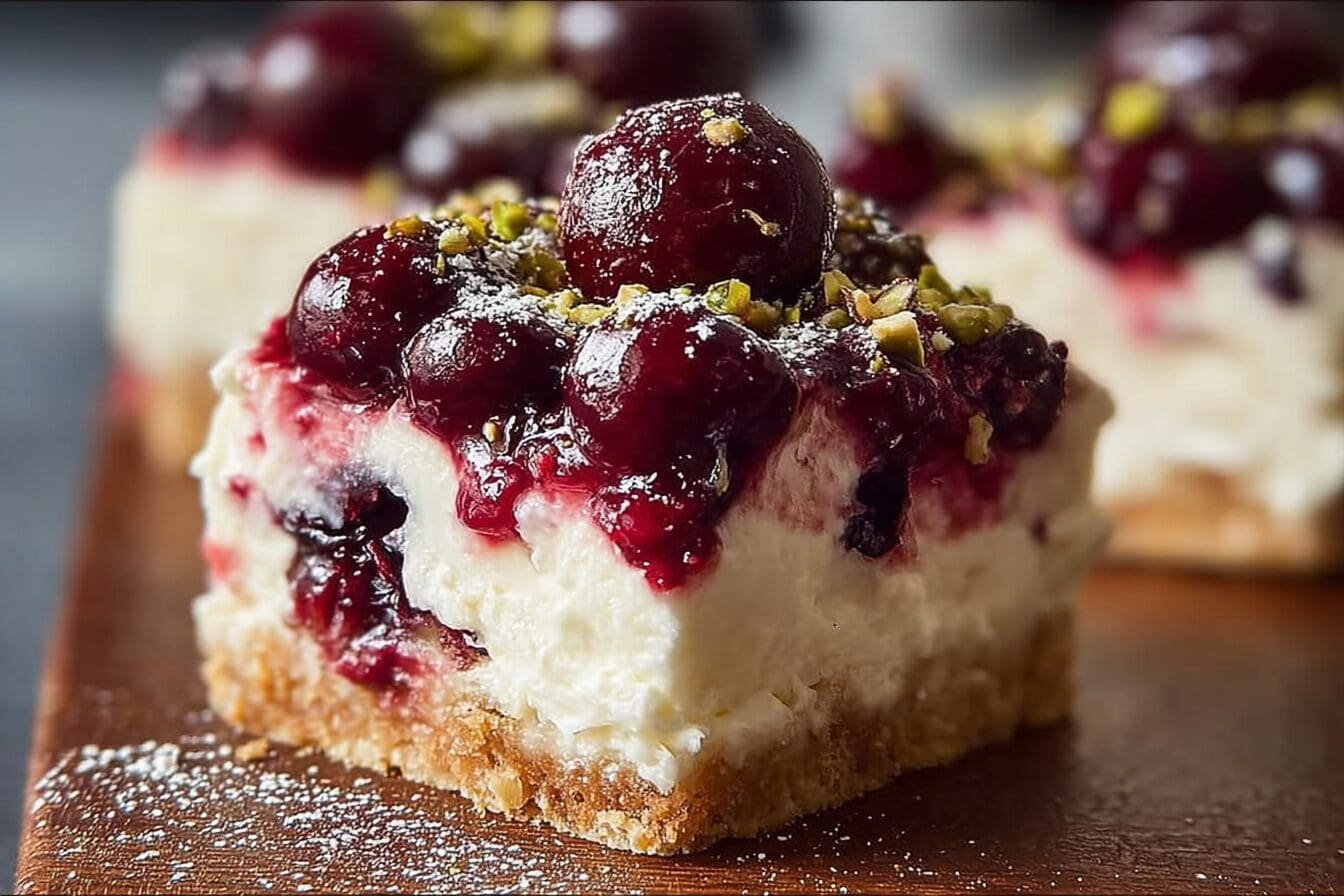
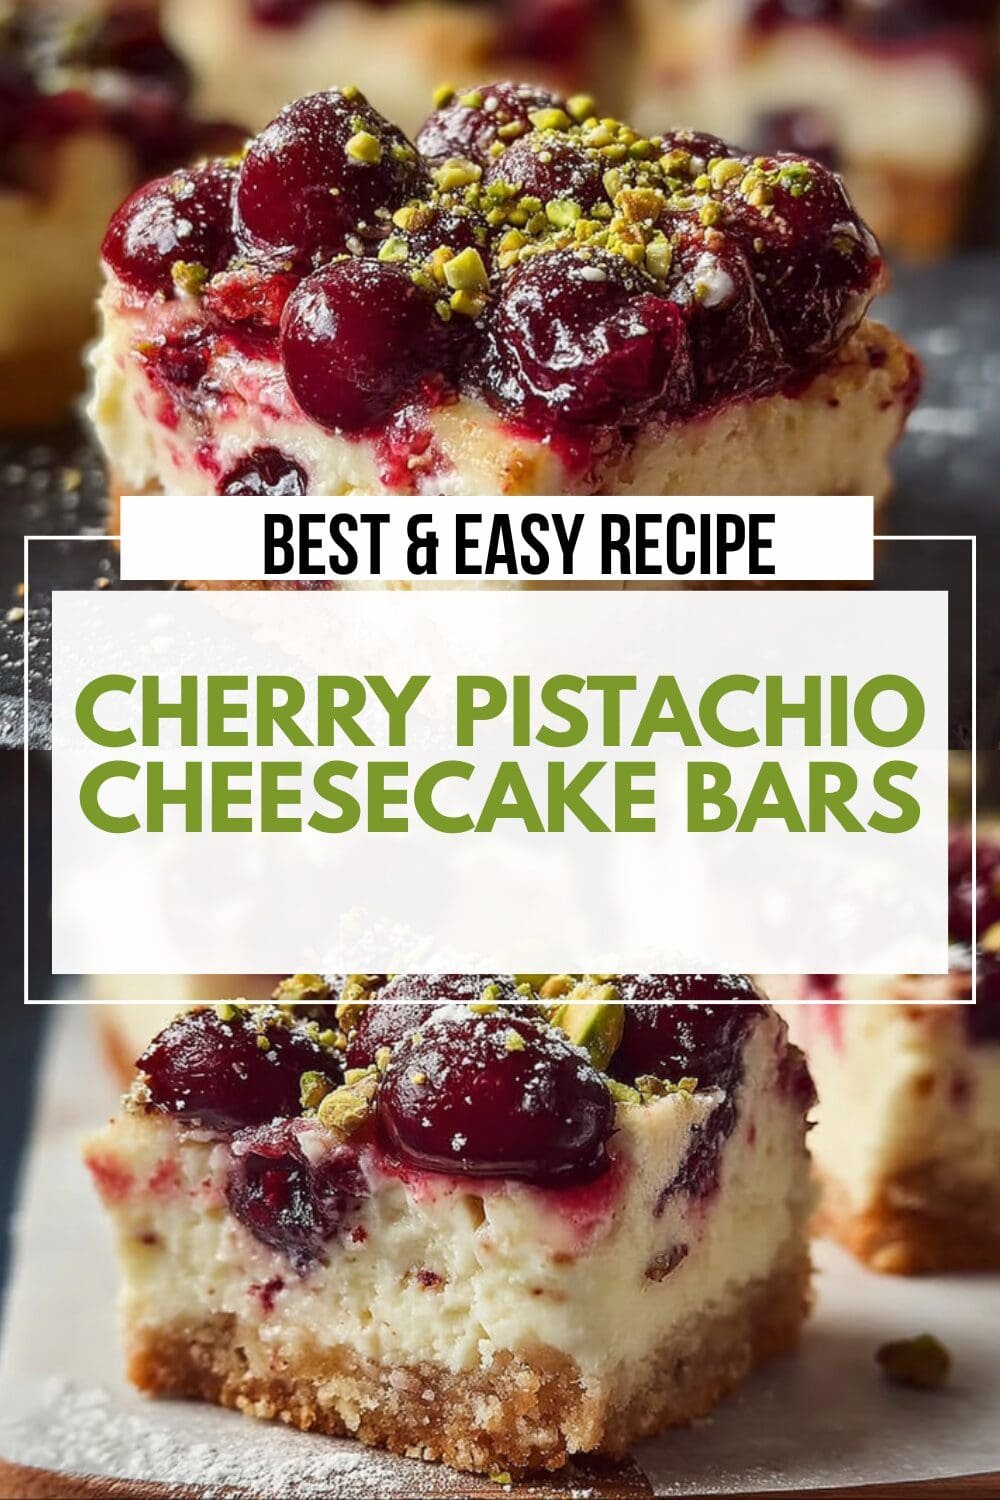
Why You’ll Love This Cherry Pistachio Cheesecake Bars
This Cherry Pistachio Cheesecake Bars recipe is designed for simplicity and quick cooking, making it perfect for both beginners and busy bakers. The ingredients are straightforward, and the steps are easy to follow, allowing you to enjoy delicious results with minimal fuss. With just about 25 minutes of preparation time, you can create a stunning dessert that tastes like it came from a professional bakery. Cherry Pistachio Cheesecake Bars offer nutritional advantages due to the antioxidant-rich cherries and heart-healthy pistachios incorporated in the recipe. These ingredients contribute to wellness by providing vitamins, minerals, and healthy fats, making this dessert a slightly better-for-you indulgence. The health benefits of cherries include reducing inflammation and improving sleep quality, while pistachio nutrition facts show they’re packed with protein and fiber. The versatility of this recipe makes it highly adaptable to various dietary needs. By swapping key ingredients, you can easily customize the bars to suit different lifestyles without losing the distinctive charm of the flavor combination. Whether you’re following a gluten-free, vegan, or low-calorie diet, there are simple substitutions that keep the delicious taste intact. The unique blend of tart cherries and crunchy pistachios creates a one-of-a-kind taste profile that sets these cheesecake bars apart. The creamy cheesecake base perfectly balances the nutty crunch and fruity brightness, delivering an exceptional dessert experience. The addition of lemon and lime adds a refreshing citrus twist that brightens the entire flavor profile, making this dessert perfect for any season.Jump To
- 1. Why You’ll Love This Cherry Pistachio Cheesecake Bars
- 2. Essential Ingredients for Cherry Pistachio Cheesecake Bars
- 3. How to Prepare the Perfect Cherry Pistachio Cheesecake Bars: Step-by-Step Guide
- 4. Dietary Substitutions to Customize Your Cherry Pistachio Cheesecake Bars
- 5. Mastering Cherry Pistachio Cheesecake Bars: Advanced Tips and Variations
- 6. How to Store Cherry Pistachio Cheesecake Bars: Best Practices
- 7. FAQs: Frequently Asked Questions About Cherry Pistachio Cheesecake Bars
- 8. Cherry Pistachio Cheesecake Bars
Essential Ingredients for Cherry Pistachio Cheesecake Bars
To create these delightful Cherry Pistachio Cheesecake Bars, you’ll need a combination of basic baking staples and a few special ingredients that give this dessert its distinctive character. Here’s a comprehensive list of what you’ll need:For the Crust:
- 1½ cups graham cracker crumbs
- ¼ cup granulated sugar
- ½ cup melted unsalted butter
For the Cheesecake Filling:
- 3 packages (8 oz each) softened cream cheese
- 1 cup granulated sugar
- 1 teaspoon vanilla extract
- 3 large eggs
- ¼ cup fresh lemon juice
- ¼ cup fresh lime juice
- 1 tablespoon lemon zest
- 1 tablespoon lime zest
- ½ cup chopped pistachios
- ½ cup chopped cherries
Optional Toppings:
- Whipped cream for serving
- Whole cherries for garnish
- Additional chopped pistachios for topping
Special Dietary Options:
If you need to adapt this recipe for specific dietary needs, here are some helpful substitutions:
- Vegan: Use plant-based cream cheese, flaxseed eggs, and vegan butter substitutes.
- Gluten-free: Replace graham cracker crumbs with gluten-free cookie crumbs or almond flour.
- Low-calorie: Substitute sugar with natural sweeteners like stevia and use low-fat cream cheese alternatives.
- Dairy-free: Use coconut cream or cashew-based cheese instead of cream cheese.
| Nutrient | Amount |
|---|---|
| Calories | 320 kcal |
| Carbohydrates | 25 g |
| Protein | 5 g |
| Fat | 22 g |
| Sugar | 19 g |
| Fiber | 1 g |
How to Prepare the Perfect Cherry Pistachio Cheesecake Bars: Step-by-Step Guide
Creating these Cherry Pistachio Cheesecake Bars is simpler than you might think. Follow this detailed step-by-step guide to achieve bakery-quality results in your own kitchen. The process can be broken down into three main stages: preparing the crust, making the filling, and baking and cooling the cheesecake.Preparing the Crust
First, preheat your oven to 325°F (163°C) and grease a 9-inch springform pan. In a medium bowl, combine the graham cracker crumbs, ¼ cup granulated sugar, and melted unsalted butter. Mix until the crumbs are thoroughly moistened and the mixture resembles wet sand. Press the crumb mixture firmly and evenly into the bottom of the prepared springform pan. Use the bottom of a measuring cup or a glass to create a compact, even layer. Bake the crust for 10 minutes, then remove from the oven and set aside to cool while you prepare the filling.Tip: For extra flavor, you can add a pinch of salt to the crust mixture to balance the sweetness. If you prefer a nuttier crust, mix in ¼ cup of finely ground pistachios with the graham cracker crumbs.
Making the Filling
In a large mixing bowl, beat the softened cream cheese and 1 cup of granulated sugar until smooth and creamy. This step is crucial for achieving the perfect texture, so take your time and beat until no lumps remain. Add the vanilla extract and mix well. Add the eggs one at a time, beating well after each addition. Be careful not to overmix once the eggs are added, as this can incorporate too much air and lead to cracks in your cheesecake. Next, mix in the fresh lemon juice, fresh lime juice, lemon zest, and lime zest. These citrus elements provide a bright, refreshing flavor that complements the creamy cheesecake base perfectly. Finally, gently fold in the chopped pistachios and chopped cherries. Be careful not to overmix, as you want to maintain some texture from these ingredients. The pistachios add a delightful crunch, while the cherries provide pockets of fruity sweetness.Baking and Cooling
Pour the cheesecake batter over the cooled crust in the springform pan. Smooth the top with a spatula to ensure even baking. Bake in the preheated oven for 50-60 minutes, or until the edges are set but the center still jiggles slightly when you gently shake the pan. Once baked, turn off the oven and crack the door open slightly. Allow the cheesecake to cool slowly in the oven for 1 hour. This gradual cooling helps prevent cracks from forming on the surface. After the initial cooling period, remove the cheesecake from the oven and let it cool completely to room temperature on a wire rack. Once cooled, refrigerate the cheesecake for at least 4 hours or overnight to allow it to set completely and develop its full flavor.Assembly and Serving
Before serving, carefully run a knife around the edges of the cheesecake to loosen it from the pan. Release the springform ring and remove it. Transfer the cheesecake to a serving plate if desired. Top the cheesecake with whipped cream, whole cherries, and additional chopped pistachios for a beautiful presentation. Slice with a sharp knife, wiping the blade clean between cuts for perfect slices.
Dietary Substitutions to Customize Your Cherry Pistachio Cheesecake Bars
This versatile Cherry Pistachio Cheesecake Bars recipe can be easily adapted to suit various dietary preferences and restrictions. Whether you’re following a specific diet or simply want to experiment with different flavors, these substitutions will help you create a personalized version of this delightful dessert.Protein and Main Component Alternatives
- Vegan cream cheese: Replace traditional cream cheese with high-quality plant-based alternatives made from almonds, cashews, or coconut. These options provide a similar creamy texture without dairy products.
- Egg substitutes: Use flax eggs (1 tablespoon ground flaxseed mixed with 3 tablespoons water per egg) or aquafaba (the liquid from a can of chickpeas) as effective vegan egg replacements.
- Dairy-free alternatives: Coconut cream or cashew-based cheese can create a rich, creamy base that mimics traditional cream cheese while being completely dairy-free.
- Reduced-fat option: Use low-fat or Neufchâtel cream cheese instead of full-fat cream cheese for a lighter version with fewer calories.
Vegetable, Sauce, and Seasoning Modifications
- Flavor enhancers: Add a hint of lemon zest or vanilla extract to enhance flavor without adding calories. A pinch of sea salt can also help balance the sweetness and highlight the other flavors.
- Natural sweeteners: Swap regular granulated sugar with maple syrup, honey, agave nectar, or coconut sugar for a natural sweetener twist. These alternatives provide different flavor profiles and may offer additional nutritional benefits.
- Spiced variations: Incorporate cinnamon, cardamom, or nutmeg into the crust or batter for a warm, aromatic twist. These spices pair beautifully with both the cherry and pistachio flavors.
- Fruit variations: While cherries are the star of this recipe, you can also experiment with other fruits like raspberries, blackberries, or diced apricots for different flavor combinations.
Crust Alternatives
- Gluten-free option: Replace graham cracker crumbs with gluten-free cookie crumbs, almond flour mixed with melted butter, or crushed gluten-free vanilla wafers.
- Nut-based crust: Use crushed pecans, almonds, or hazelnuts mixed with a small amount of dates or maple syrup for a grain-free, nutrient-dense crust option.
- Oatmeal cookie crust: Crushed oatmeal cookies create a heartier, more wholesome crust that adds an extra layer of texture to the cheesecake bars.
Experimenting with different ingredients is part of the fun of baking! Keep notes on your substitutions to remember which combinations work best for your taste preferences.
Mastering Cherry Pistachio Cheesecake Bars: Advanced Tips and Variations
Once you’ve mastered the basic Cherry Pistachio Cheesecake Bars recipe, you might want to try some advanced techniques and variations to take your dessert to the next level. These tips will help you achieve professional results and create custom versions that suit any occasion or taste preference.Pro Cooking Techniques
Achieving the perfect cheesecake texture requires attention to detail and proper technique. Here are some professional tips to help you succeed:- Room temperature ingredients: Always use room temperature cream cheese and eggs to prevent lumps in your batter. Cold ingredients can lead to overmixing as you try to achieve a smooth consistency, which can incorporate too much air and cause cracking.
- Gentle mixing: Beat cream cheese and sugar until smooth, but avoid overmixing once eggs are added. Overmixing incorporates excess air into the batter, which can cause the cheesecake to puff up during baking and then collapse as it cools, leading to cracks.
- Water bath method: For an even creamier texture, place the springform pan in a larger pan filled with hot water (about halfway up the sides of the cheesecake pan) while baking. This gentle heat helps prevent cracks and creates a silky smooth texture.
- Proper cooling: Cool the cheesecake slowly in the oven with the door ajar, as mentioned in the basic recipe. This gradual temperature change is crucial for preventing cracks on the surface.
Flavor Variations
While the original recipe is delicious on its own, these variations can help you create new flavor profiles while keeping the essence of Cherry Pistachio Cheesecake Bars:- White chocolate addition: Add ½ cup of melted white chocolate to the filling for extra richness and sweetness. The creamy white chocolate pairs beautifully with both cherries and pistachios.
- Nut alternatives: Swap pistachios for toasted almonds, pecans, or walnuts for different flavor profiles. Each nut brings its unique characteristics to the dessert.
- Enhanced cherry flavor: Incorporate ¼ cup of cherry preserves or homemade cherry compote into the filling for a deeper, more concentrated cherry flavor.
- Citrus twist: Increase the lemon and lime elements by adding more zest or even a splash of orange juice for a more pronounced citrus flavor profile.
- Chocolate variation: Add ½ cup of melted dark chocolate to the filling for a chocolate-cherry-pistachio combination that chocolate lovers will adore.
- Saffron infusion: Infuse the cream with a pinch of saffron before adding it to the cream cheese mixture for an exotic, sophisticated flavor that pairs surprisingly well with pistachios.
Presentation Tips
The way you present your Cherry Pistachio Cheesecake Bars can elevate the entire dessert experience:- Elegant garnish: Top bars with whole pistachios, fresh cherries with stems, and a dollop of whipped cream for a restaurant-quality presentation.
- Dusting technique: Lightly dust with powdered sugar through a fine-mesh sieve for a simple, elegant finish.
- Chocolate drizzle: Drizzle melted white or dark chocolate over the cooled cheesecake for an artistic touch and additional flavor dimension.
- Edible flowers: Garnish with edible flowers like pansies or violets for a stunning, spring-inspired presentation.
- Microgreens: Add a touch of fresh microgreens or mint leaves for a pop of color and fresh flavor that contrasts beautifully with the rich cheesecake.
Make-Ahead Options
Planning ahead can make serving Cherry Pistachio Cheesecake Bars stress-free:- Advance preparation: Prepare the crust and filling a day in advance. Store them separately in the refrigerator and assemble just before baking.
- Freezer-friendly: Once completely cooled and set, the cheesecake can be frozen for up to 3 months. Thaw overnight in the refrigerator before serving.
- Portion control: Cut the cheesecake into individual portions before freezing for easy grab-and-go desserts.
- Pre-baked storage: The fully baked cheesecake can be refrigerated for up to 5 days, making it perfect for preparing ahead for parties or gatherings.
How to Store Cherry Pistachio Cheesecake Bars: Best Practices
Proper storage of your Cherry Pistachio Cheesecake Bars is essential for maintaining freshness, flavor, and texture. Following these storage guidelines will ensure your dessert stays delicious for as long as possible, whether you’re saving leftovers or preparing in advance for a special occasion.Refrigeration Guidelines
Cherry Pistachio Cheesecake Bars should always be stored in the refrigerator due to their dairy content. Here are the best practices for refrigeration:- Airtight container: Store cheesecake bars in an airtight container to prevent them from absorbing odors from other foods in the refrigerator and to maintain proper moisture levels.
- Plastic wrap alternative: If you don’t have a suitable container, you can tightly wrap the cheesecake (or individual portions) in plastic wrap, followed by a layer of aluminum foil for extra protection.
- Duration: Properly stored cheesecake bars will remain fresh in the refrigerator for up to 5 days. After this time, the texture may begin to degrade, and the crust may become soggy.
- Placement: Store the cheesecake on a middle shelf in the refrigerator, away from the door where temperature fluctuations are more likely to occur.
- Separation: If storing cut pieces, place a piece of parchment paper between each slice to prevent them from sticking together.
Freezing Instructions
Freezing is an excellent option for extending the life of your Cherry Pistachio Cheesecake Bars:- Pre-freezing: For best results, freeze the cheesecake whole or in large pieces first. Place on a baking sheet in the freezer until firm (about 1-2 hours).
- Wrapping technique: Wrap the frozen cheesecake tightly in plastic wrap, followed by a layer of aluminum foil to prevent freezer burn. For extra protection, place the wrapped cheesecake in a freezer-safe bag or container.
- Duration: Frozen cheesecake bars will maintain their quality for up to 3 months. While they may still be safe to eat beyond this time, the texture and flavor may begin to deteriorate.
- Thawing process: Thaw frozen cheesecake overnight in the refrigerator. Avoid thawing at room temperature, as this can cause condensation that makes the crust soggy.
- Texture changes: Expect slight textural changes after freezing and thawing. The cheesecake may be slightly less creamy, but the flavor should remain intact.
Serving Temperature
The serving temperature significantly impacts the taste and texture of Cherry Pistachio Cheesecake Bars:- Chilled serving: These bars are best served chilled, straight from the refrigerator. The cooler temperature maintains the firm structure and enhances the refreshing citrus flavors.
- Room temperature alternative: If you prefer a softer, creamier texture, let the cheesecake sit at room temperature for 15-20 minutes before serving. This allows the flavors to bloom and the texture to soften slightly.
- Gentle warming: For a warm dessert experience, you can gently reheat individual portions in the microwave for 10-15 seconds. Be careful not to overheat, as this can cause the cheesecake to become loose and the texture to change dramatically.
Meal Prep Considerations
Cherry Pistachio Cheesecake Bars can be an excellent addition to your meal prep routine:- Individual portions: Cut the cheesecake into individual portions before storing for convenient grab-and-go desserts or snacks.
- Weekly preparation: Make a batch at the beginning of the week to have a delicious dessert ready for unexpected guests or as a treat throughout the week.
- Portion control: Pre-cutting helps with portion control, ensuring you enjoy an appropriate serving size each time.
- Batch freezing: Make a double batch and freeze half for future occasions, saving time and effort later.
FAQs: Frequently Asked Questions About Cherry Pistachio Cheesecake Bars
How do you make Cherry Pistachio Cheesecake Bars from scratch?
To make Cherry Pistachio Cheesecake Bars, start by preparing a buttery graham cracker crust pressed into a baking pan. For the filling, beat cream cheese with sugar, eggs, and vanilla until smooth. Fold in chopped pistachios for crunch. Pour the filling over the crust and spread cherry pie filling or fresh cherries evenly on top. Bake at 325°F (163°C) for about 35-40 minutes until the edges are set but the center is slightly jiggly. Cool completely before refrigerating for at least 4 hours. This process creates a creamy, flavorful dessert with a perfect balance of cherry tartness and pistachio nuttiness.
Can I use fresh cherries instead of canned cherry pie filling for these cheesecake bars?
Yes, you can use fresh cherries, but you’ll need to cook them down into a compote for the best texture and sweetness. Combine pitted fresh cherries with a bit of sugar, lemon juice, and cornstarch in a saucepan, then simmer until the mixture thickens. Cool it before spreading over the cheesecake bars. This fresh cherry topping adds natural tartness and reduces added sugars compared to canned pie filling, resulting in a more vibrant and homemade flavor.
How long do Cherry Pistachio Cheesecake Bars stay fresh in the refrigerator?
Cherry Pistachio Cheesecake Bars can be stored in an airtight container in the refrigerator for up to 5 days. For best taste and texture, keep them chilled until serving. If you want to store them longer, wrap tightly and freeze for up to 2 months. Thaw overnight in the fridge before enjoying to maintain the creamy texture and prevent the crust from becoming soggy.
What is the best way to toast pistachios for Cherry Pistachio Cheesecake Bars?
To toast pistachios, preheat your oven to 350°F (175°C). Spread shelled pistachios in a single layer on a baking sheet and toast for 5-7 minutes, stirring halfway through to ensure even browning. Alternatively, you can toast them in a dry skillet over medium heat for 3-4 minutes, shaking frequently. Let them cool completely before chopping and folding into the cheesecake batter. Toasting intensifies their flavor, adds crunch, and enhances the overall taste of the bars.
Can Cherry Pistachio Cheesecake Bars be made gluten-free?
Yes, you can make these cheesecake bars gluten-free by substituting the graham cracker crust with gluten-free graham crackers or almond flour mixed with melted butter. Ensure that all other ingredients, such as vanilla extract and baking powder, are certified gluten-free. This swap keeps the crust crispy and flavorful while accommodating gluten sensitivities without compromising the dessert’s rich texture and taste.
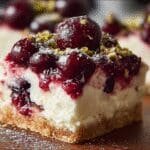
Cherry Pistachio Cheesecake Bars
- Total Time: 5 hours 25 minutes
- Yield: 12 servings
Description
🍋 This Lemon-Lime Cherry Pistachio Cheesecake offers bright and refreshing flavors that combine citrusy zest with sweet cherries and crunchy pistachios.
🍒 It’s a luscious and elegant dessert perfect for special occasions or whenever you crave a vibrant twist on classic cheesecake.
Ingredients
– 1½ cups graham cracker crumbs
– ¼ cup granulated sugar
– ½ cup melted unsalted butter
– 3 packages (8 oz each) softened cream cheese
– 1 cup granulated sugar
– 1 teaspoon vanilla extract
– 3 large eggs
– ¼ cup fresh lemon juice
– ¼ cup fresh lime juice
– 1 tablespoon lemon zest
– 1 tablespoon lime zest
– ½ cup chopped pistachios
– ½ cup chopped cherries
– Whipped cream for serving
– Whole cherries for garnish
– Additional chopped pistachios for topping
Instructions
1-Preparing the Crust: First, preheat your oven to 325°F (163°C) and grease a 9-inch springform pan. In a medium bowl, combine the graham cracker crumbs, ¼ cup granulated sugar, and melted unsalted butter. Mix until the crumbs are thoroughly moistened and the mixture resembles wet sand. Press the crumb mixture firmly and evenly into the bottom of the prepared springform pan. Use the bottom of a measuring cup or a glass to create a compact, even layer. Bake the crust for 10 minutes, then remove from the oven and set aside to cool while you prepare the filling.
2-Making the Filling: In a large mixing bowl, beat the softened cream cheese and 1 cup of granulated sugar until smooth and creamy. This step is crucial for achieving the perfect texture, so take your time and beat until no lumps remain. Add the vanilla extract and mix well. Add the eggs one at a time, beating well after each addition. Be careful not to overmix once the eggs are added, as this can incorporate too much air and lead to cracks in your cheesecake. Next, mix in the fresh lemon juice, fresh lime juice, lemon zest, and lime zest. These citrus elements provide a bright, refreshing flavor that complements the creamy cheesecake base perfectly. Finally, gently fold in the chopped pistachios and chopped cherries. Be careful not to overmix, as you want to maintain some texture from these ingredients. The pistachios add a delightful crunch, while the cherries provide pockets of fruity sweetness.
3-Baking and Cooling: Pour the cheesecake batter over the cooled crust in the springform pan. Smooth the top with a spatula to ensure even baking. Bake in the preheated oven for 50-60 minutes, or until the edges are set but the center still jiggles slightly when you gently shake the pan. Once baked, turn off the oven and crack the door open slightly. Allow the cheesecake to cool slowly in the oven for 1 hour. This gradual cooling helps prevent cracks from forming on the surface. After the initial cooling period, remove the cheesecake from the oven and let it cool completely to room temperature on a wire rack. Once cooled, refrigerate the cheesecake for at least 4 hours or overnight to allow it to set completely and develop its full flavor.
4-Assembly and Serving: Before serving, carefully run a knife around the edges of the cheesecake to loosen it from the pan. Release the springform ring and remove it. Transfer the cheesecake to a serving plate if desired. Top the cheesecake with whipped cream, whole cherries, and additional chopped pistachios for a beautiful presentation. Slice with a sharp knife, wiping the blade clean between cuts for perfect slices.
Notes
🍰 Use room temperature cream cheese and eggs for a smooth filling.
🕰️ Cool cheesecake slowly to prevent cracks.
🍋 Feel free to add extra citrus zest or substitute cherries and pistachios to your liking.
- Prep Time: 25 minutes
- Chilling time: 4 hours
- Cook Time: 1 hour
- Category: Dessert
- Method: Baking
- Cuisine: American
Nutrition
- Serving Size: 1 slice
- Calories: 320
- Sugar: 19 grams
- Sodium: 180 mg
- Fat: 22 grams
- Saturated Fat: 13 grams
- Trans Fat: 0 grams
- Carbohydrates: 25 grams
- Fiber: 1 gram
- Protein: 5 grams
- Cholesterol: 100 mg
Keywords: Lemon-Lime Cheesecake, Cherry Pistachio, Bright Flavors, Citrus Dessert