Why You’ll Love This Canning Lemons
Canning lemons is a fun and simple way to keep those bright, tangy flavors on hand for all your favorite meals. This recipe stands out for its ease of preparation, letting even beginners dive right in with just a few basic steps and ingredients. You’ll enjoy the health benefits too, as it locks in vitamin C and antioxidants from fresh lemons to support your immune system and overall wellness.
Plus, it’s incredibly versatile, fitting seamlessly into vegan, gluten-free, or low-calorie diets without any fuss. The distinctive flavor adds a unique twist to dishes, making everything from salads to desserts taste more exciting and fresh.
Benefits for Different Lifestyles
For busy parents and working professionals, this method saves time while offering a quick way to enhance meals. Students and travelers might appreciate how it turns simple ingredients into portable treats. Baking enthusiasts and food lovers can experiment with it in new recipes, while diet-conscious folks and seniors value its natural health boost.
Imagine pulling a jar from the fridge to brighten up your morning yogurt or a weeknight dinner. As someone who loves sharing easy kitchen hacks, I find that preserving lemons this way brings a bit of sunshine into everyday cooking.
Jump To
- 1. Why You’ll Love This Canning Lemons
- 2. Essential Ingredients for Canning Lemons
- 3. How to Prepare the Perfect Canning Lemons: Step-by-Step Guide
- 4. Dietary Substitutions to Customize Your Canning Lemons
- 5. Mastering Canning Lemons: Advanced Tips and Variations
- 6. How to Store Canning Lemons: Best Practices
- 7. FAQs: Frequently Asked Questions About Canning Lemons
- 8. Canning Lemons
Essential Ingredients for Canning Lemons
Gathering the right ingredients is the first step to success in canning lemons. This recipe keeps things straightforward with items you likely have on hand or can easily find. Below is a complete list based on the recipe, ensuring you have exactly what you need for three pint-sized jars.
- 8 lemons (to fill 3 pint-sized glass jars)
- 2 to 3 cups of sugar
- 3 pint-sized glass jars with lids
Each pint jar will use about 2 to 2.5 lemons, so plan accordingly for even distribution. This setup makes the process quick and highlights the recipe’s suitability for various diets, as it’s naturally vegan and gluten-free. For low-calorie options, the sugar helps create a light syrup without overwhelming the natural lemon taste.
Special Dietary Notes
This recipe aligns with healthy eating by using minimal additives. Fresh lemons provide the main flavor and acidity, while sugar acts as a natural preservative. Remember, wide-mouth jars are recommended for easier filling, and you can add optional items like cloves for extra flavor if desired.
How to Prepare the Perfect Canning Lemons: Step-by-Step Guide
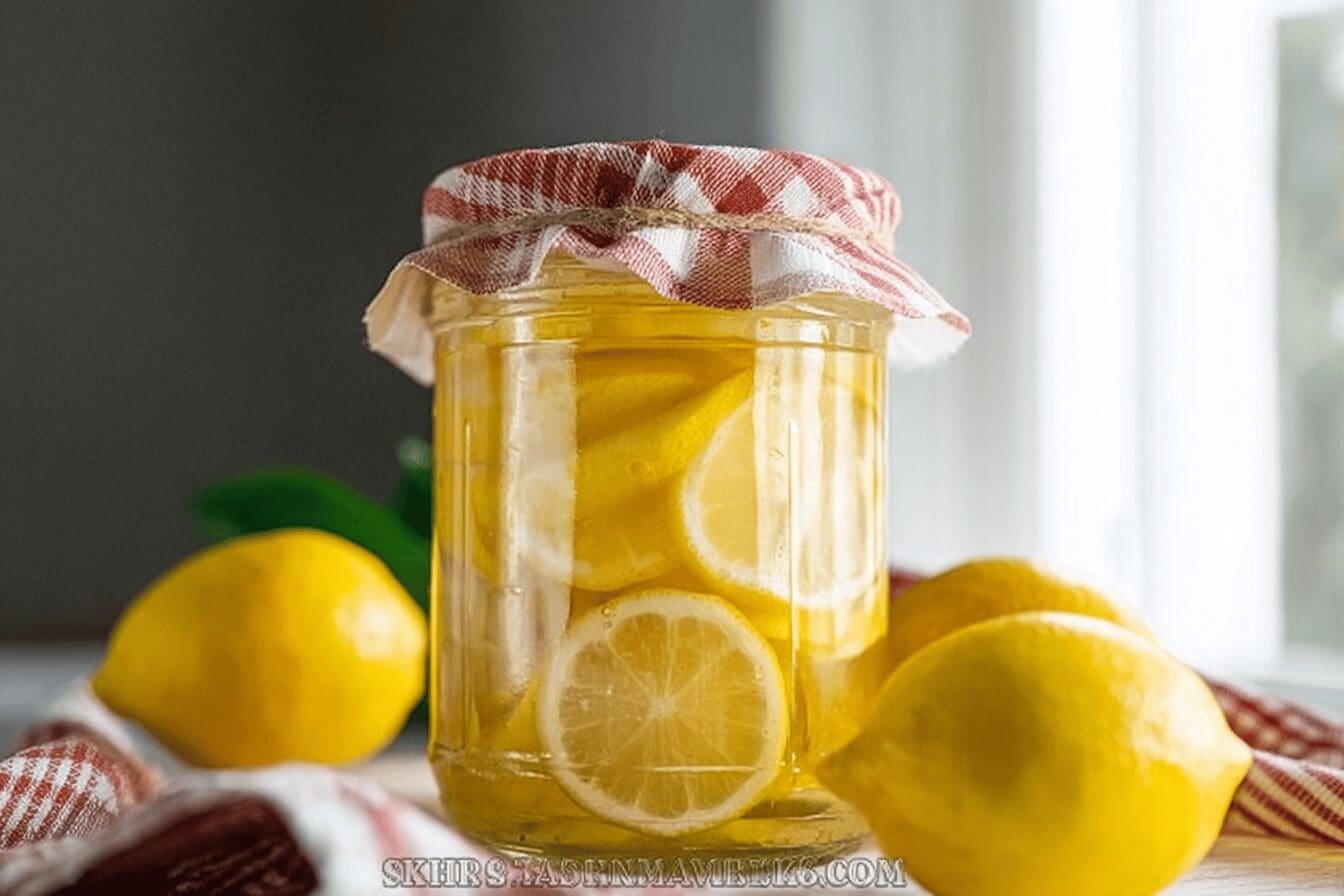
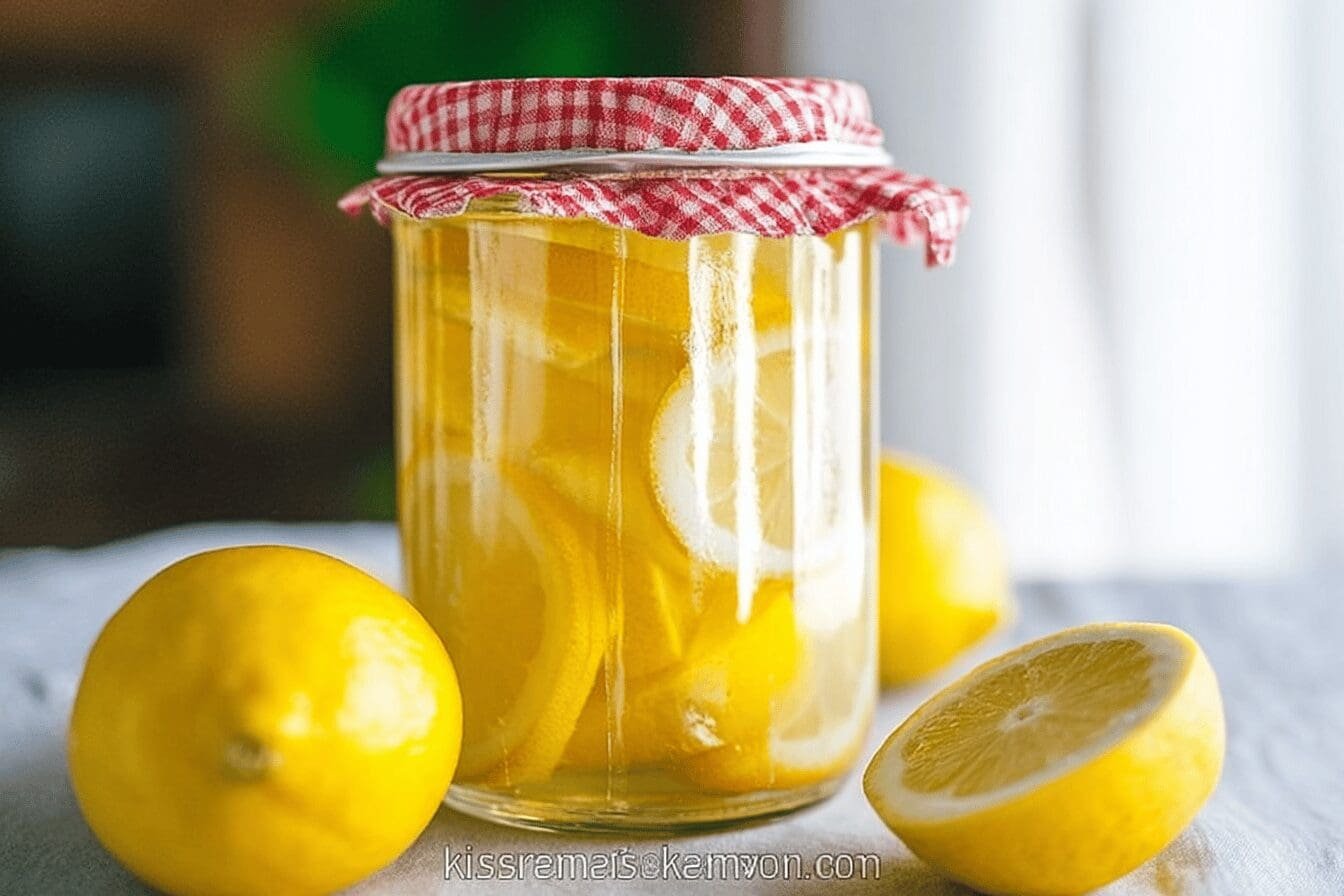
Getting started with canning lemons is easier than you might think, and this guide walks you through each part. First, wash the jars with soap and water, then sterilize them by filling each one-third full with boiling hot water, swirling, draining, and repeating. You can also boil the jars for 5 minutes or run them through a dishwasher for sterilization, and do the same for the lids.
Next, thoroughly clean the lemons with a sponge or dish brush, then slice them into rings or half circles to prepare them for layering. Wash and scrub fresh lemons thoroughly to remove any impurities, as this ensures a clean surface for canning. Place about half a lemon’s worth of slices into each jar and cover with at least 3 tablespoons of sugar, then continue layering lemon slices and sugar until the jars are full, pressing down the lemons as you go.
Add extra sugar to fill the top, seal the jars with lids, and refrigerate this recipe takes about 30 minutes total and forms a syrup as the sugar dissolves after a day in the fridge. For safety, follow trusted methods like water bath canning for longer storage, but keep these refrigerated for up to a month. Optionally, cover the flat lids with a piece of fabric before sealing for a decorative touch. Cut lemons into quarters or slices as preferred, removing seeds to avoid bitterness, and pack them tightly into the sterilized jars.
Prepare a Simple Syrup
As you layer, the sugar will dissolve into a syrup, enhancing the lemons’ flavor over time. This step ensures the final product is ready for use in various recipes, like adding a burst of citrus to your meals. For more ideas on using preserved fruits, check out our rhubarb muffins recipe for another fun preservation twist.

Dietary Substitutions to Customize Your Canning Lemons
One of the best parts of this recipe is how easy it is to tweak for your needs. If you want a sweeter taste, substitute standard lemons with Meyer lemons for less acidity. For organic options, go for organic or wild-crafted lemons to keep things natural and pesticide-free.
When it comes to seasonings, add fresh herbs like rosemary or thyme to mix up the flavors. Try low-sodium salts or herbal salts if you’re watching your sodium, or throw in chili flakes and garlic cloves for a spicier kick. For those skipping salt, a vinegar-based pickling method works well as an alternative, making it simple to adapt to seasonal ingredients or specific diets.
Tips for Personalization
These changes help everyone from newlyweds experimenting in the kitchen to seniors keeping meals light. For instance, mixing in spices can turn your canned lemons into a versatile ingredient for diet-conscious folks or food enthusiasts exploring new tastes.
Mastering Canning Lemons: Advanced Tips and Variations
Taking your canning skills further can make this recipe even more rewarding. A pro technique is using a weight to press lemons inside the jars, helping them absorb flavors better and compact everything neatly. For flavor variations, experiment with additions like cinnamon sticks, star anise, or even cloves to create unique profiles that suit your preferences.
Presentation matters too use thin lemon slices from your jars to garnish dishes for a pop of color and appeal. If you’re always on the go, like busy parents or working professionals, prepare larger batches ahead and let them age for deeper flavors. These tips build on the basic recipe, making it ideal for experienced cooks who want to innovate.
Creative Ideas for Everyday Use
Inspired by other fruit-based recipes, you might pair this with something like our blueberry cottage cheese breakfast bake for complementary flavors. Remember, the syrup that forms from layering adds a sweet touch, perfect for enhancing your meals without much effort.
How to Store Canning Lemons: Best Practices
Proper storage keeps your canned lemons fresh and safe to eat. Store them in the refrigerator for up to 6 months, always ensuring the jars stay tightly sealed to maintain quality. For longer needs, freezing in airtight containers works well, though it might change the texture a bit the flavor stays strong.
Avoid reheating canned lemons, as they’re best enjoyed cold or at room temperature to preserve their taste. When meal prepping, portion them into smaller jars to make it easy to add to recipes and cut down on waste. Following these steps helps everyone, from students to baking enthusiasts, get the most out of their preserves.
Long-Term Tips
This method is quick, taking just 30 minutes, and focuses on refrigerated storage rather than shelf-stable options. If you’re looking for more on safe practices, check out external resources like the FDA food safety guidelines for detailed advice.
FAQs: Frequently Asked Questions About Canning Lemons
How do I prepare lemons for canning?
To prepare lemons for canning, start by washing them thoroughly under cool running water to remove dirt and pesticides. Next, peel the lemons if the recipe calls for preserved lemon peel, or slice them into thin rounds or wedges. Remove any seeds, as these can add bitterness. For best results, use fresh, firm lemons. Some recipes require blanching the lemon slices briefly in boiling water to soften them before packing into sterilized jars with a pickling liquid or syrup.
What is the safest method to can lemons at home?
The safest method to can lemons is by using the water bath canning process. Sterilize your jars and lids before filling them with prepared lemons and the appropriate preserving liquid, such as a sugar syrup, salt brine, or lemon juice. Leave proper headspace according to your recipe. Process the sealed jars in a boiling water bath for the recommended time (usually 10-15 minutes) to kill any harmful bacteria and create a vacuum seal. Always follow trusted canning recipes from sources like the USDA or local extension offices to ensure safety.
How long can canned lemons be stored, and how do I know if they are still good?
Properly canned lemons can be stored unopened in a cool, dark place for up to one year. After that, flavor and texture may deteriorate, but they can still be safe if sealed correctly. Always check for signs of spoilage before use, such as bulging lids, leakage, off-smells, or mold. If the seal is broken or the contents look cloudy or slimy, discard the jar. Refrigerate after opening and consume within a few weeks.
Can I use canned lemons in recipes the same way I use fresh lemons?
Canned lemons have a more intense, salty, or sweet flavor depending on the preserving liquid used, so they are not always a direct substitute for fresh lemons. They work particularly well in Middle Eastern and Mediterranean recipes like tagines, salads, or sauces, adding a unique depth of flavor. When substituting, start with smaller amounts and adjust seasoning to taste. Fresh lemon juice or zest is better for dishes requiring bright, crisp acidity.
What equipment do I need to safely can lemons at home?
Essential equipment for canning lemons includes glass canning jars with two-piece lids (flat lid plus screw band), a large pot for boiling water bath processing, a jar lifter for handling hot jars safely, and a funnel to transfer lemon slices and liquid into jars without spilling. You’ll also need clean towels and a food-grade funnel for pouring syrup or brine. Using tested canning recipes with accurate times and recommended equipment helps ensure safety and quality.
Canning Lemons
- Total Time: 30 minutes
- Yield: 3 pint jars of canned lemons 1x
- Diet: Vegan, Gluten-Free
Description
🍋 This Canning Lemons recipe offers a simple and effective way to preserve citrus for extended use in your cooking and drinks.
❄️ Refrigerated preserved lemons create a sweet syrup and maintain bright lemon flavor, making them a versatile addition to your pantry.
Ingredients
8 lemons to fill 3 pint-sized glass jars
2 to 3 cups of sugar
Instructions
1-Getting started: Getting started with canning lemons is easier than you might think, and this guide walks you through each part. First, wash the jars with soap and water, then sterilize them by filling each one-third full with boiling hot water, swirling, draining, and repeating. You can also boil the jars for 5 minutes or run them through a dishwasher for sterilization, and do the same for the lids.
2-Preparing the lemons: Next, thoroughly clean the lemons with a sponge or dish brush, then slice them into rings or half circles to prepare them for layering. Wash and scrub fresh lemons thoroughly to remove any impurities, as this ensures a clean surface for canning. Place about half a lemon’s worth of slices into each jar and cover with at least 3 tablespoons of sugar, then continue layering lemon slices and sugar until the jars are full, pressing down the lemons as you go.
3-Filling and storing: Add extra sugar to fill the top, seal the jars with lids, and refrigerate this recipe takes about 30 minutes total and forms a syrup as the sugar dissolves after a day in the fridge. For safety, follow trusted methods like water bath canning for longer storage, but keep these refrigerated for up to a month. Optionally, cover the flat lids with a piece of fabric before sealing for a decorative touch. Cut lemons into quarters or slices as preferred, removing seeds to avoid bitterness, and pack them tightly into the sterilized jars.
4-Prepare a Simple Syrup: As you layer, the sugar will dissolve into a syrup, enhancing the lemons’ flavor over time. This step ensures the final product is ready for use in various recipes, like adding a burst of citrus to your meals. For more ideas on using preserved fruits, check out our rhubarb muffins recipe for another fun preservation twist.
Notes
🧼 Sterilize jars thoroughly to ensure safety and longer shelf life.
🍽️ Use wide-mouth jars for easier filling and layering.
🌿 Add cloves or other spices for flavor variations if desired.
- Prep Time: 30 minutes
- Category: Preserving, Condiments
- Method: Canning, Refrigeration
- Cuisine: Universal
Nutrition
- Serving Size: 1 slice or serving
Keywords: Canning Lemons,Preserved Lemons,Citrus Preservation,Sugar Syrup