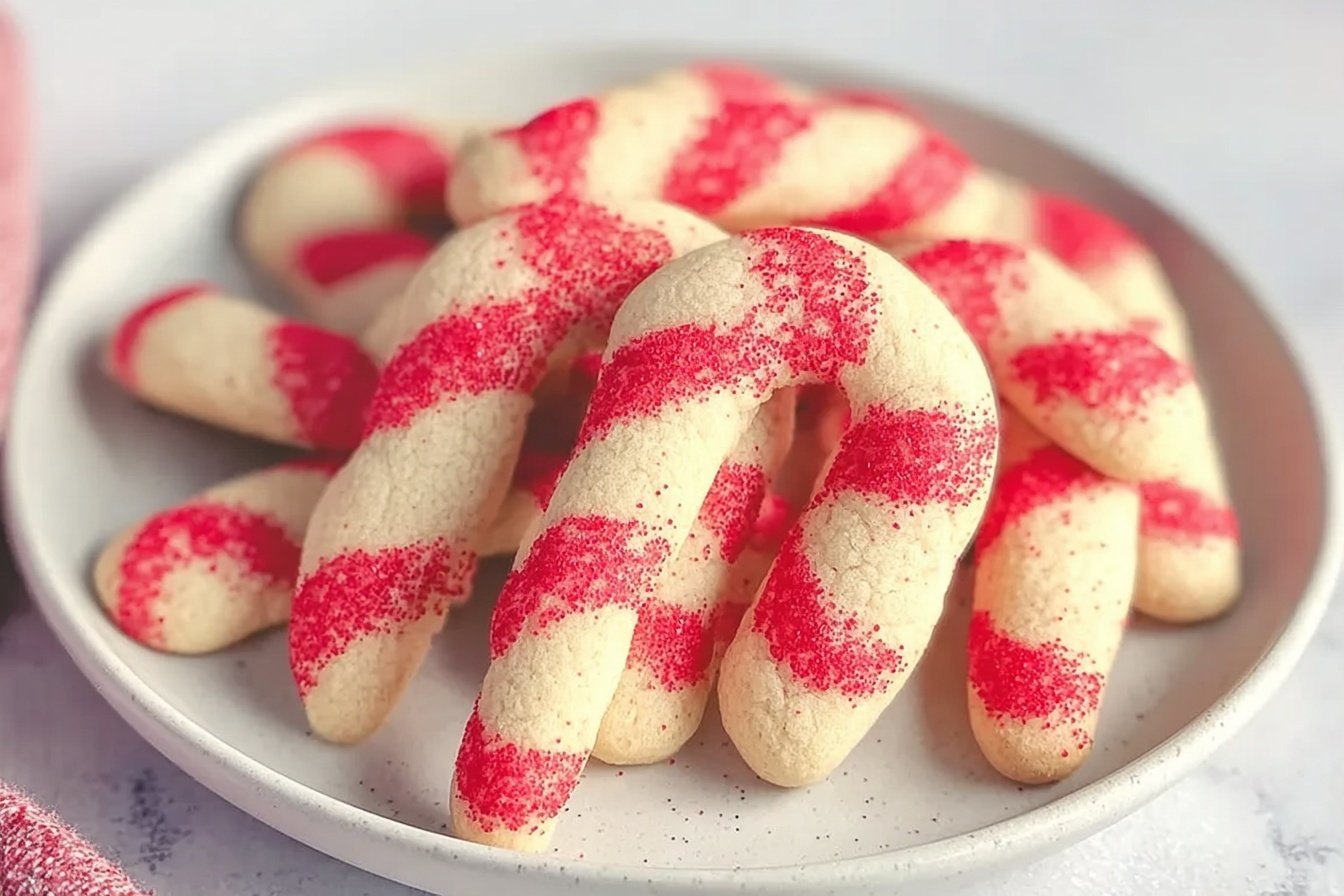
Candy Cane Cookies Recipe Easy Festive Holiday Treat
Candy Cane Cookies are one of those holiday bakes that feel special, but still fit into a busy week. This recipe uses simple pantry ingredients, a soft dough, and a fun shaping method that makes the cookies look cheerful on any dessert tray. If you love peppermint cookies, Christmas cookie recipes, or easy holiday baking ideas, this one belongs in your rotation.
These cookies are also a great fit for home cooks who want something family-friendly and low stress. Kids can help roll the ropes and twist the dough, while adults handle the oven and chilling time. The result is a pretty striped cookie with a buttery bite, a light peppermint flavor, and just the right amount of sweetness.
If you are building a holiday cookie tray, these Candy Cane Cookies pair well with festive bakes like churro cheesecake cookies and lemon oatmeal cookies for a mix of flavors and textures.
For readers who like a little nutrition context, peppermint has long been used in holiday treats and drinks, and some people enjoy it for its fresh flavor and soothing aroma. You can read more about peppermint on WebMD. Sugar also plays a role in baking texture and browning, and if you like learning how ingredients work, Verywell Fit has a helpful overview.
Jump To
- 1. Candy Cane Cookies Recipe Easy Festive Holiday Treat
- 2. Why You’ll Love This Candy Cane Cookies
- 3. How to Prepare the Perfect Candy Cane Cookies: Step-by-Step Guide
- 4. Dietary Substitutions to Customize Your Candy Cane Cookies
- 5. Mastering Candy Cane Cookies: Advanced Tips and Variations
- 6. How to Store Candy Cane Cookies: Best Practices
- 7. Nutritional information for Candy Cane Cookies
- 8. FAQs: Frequently Asked Questions About Candy Cane Cookies
- 9. Candy Cane Cookies
Why You’ll Love This Candy Cane Cookies
- Easy to make: Candy Cane Cookies start with a simple butter cookie dough that comes together in one bowl with a mixer. The prep time is only about 30 minutes, and the shaping is fun instead of fussy.
- Great for holiday baking with kids: The dough is soft and easy to handle, so children can help roll, twist, and shape the cookies. It turns baking into a small holiday activity, not a big project.
- Classic festive flavor: The mix of vanilla and peppermint gives these cookies that familiar candy cane taste people expect in December. If peppermint is not your thing, you can use almond extract for a softer flavor.
- Good for make-ahead planning: The dough can rest in the fridge for up to 3 days, and the baked cookies store well for later. That makes Candy Cane Cookies a smart choice for cookie swaps, parties, and gifting.
Candy Cane Cookies ingredients
- 2 sticks (8 ounces) unsalted butter, at room temperature
- 1 cup powdered sugar
- 1 large egg
- 1 teaspoon vanilla extract
- 1 teaspoon peppermint extract, or 1/2 teaspoon almond extract as a substitute
- 3 cups all-purpose flour
- 1 teaspoon kosher salt
- 1/2 teaspoon red liquid food coloring, plus more if needed
These ingredients create a soft dough that is easy to shape, and the red food coloring gives the cookies their candy cane look. If the red color seems too pale, add a little more food coloring until the dough looks vibrant. For best results, measure everything before starting so the process stays smooth.
How to Prepare the Perfect Candy Cane Cookies: Step-by-Step Guide
First step: cream the butter and sugar
Start by placing the 2 sticks of room-temperature unsalted butter and 1 cup powdered sugar in a stand mixer. Beat them on medium speed until the mixture looks light and fluffy. This step helps the cookies bake up tender, so do not rush it. Scrape down the sides of the bowl so every bit of butter gets mixed in.
Second step: add the flavoring and egg
Add 1 large egg, 1 teaspoon vanilla extract, and 1 teaspoon peppermint extract. Beat again until the dough is smooth, then scrape the bowl once more. If you prefer a gentler flavor, use 1/2 teaspoon almond extract instead of the peppermint extract. That swap still gives the cookies a holiday feel without the stronger mint taste.
Third step: mix in the dry ingredients
Turn the mixer to low speed and add 3 cups all-purpose flour and 1 teaspoon kosher salt. Mix only until the flour is no longer visible. Overmixing can make the dough tough, so stop as soon as it comes together. The dough will be soft, which is exactly what you want for shaping later.
Fourth step: color half the dough red
Remove half of the dough and set it aside. Add 1/2 teaspoon red liquid food coloring to the remaining dough, then knead it until the color is bright and even. If the dough still looks too pale, add a little more food coloring. This part is easy to do by hand, and it is a great step for older kids to help with under supervision.
Fifth step: chill the dough
Shape both portions into discs and wrap them tightly in plastic wrap. Refrigerate for at least 1 hour, or up to 3 days. Chilling makes the dough easier to roll and keeps the cookies from spreading too much in the oven. If the dough feels sticky later, a quick chill can bring it back into shape.
Sixth step: preheat and prepare your pans
When you are ready to bake, preheat the oven to 375°F. Line baking sheets with parchment paper or silicone mats. This helps the cookies release cleanly and keeps the bottoms from browning too fast. A lined pan also makes cleanup easier, which is always a nice bonus during holiday baking.
Seventh step: shape the candy canes
Roll the red and white dough into ropes about 6 inches long for large cookies or 4 inches for smaller cookies. Twist one red rope with one plain rope together, then curve the top into a hook to make the candy cane shape. Pinch the ends gently so they stay together. Try to keep the ropes even in thickness so the cookies bake at the same rate.
Place the shaped cookies on the prepared baking sheets with enough space between them. The dough is soft, but it is still easy to manage. If a rope cracks or feels dry, let it rest for a few minutes or chill it again for about 15 minutes before trying once more.
Eighth step: chill the shaped cookies
Before baking, chill the shaped cookies for 15 minutes. This quick rest helps the candy cane shape hold better in the oven. If you want very defined cookies, you can chill them a little longer. For large holiday batches, shape all the cookies first and then chill the trays together.
Ninth step: bake until lightly golden
Bake the large cookies for 10 to 12 minutes, or the smaller ones for about 8 minutes. Watch for the edges to start turning golden. The centers should still look soft, because the cookies continue to set as they cool. If you like a slightly firmer cookie, let them go for the full baking window, but do not overbake them.
Tenth step: cool and serve
Leave the cookies on the baking sheets for 10 minutes before moving them to wire racks. This helps them firm up so they do not break. Once they are fully cool, serve them right away or store them for later. The flavor gets even better the next day as the peppermint and vanilla settle in.
One small tip makes a big difference: if the dough gets too soft while you are shaping, pop it back in the fridge for 15 minutes. That little pause keeps the Candy Cane Cookies neat and pretty.
| Recipe Detail | Information |
|---|---|
| Prep time | 30 minutes |
| Cook time | 10 to 15 minutes |
| Chill time | At least 1 hour, plus 15 minutes after shaping |
| Yield | About 28 servings |

Dietary Substitutions to Customize Your Candy Cane Cookies
Protein and main ingredient alternatives
These Candy Cane Cookies already have a simple ingredient list, which makes substitutions easier. If you want a milder holiday flavor, swap the peppermint extract for 1/2 teaspoon almond extract. That gives the cookies a sweet, bakery-style note that many people enjoy. You can also keep the vanilla extract and skip the peppermint if you are baking for kids who prefer a softer taste.
If you need a different texture, you can add a touch more flour only if the dough is very sticky, but do it carefully so the cookies do not turn dry. For a brighter red color, add a little more food coloring in very small amounts. If you are baking for a mixed crowd, a batch made with half peppermint and half almond can be a nice compromise.
Vegetable, sauce, and seasoning modifications
There are no vegetables or sauces in this recipe, but there is still room to adjust the seasoning. A small pinch more kosher salt can make the buttery flavor stand out, while a little less peppermint can make the cookies taste softer and sweeter. If you want a more natural holiday look, you can dust the baked cookies lightly with powdered sugar after cooling.
For a fun variation, try adding a tiny bit of crushed candy cane on top right after baking, though this does make the cookies a little sweeter. You can also shape them smaller for party platters or larger for gift boxes. If you are serving people with different preferences, it is easy to bake one tray as classic peppermint and one tray with almond extract.
Mastering Candy Cane Cookies: Advanced Tips and Variations
Pro cooking techniques
For the best Candy Cane Cookies, keep the dough cold but not hard. Room-temperature butter gives you a smooth, creamy dough, while chilling the discs before shaping helps everything hold together. If you want very even ropes, use your hands to roll them on a lightly floured surface with gentle pressure. That keeps the dough from cracking and helps the stripes stay neat.
Another useful trick is to bake one test cookie first if you are unsure about your oven. Some ovens run hotter than the set temperature, and a test cookie can help you decide whether to shorten the bake time by a minute. The cookies should look set at the edges and still soft in the center when they come out.
Flavor variations
If peppermint is your favorite, keep the recipe as written for that classic candy cane taste. If you want a softer holiday cookie, use almond extract instead. You can also pair the cookies with hot cocoa or coffee for a cozy serving idea. Some bakers like to add a tiny bit of extra vanilla for a rounder flavor.
Presentation tips
Arrange the cookies on a white platter or a red and green holiday tray so the striped shape stands out. They also look lovely stacked in cellophane bags tied with ribbon for gifts. If you are serving them with other holiday treats, try pairing them with cake mix coffee cake for a sweet brunch table or peanut butter squares for a richer dessert spread.
Make-ahead options
The dough can rest in the refrigerator for up to 3 days, which makes holiday planning much easier. You can also shape the cookies ahead of time, chill them on trays, and bake them later the same day. After baking, the cookies are often even better the next day, so they work well for parties, bake sales, and gift baskets.
How to Store Candy Cane Cookies: Best Practices
Refrigeration and short-term storage
After the cookies cool completely, store them in an airtight container at room temperature. Layer wax paper or parchment paper between the cookies so they do not stick together. Kept in a cool, dry spot, Candy Cane Cookies stay fresh for up to 2 weeks.
Freezing for longer storage
If you want to make a larger batch, freeze the cookies in a single layer first, then move them to a freezer-safe bag or container. They can keep for up to 3 months this way. Let them thaw at room temperature before serving. This works well for anyone planning ahead for holiday parties or cookie exchanges.
Reheating and serving again
These cookies usually do not need reheating, but if you want them to taste freshly baked, let them sit at room temperature after freezing. Avoid microwaving, since that can soften the shape too much. The cookies are best enjoyed as they are, with the texture staying tender and the peppermint flavor still bright.
Nutritional information for Candy Cane Cookies
| Nutrient | Per serving, based on 28 servings |
|---|---|
| Calories | 127 |
| Fat | 6.9 grams |
| Saturated Fat | 4.2 grams |
| Carbohydrates | 14.6 grams |
| Fiber | 0.4 grams |
| Sugars | 4.3 grams |
| Protein | 1.7 grams |
| Sodium | 65 milligrams |
These Candy Cane Cookies are a sweet holiday treat, so they are best enjoyed as part of a balanced day. The portion size is modest, and the recipe makes enough to share, which is perfect for gatherings. If you are watching sugar intake, enjoy one cookie with coffee or tea and save the rest for later.

FAQs: Frequently Asked Questions About Candy Cane Cookies
How do you make easy candy cane cookies at home?
Candy cane cookies are simple to bake with basic ingredients like butter, sugar, flour, egg, vanilla, peppermint extract, and red food coloring. Cream 1 cup softened butter with 1 cup powdered sugar and 1 egg. Mix in 2 1/2 cups flour, 1 tsp vanilla, and 1 tsp peppermint extract to form a soft dough. Divide in half; tint one half red. Roll each color into 4-inch ropes, twist together, and curve the top into a hook. Place on parchment-lined sheets and chill 30 minutes. Bake at 375°F for 9-10 minutes until edges are light brown. Cool on racks. This kid-friendly recipe yields about 4 dozen cookies and takes under an hour active time. Perfect for holiday baking parties.
What is the best way to shape candy cane cookies?
Start with chilled dough for easier handling. Pinch off 1 tablespoon plain dough and 1 tablespoon red dough. Roll each into a 4-inch rope of even thickness on a lightly floured surface. Lay ropes side by side, gently twist 3-4 times without stretching, then curve the top into a cane hook. Pinch ends to seal. Place 2 inches apart on parchment-lined baking sheets. Chill shaped cookies for 20-30 minutes to prevent spreading. Bake right from the fridge at 375°F for 9-10 minutes. This method keeps shapes crisp and defined, avoiding flat or misshapen results. Practice with kids for fun twists.
Can you substitute peppermint extract in candy cane cookies?
Yes, if peppermint is too strong or unavailable, use 1 tsp almond extract instead for a classic twist that pairs well with the candy cane look. Other options include 1/2 tsp mint extract diluted with vanilla, or skip extract entirely and crush real candy canes into the dough for natural flavor. For nut-free, stick to vanilla alone. Test a small batch first, as flavors vary. Almond gives a subtle, festive taste many prefer for kids. Adjust red coloring as needed. This swap keeps cookies soft and holiday-ready without overpowering mint.
How should you store homemade candy cane cookies?
Layer cooled cookies between sheets of wax or parchment paper in an airtight container to prevent sticking. Store at room temperature in a cool, dry spot for up to 2 weeks. For longer storage, freeze in a single layer first, then transfer to freezer bags for up to 3 months—thaw at room temp. Avoid direct sunlight or humidity to maintain crisp shapes and flavor. If gifting, use tins with dividers. Properly stored, they stay soft and fresh, with flavors improving after 24 hours as they meld.
Why do candy cane cookies taste better the next day?
Freshly baked candy cane cookies have bold peppermint and sugar notes, but resting allows flavors to blend and mellow overnight. The butter softens further, spices integrate, and textures firm up for a more balanced bite. Store in an airtight container at room temp; by day two, expect a richer, cookie-jar taste without losing crisp edges. This happens due to moisture redistribution and chemical reactions post-baking. Resist eating them all warm from the oven—wait for peak enjoyment. Great for make-ahead holiday treats; they hold up well for cookie swaps.

Candy Cane Cookies
- Total Time: 2 hours
- Yield: 28 cookies
- Diet: Vegetarian
Description
🎄 Shape festive candy cane cookies with kids for holiday fun and peppermint bliss in every soft, chewy bite.
🍭 Easy dough chills perfectly, bakes golden – store-ready treats that taste even better the next day.
Instructions
1-First step: cream the butter and sugar Start by placing the 2 sticks of room-temperature unsalted butter and 1 cup powdered sugar in a stand mixer. Beat them on medium speed until the mixture looks light and fluffy. This step helps the cookies bake up tender, so do not rush it. Scrape down the sides of the bowl so every bit of butter gets mixed in.
2-Second step: add the flavoring and egg Add 1 large egg, 1 teaspoon vanilla extract, and 1 teaspoon peppermint extract. Beat again until the dough is smooth, then scrape the bowl once more. If you prefer a gentler flavor, use 1/2 teaspoon almond extract instead of the peppermint extract. That swap still gives the cookies a holiday feel without the stronger mint taste.
3-Third step: mix in the dry ingredients Turn the mixer to low speed and add 3 cups all-purpose flour and 1 teaspoon kosher salt. Mix only until the flour is no longer visible. Overmixing can make the dough tough, so stop as soon as it comes together. The dough will be soft, which is exactly what you want for shaping later.
4-Fourth step: color half the dough red Remove half of the dough and set it aside. Add 1/2 teaspoon red liquid food coloring to the remaining dough, then knead it until the color is bright and even. If the dough still looks too pale, add a little more food coloring. This part is easy to do by hand, and it is a great step for older kids to help with under supervision.
5-Fifth step: chill the dough Shape both portions into discs and wrap them tightly in plastic wrap. Refrigerate for at least 1 hour, or up to 3 days. Chilling makes the dough easier to roll and keeps the cookies from spreading too much in the oven. If the dough feels sticky later, a quick chill can bring it back into shape.
6-Sixth step: preheat and prepare your pans When you are ready to bake, preheat the oven to 375°F. Line baking sheets with parchment paper or silicone mats. This helps the cookies release cleanly and keeps the bottoms from browning too fast. A lined pan also makes cleanup easier, which is always a nice bonus during holiday baking.
7-Seventh step: shape the candy canes Roll the red and white dough into ropes about 6 inches long for large cookies or 4 inches for smaller cookies. Twist one red rope with one plain rope together, then curve the top into a hook to make the candy cane shape. Pinch the ends gently so they stay together. Try to keep the ropes even in thickness so the cookies bake at the same rate. Place the shaped cookies on the prepared baking sheets with enough space between them. The dough is soft, but it is still easy to manage. If a rope cracks or feels dry, let it rest for a few minutes or chill it again for about 15 minutes before trying once more.
8-Eighth step: chill the shaped cookies Before baking, chill the shaped cookies for 15 minutes. This quick rest helps the candy cane shape hold better in the oven. If you want very defined cookies, you can chill them a little longer. For large holiday batches, shape all the cookies first and then chill the trays together.
9-Ninth step: bake until lightly golden Bake the large cookies for 10 to 12 minutes, or the smaller ones for about 8 minutes. Watch for the edges to start turning golden. The centers should still look soft, because the cookies continue to set as they cool. If you like a slightly firmer cookie, let them go for the full baking window, but do not overbake them.
10-Tenth step: cool and serve Leave the cookies on the baking sheets for 10 minutes before moving them to wire racks. This helps them firm up so they do not break. Once they are fully cool, serve them right away or store them for later. The flavor gets even better the next day as the peppermint and vanilla settle in.
Notes
👶 Soft dough is perfect for kids to shape without frustration.
❄️ Chill dough longer if it cracks during rolling for easier handling.
📦 Layer cookies with parchment in airtight container for up to 2 weeks.
- Prep Time: 30 minutes
- Chill: 1 hour 15 minutes
- Cook Time: 10-12 minutes
- Category: Desserts
- Method: Baking
- Cuisine: American
Nutrition
- Serving Size: 1 cookie
- Calories: 127
- Sugar: 4.3g
- Sodium: 65mg
- Fat: 6.9g
- Saturated Fat: 4.2g
- Unsaturated Fat: 2.7g
- Trans Fat: 0g
- Carbohydrates: 14.6g
- Fiber: 0.4g
- Protein: 1.7g
- Cholesterol: 25mg
Keywords: candy cane cookies, festive holiday cookies, peppermint cane treats, easy christmas cookies