
Why You’ll Love This Buttermilk Waffles
There’s something truly special about waking up to the aroma of freshly made buttermilk waffles on a lazy weekend morning. This recipe delivers the perfect balance of crispy exterior and fluffy interior that makes waffle lovers come back for more. Whether you’re cooking for a family breakfast or meal prepping for the week ahead, this recipe offers simplicity and satisfaction in every bite.
Ease of Preparation
One of the biggest advantages of this buttermilk waffles recipe is how straightforward it is to prepare. With just 10 minutes of prep time and about 30 minutes of cooking, you can have a complete breakfast on the table in under an hour. The batter comes together in minutes using basic mixing bowls and a whisk, no fancy equipment required. Even beginner cooks can achieve excellent results on their first attempt.
Health Benefits
Buttermilk brings several nutritional advantages to your breakfast table. According to WebMD, buttermilk contains probiotics, calcium, and protein that support digestive health and strong bones. The fermentation process used to make buttermilk also makes it easier to digest than regular milk. Additionally, using quality ingredients like eggs provides protein, while the optional pecan meal adds healthy fats and nutrients.
Versatility
This recipe adapts beautifully to various preferences and dietary needs. You can easily make it sweeter by adding the optional sugar, or keep it savory by omitting the sweetener entirely. The recipe works with either pastry flour for an ultra-tender crumb or all-purpose flour for a more accessible option. Plus, you can customize each waffle with different toppings to please everyone at your table.
Distinctive Flavor
The tangy richness of buttermilk creates a depth of flavor that regular milk simply cannot match. Combined with pure vanilla extract and the option of pecan meal, these waffles have a complex, satisfying taste that stands out from standard recipes. The slight acidity of buttermilk also activates the baking soda perfectly, resulting in waffles with incredible texture and lift.
Jump To
- 1. Why You’ll Love This Buttermilk Waffles
- 2. Essential Ingredients for Buttermilk Waffles
- 3. How to Prepare the Perfect Buttermilk Waffles: Step-by-Step Guide
- 4. Dietary Substitutions to Customize Your Buttermilk Waffles
- 5. Mastering Buttermilk Waffles: Advanced Tips and Variations
- 6. How to Store Buttermilk Waffles: Best Practices
- 7. FAQs: Frequently Asked Questions About Buttermilk Waffles
- 8. Buttermilk Waffles
Essential Ingredients for Buttermilk Waffles
Gathering the right ingredients is the first step toward making exceptional waffles. Each component plays a specific role in creating the perfect texture and flavor. Below is a comprehensive list of everything you’ll need.
Main Ingredients
- 2 large eggs – Provide structure, richness, and protein while helping bind the batter together for a tender yet sturdy waffle
- 1 3/4 cups buttermilk – The star ingredient that adds tangy flavor, activates the baking soda, and creates a tender crumb with its acidic properties
- 8 tablespoons unsalted butter, melted and cooled – Adds richness and helps create a crispy exterior; cooling prevents cooking the eggs
- 2 teaspoons vanilla extract – Infuses warm, aromatic flavor that complements the buttermilk beautifully
- 2 cups pastry flour or 1 3/4 cups all-purpose flour – Pastry flour yields a more tender waffle, while all-purpose flour is more readily available
- 2 tablespoons granulated sugar (optional) – Adds subtle sweetness; omit this ingredient entirely for savory waffle variations
- 2 teaspoons baking powder – Provides additional lift and helps create that characteristic fluffy interior
- 1 teaspoon baking soda – Reacts with buttermilk’s acidity to create air bubbles for a light, airy texture
- 1 teaspoon table salt – Balances and brings out the flavors of all other ingredients
- 1/2 cup pecan meal or almond flour (optional) – Adds nutty flavor, extra protein, and a subtle richness to the finished waffles
Special Dietary Options
| Dietary Need | Substitution Options |
|---|---|
| Vegan | Replace eggs with 2 flax eggs (2 tbsp ground flaxseed + 6 tbsp water); use plant-based buttermilk (1 3/4 cups plant milk + 1 tbsp vinegar); substitute coconut oil or vegan butter for butter |
| Gluten-free | Use a 1:1 gluten-free flour blend in place of regular flour; ensure baking powder is certified gluten-free |
| Low-calorie | Reduce butter to 4 tablespoons; use low-fat buttermilk; skip the pecan meal; consider using a sugar substitute |
| Dairy-free | Make dairy-free buttermilk by combining 1 3/4 cups almond or oat milk with 1 tablespoon lemon juice; use dairy-free butter alternative |
Having all ingredients measured and ready before you begin will make the cooking process smooth and enjoyable. For more breakfast inspiration using wholesome ingredients, check out our blueberry cottage cheese breakfast bake for another nutritious morning option.
How to Prepare the Perfect Buttermilk Waffles: Step-by-Step Guide
Creating light, crispy waffles requires following a few key steps. This detailed guide walks you through the entire process from start to finish, ensuring perfect results every time you fire up your waffle iron.
First Step: Prepare Your Wet Ingredients
Start by gathering a medium-sized mixing bowl. Crack 2 large eggs into the bowl and beat them lightly with a whisk until the yolks and whites are combined. Pour in 1 3/4 cups buttermilk and whisk to blend with the eggs. Add 8 tablespoons of melted and cooled unsalted butter to the mixture, followed by 2 teaspoons of vanilla extract. Whisk everything together until all the wet ingredients are fully incorporated and the mixture looks smooth and creamy.
Pro Tip: Make sure your melted butter has cooled to room temperature before adding it to the egg mixture. Hot butter can partially cook the eggs, creating unwanted lumps in your batter.
Second Step: Mix Your Dry Ingredients
In a separate large bowl, combine all your dry ingredients. Add 2 cups of pastry flour (or 1 3/4 cups all-purpose flour if that’s what you have on hand). Add 2 tablespoons of granulated sugar if you want slightly sweet waffles, or skip this for savory applications. Measure in 2 teaspoons of baking powder, 1 teaspoon of baking soda, and 1 teaspoon of table salt. If using the optional 1/2 cup of pecan meal or almond flour, add it now. Use a whisk to thoroughly combine all the dry ingredients, breaking up any lumps in the flour or pecan meal.
Third Step: Combine Wet and Dry Mixtures
Now comes the crucial part that determines your waffle texture. Pour the wet ingredient mixture into the bowl of dry ingredients. Using a spatula or wooden spoon, gently fold and stir the two mixtures together. The key here is to stop mixing as soon as the ingredients are nearly combined. Some small lumps in the batter are perfectly fine and actually desirable. Overmixing develops gluten in the flour, which leads to tough, chewy waffles rather than tender, fluffy ones.
The batter should be thick but still pourable. If it seems too thick, you can add a splash more buttermilk. If it’s too thin, let it rest for a few minutes to thicken slightly. The batter will continue to develop as the baking soda reacts with the buttermilk.
Fourth Step: Preheat and Prepare Your Waffle Iron
While your batter rests for just a minute or two, prepare your waffle iron. Plug it in and set it to medium-high heat. Most waffle irons have an indicator light that tells you when they’re properly preheated. Once hot, spray both the top and bottom plates generously with non-stick cooking spray. You can also brush them lightly with melted butter, though cooking spray tends to distribute more evenly.
Fifth Step: Cook Your Waffles
For an 8-inch round waffle iron, ladle approximately 1/3 cup of batter onto the center of the bottom plate. The batter will spread when you close the iron, so start with less than you think you need. Close the waffle iron gently and cook for 2 to 3 minutes. The waffle is done when the steam significantly reduces or stops coming from the iron. Most modern waffle irons also have a doneness indicator.
Open the iron carefully and use a fork or tongs to remove the waffle. Place it directly on a wire rack if you’re making multiple waffles, or serve immediately if you’re eating right away. Repeat with remaining batter, spraying the iron lightly between each waffle if needed.
Serving Your Buttermilk Waffles
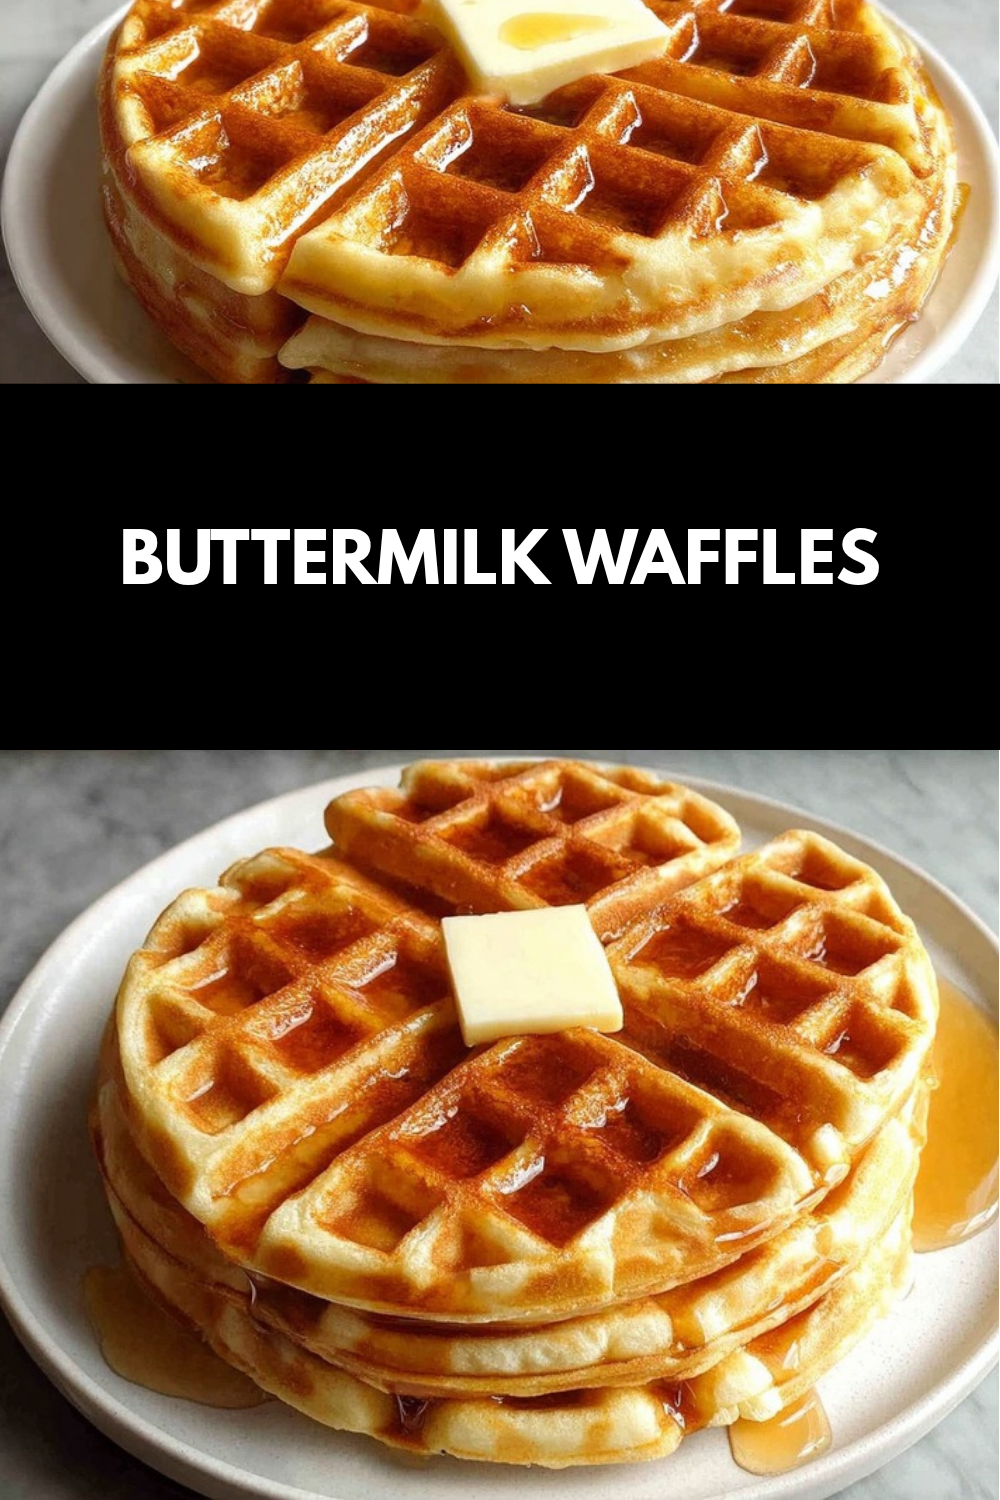
These waffles are at their absolute best when served hot off the iron. Top them with butter and real maple syrup for a classic presentation. Fresh berries, whipped cream, or a dusting of powdered sugar make excellent additions. For a savory twist, try topping with fried chicken, or serve alongside eggs and bacon for a complete breakfast spread.
If you’re planning a larger breakfast spread, consider pairing these waffles with our ham and cheese hash brown casserole for a hearty weekend brunch that will satisfy any appetite.

Dietary Substitutions to Customize Your Buttermilk Waffles
One of the wonderful things about this buttermilk waffles recipe is how easily it adapts to various dietary needs and preferences. Whether you’re cooking for someone with food allergies, following a specific eating plan, or simply working with what’s in your pantry, these substitutions will help you create delicious waffles that meet your requirements.
Protein and Main Component Alternatives
For those avoiding eggs, several effective alternatives exist. Flax eggs work remarkably well in waffle recipes. To make one flax egg, combine 1 tablespoon of ground flaxseed with 3 tablespoons of water and let it sit for 5 minutes until it becomes gelatinous. Use this mixture in place of each egg called for in the recipe. Chia eggs prepared the same way also work effectively.
If you’re looking to increase the protein content of your waffles, consider adding a scoop of unflavored protein powder to the dry ingredients. Reduce the flour slightly to accommodate the extra powder. Greek yogurt can also replace some of the buttermilk for added protein, though you may need to thin it with a little milk.
For those avoiding dairy, creating a buttermilk substitute is simple. Combine any plant-based milk (almond, oat, soy, or coconut) with 1 tablespoon of lemon juice or white vinegar per cup of milk. Let it sit for 5 minutes until it thickens and curdles slightly. This provides the same acidic properties that make buttermilk so effective in baking.
Flour and Grain Modifications
The type of flour you use significantly affects the final texture of your waffles. Pastry flour creates the most tender crumb because of its lower protein content. All-purpose flour works well and is more commonly available, producing a slightly chewier waffle. For a heartier option, substitute up to half of the white flour with whole wheat flour, though expect a denser result with a nuttier flavor.
Gluten-free cooks should use a quality 1:1 gluten-free flour blend designed for baking. These blends typically contain xanthan gum, which helps provide structure in the absence of gluten. Rice flour blends tend to produce the most waffle-like texture among gluten-free options.
The optional pecan meal or almond flour adds wonderful flavor and nutrients. If nut allergies are a concern, sunflower seed meal or omitting this ingredient entirely both work fine. The recipe is quite forgiving and will still produce delicious waffles without this addition.
For those tracking nutritional information, you can find detailed calorie counts at Eat This Much to help plan your meals accordingly.
Mastering Buttermilk Waffles: Advanced Tips and Variations
Once you’ve mastered the basic recipe, it’s time to get creative and take your waffle game to the next level. These advanced techniques and variations will help you create restaurant-quality breakfasts in your own kitchen.
Pro Cooking Techniques
The secret to perfectly crispy waffles lies in a few key techniques. First, always preheat your waffle iron thoroughly before adding batter. A properly heated iron creates an immediate sear that starts building that desirable crispy exterior right away. If your waffles are coming out soggy, your iron might not be hot enough.
Second, resist the urge to peek during cooking. Opening the waffle iron mid-cycle tears the waffle apart and prevents proper browning. Trust the steam indicator instead. When steam stops billowing from the sides of the iron, your waffle is likely done or very close to it.
Third, if you’re making multiple waffles for a crowd, keep them crisp by placing cooked waffles directly on the rack of a 200°F oven. This keeps them warm while allowing air to circulate, maintaining that coveted crunch. Never stack hot waffles, as trapped steam makes them soggy.
Delicious Flavor Variations
This basic buttermilk waffles recipe serves as an excellent canvas for countless variations. Try these popular options:
- Blueberry Waffles: Gently fold 1 cup of fresh or frozen blueberries into the batter just before cooking. Frozen berries work well but may need an extra 30 seconds of cooking time.
- Chocolate Chip Waffles: Sprinkle a handful of chocolate chips onto each waffle right after pouring the batter into the iron for a kid-friendly treat.
- Cinnamon Spice Waffles: Add 1 teaspoon of ground cinnamon and 1/4 teaspoon of nutmeg to the dry ingredients for warm, comforting flavors perfect for fall mornings.
- Lemon Poppy Seed: Add 1 tablespoon of poppy seeds and the zest of one lemon to the batter for a bright, refreshing twist.
- Savory Herb Waffles: Omit the sugar and vanilla, then add 1/4 cup of chopped fresh herbs like chives, parsley, or dill for a savory base that pairs wonderfully with fried chicken or smoked salmon.
Make-Ahead Options
Busy mornings call for make-ahead strategies. You can prepare the dry ingredients up to a week in advance and store them in an airtight container. When you’re ready to cook, simply add the wet ingredients and proceed with the recipe. This cuts your morning prep time significantly.
Alternatively, mix the complete batter the night before and store it covered in the refrigerator. The flavor actually improves after an overnight rest as the ingredients meld together. Just give the batter a gentle stir before cooking, and note that you may need an extra tablespoon or two of buttermilk if it has thickened considerably.
Presentation Tips
Beautiful presentation turns a simple breakfast into something special. Stack waffles with layers of butter between them for a restaurant-style look. Create height and visual interest by fanning sliced fruit across the plate. A final drizzle of maple syrup right before serving adds an appealing shine and lets diners control their own sweetness level.
Consider the plate temperature too. Warm plates keep waffles hot longer, while a cold plate can cool them down quickly. Run plates under warm water and dry them, or place them in a low oven for a few minutes before serving.
How to Store Buttermilk Waffles: Best Practices
While these buttermilk waffles taste best fresh from the iron, proper storage techniques allow you to enjoy them throughout the week. Follow these guidelines to maintain quality and flavor.
Refrigeration Guidelines
For short-term storage, allow cooked waffles to cool completely on a wire rack. This prevents condensation from making them soggy. Once cooled, wrap each waffle individually in plastic wrap or place them in an airtight container with parchment paper between layers. Store in the refrigerator for up to 3 days. The key is removing as much air as possible to prevent the waffles from drying out or absorbing refrigerator odors.
Freezing for Long-Term Storage
Freezing is an excellent option for batch cooking. Cool waffles completely, then flash-freeze them by placing them in a single layer on a baking sheet in the freezer for about 2 hours. Once frozen solid, transfer them to a freezer-safe bag or container with pieces of parchment between each waffle. This prevents them from sticking together and allows you to remove individual portions as needed. Frozen waffles maintain quality for up to 3 months.
Reheating Methods
The best method for reheating buttermilk waffles is in a 350°F oven for about 6 minutes. This restores crispness to the exterior while heating the interior evenly. A toaster works well for frozen waffles, providing quick results with good texture. Set the toaster to medium and check after one cycle, toasting again if needed.
Avoid microwaving waffles when possible, as this method makes them soft and rubbery rather than crispy. If you must use a microwave, do so in short 15-second bursts and eat immediately, as the texture deteriorates quickly.
Meal Prep Considerations
For efficient meal prep, spend one weekend morning making a double or triple batch of waffles. Cool and freeze them following the method above. On busy weekday mornings, simply pull out the number of waffles needed and reheat. This approach provides homemade breakfast with virtually no morning prep time, perfect for busy families and professionals.
FAQs: Frequently Asked Questions About Buttermilk Waffles
Print
Buttermilk Waffles
- Total Time: 40 minutes
- Yield: 8 waffles
- Diet: Vegetarian
Description
🧇 Whip up crispy-on-the-outside, fluffy-inside classic buttermilk waffles for the ultimate breakfast treat that’s golden, tender, and full of tangy flavor.
🍓 Easy 40-minute recipe perfect for weekends or meal prep, endlessly customizable with toppings for family favorites everyone loves.
Ingredients
– 2 large eggs
– 1 3/4 cups buttermilk
– 8 tablespoons unsalted butter, melted and cooled
– 2 teaspoons vanilla extract
– 2 cups pastry flour or 1 3/4 cups all-purpose flour
– 2 tablespoons granulated sugar (optional)
– 2 teaspoons baking powder
– 1 teaspoon baking soda
– 1 teaspoon table salt
– 1/2 cup pecan meal or almond flour (optional)
Instructions
1-First Step: Prepare Your Wet Ingredients Start by gathering a medium-sized mixing bowl. Crack 2 large eggs into the bowl and beat them lightly with a whisk until the yolks and whites are combined. Pour in 1 3/4 cups buttermilk and whisk to blend with the eggs. Add 8 tablespoons of melted and cooled unsalted butter to the mixture, followed by 2 teaspoons of vanilla extract. Whisk everything together until all the wet ingredients are fully incorporated and the mixture looks smooth and creamy.
2-Second Step: Mix Your Dry Ingredients In a separate large bowl, combine all your dry ingredients. Add 2 cups of pastry flour (or 1 3/4 cups all-purpose flour if that’s what you have on hand). Add 2 tablespoons of granulated sugar if you want slightly sweet waffles, or skip this for savory applications. Measure in 2 teaspoons of baking powder, 1 teaspoon of baking soda, and 1 teaspoon of table salt. If using the optional 1/2 cup of pecan meal or almond flour, add it now. Use a whisk to thoroughly combine all the dry ingredients, breaking up any lumps in the flour or pecan meal.
3-Third Step: Combine Wet and Dry Mixtures Now comes the crucial part that determines your waffle texture. Pour the wet ingredient mixture into the bowl of dry ingredients. Using a spatula or wooden spoon, gently fold and stir the two mixtures together. The key here is to stop mixing as soon as the ingredients are nearly combined. Some small lumps in the batter are perfectly fine and actually desirable. Overmixing develops gluten in the flour, which leads to tough, chewy waffles rather than tender, fluffy ones. The batter should be thick but still pourable. If it seems too thick, you can add a splash more buttermilk. If it’s too thin, let it rest for a few minutes to thicken slightly. The batter will continue to develop as the baking soda reacts with the buttermilk.
4-Fourth Step: Preheat and Prepare Your Waffle Iron While your batter rests for just a minute or two, prepare your waffle iron. Plug it in and set it to medium-high heat. Most waffle irons have an indicator light that tells you when they’re properly preheated. Once hot, spray both the top and bottom plates generously with non-stick cooking spray. You can also brush them lightly with melted butter, though cooking spray tends to distribute more evenly.
5-Fifth Step: Cook Your Waffles For an 8-inch round waffle iron, ladle approximately 1/3 cup of batter onto the center of the bottom plate. The batter will spread when you close the iron, so start with less than you think you need. Close the waffle iron gently and cook for 2 to 3 minutes. The waffle is done when the steam significantly reduces or stops coming from the iron. Most modern waffle irons also have a doneness indicator. Open the iron carefully and use a fork or tongs to remove the waffle. Place it directly on a wire rack if you’re making multiple waffles, or serve immediately if you’re eating right away. Repeat with remaining batter, spraying the iron lightly between each waffle if needed.
Notes
🥄 Avoid overmixing the batter to ensure light, fluffy waffles – lumps are fine.
🔥 Preheat the waffle iron fully and grease well for crisp, non-stick results.
❄️ Cool completely on a rack before storing; reheat in a 350°F oven for 6 minutes.
- Prep Time: 10 minutes
- Cook Time: 30 minutes
- Category: Breakfast
- Method: Waffle Iron
- Cuisine: American
Nutrition
- Serving Size: 1 waffle
- Calories: 280 kcal
- Sugar: 4g
- Sodium: 500mg
- Fat: 14g
- Saturated Fat: 8g
- Unsaturated Fat: 6g
- Trans Fat: 0g
- Carbohydrates: 32g
- Fiber: 1g
- Protein: 7g
- Cholesterol: 80mg
Keywords: classic buttermilk waffles, fluffy buttermilk waffles, homemade waffles, breakfast waffles recipe