Why You’ll Love This Buttermilk Cake
If you’re looking for a cake that strikes the perfect balance between moist, tender, and full of flavor, this buttermilk cake is about to become your new favorite. There’s something magical about how buttermilk transforms a simple cake into something extraordinary, giving it that delightful tang and keeping it incredibly moist for days.
This recipe has been carefully crafted to deliver outstanding results with minimal effort. Whether you’re an experienced baker or just starting out in the kitchen, this buttermilk cake recipe is designed with you in mind. The straightforward steps and common ingredients make it accessible to home cooks of all skill levels, while still producing a bakery-quality cake that will impress everyone who tries it.
Ease of Preparation
This buttermilk cake recipe is designed for simplicity, requiring minimal ingredients and straightforward steps, allowing you to enjoy a quick cooking time without compromising on taste or texture. The reverse creaming method we use creates a tender crumb that’s practically foolproof, even if you’ve struggled with dense cakes in the past. Everything comes together in one bowl with just a few minutes of active prep time.
Health Benefits
Packed with nutritious ingredients, this cake offers a balance of flavor and wellness, featuring components that support digestion and provide essential nutrients. Buttermilk itself is lower in fat than regular milk and contains probiotics that can support gut health. The eggs provide high-quality protein, and while this is certainly a treat, using real ingredients means you’re avoiding the processed additives found in many store-bought cakes.
Versatility
Adaptable to a variety of dietary needs, the recipe can be easily modified for vegan, gluten-free, or low-calorie diets, making it suitable for almost anyone. Whether you’re accommodating allergies, watching your sugar intake, or just working with what’s in your pantry, this recipe offers flexibility without sacrificing results. We’ll explore some substitution options later in this article to help you customize it to your needs.
Distinctive Flavor
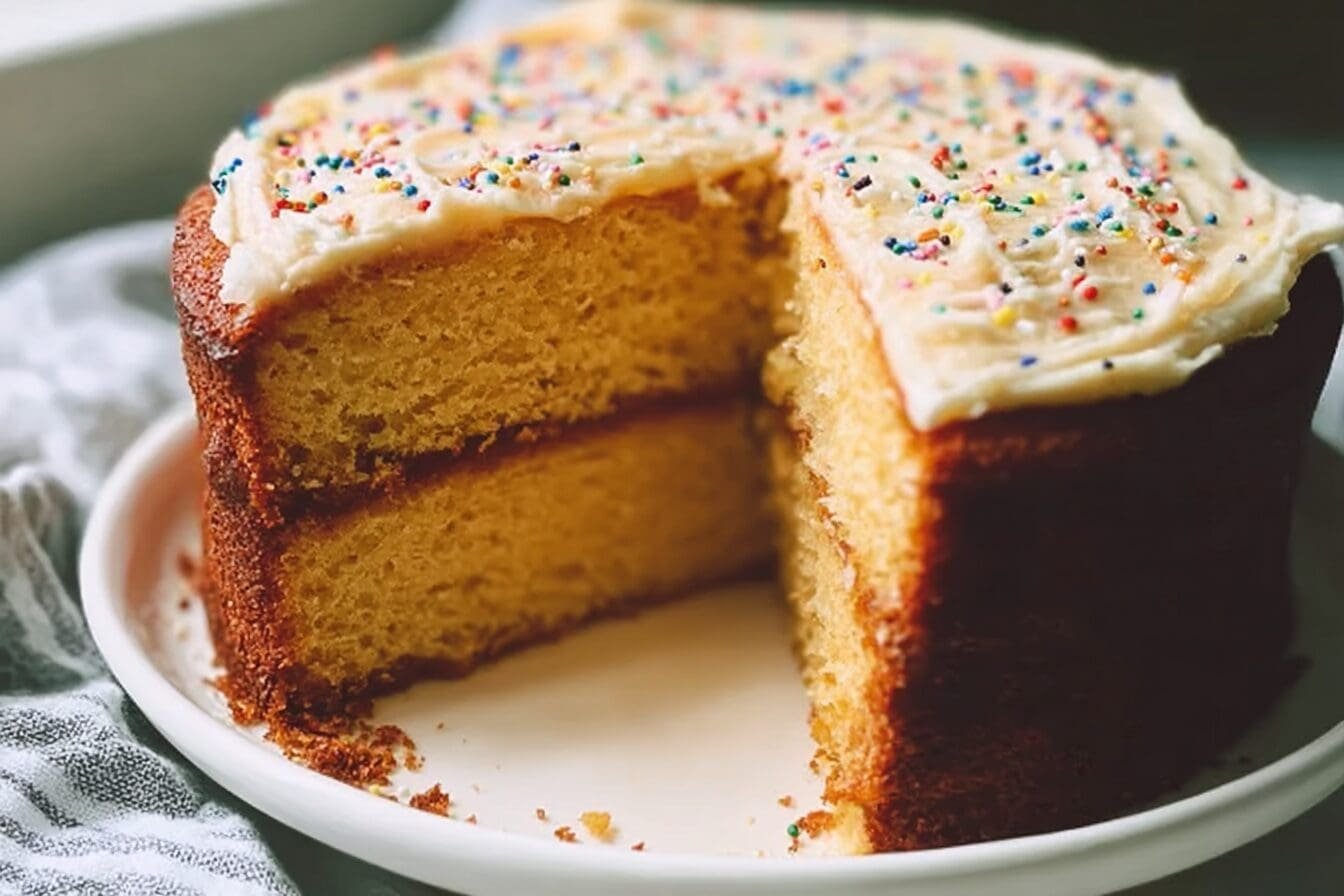
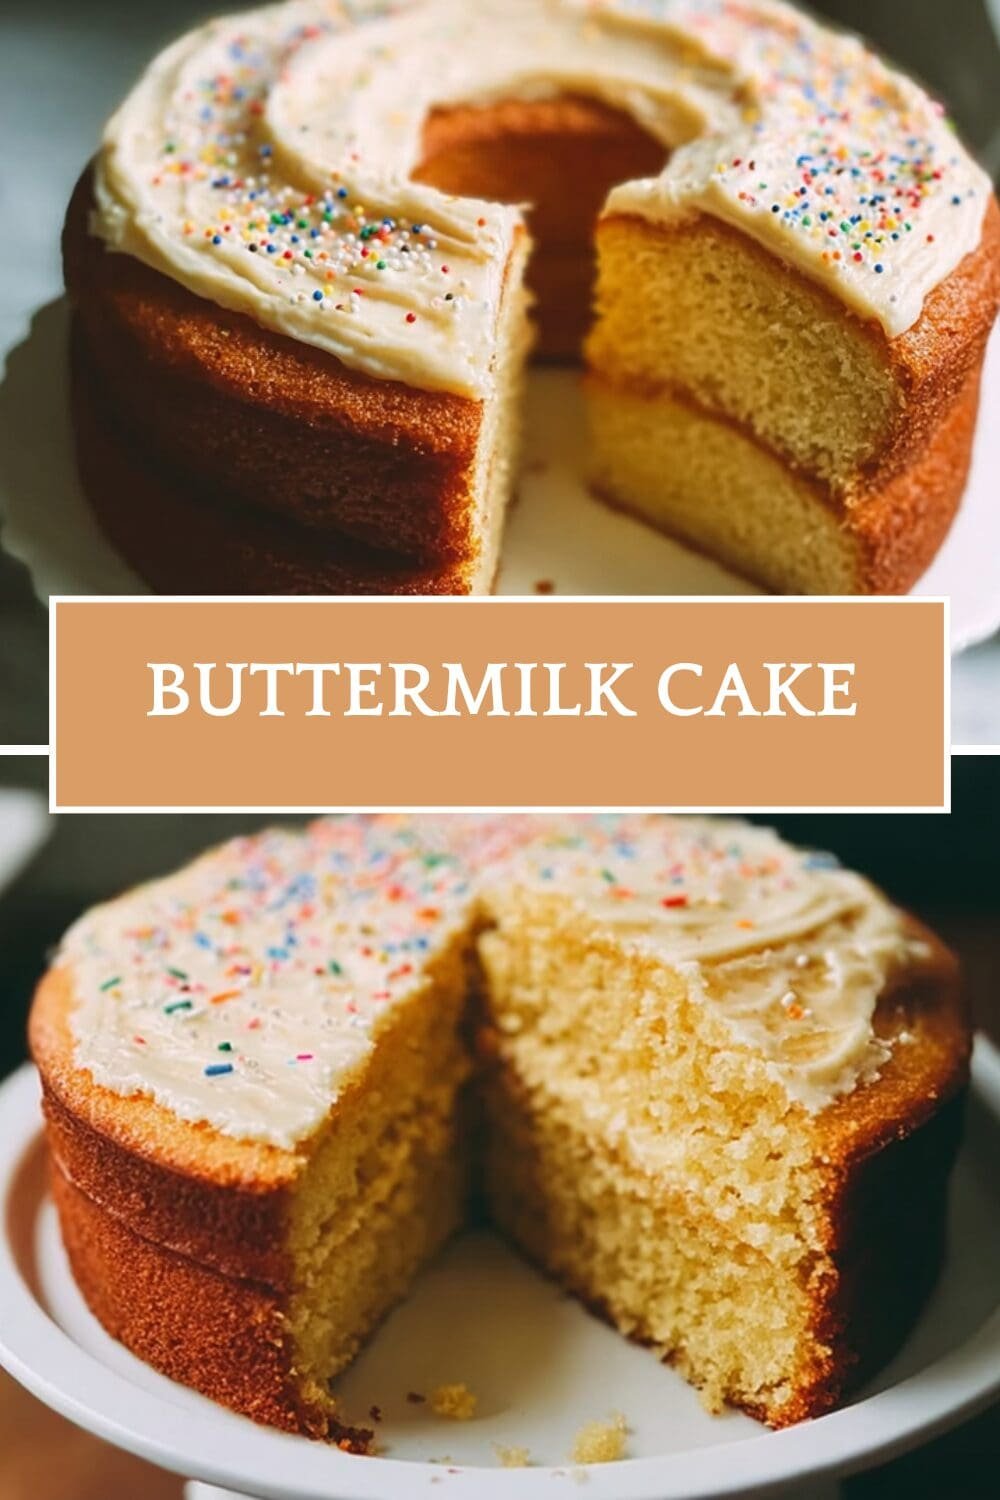
The unique tanginess from the buttermilk combined with subtle spices creates a standout taste that is both rich and refreshing, setting this cake apart from other traditional cakes. The rich vanilla glaze adds the perfect amount of sweetness without overpowering the delicate balance of flavors. It’s a cake that’s sophisticated enough for special occasions but simple enough for everyday enjoyment.
Jump To
- 1. Why You’ll Love This Buttermilk Cake
- 2. Essential Ingredients for Buttermilk Cake
- 3. How to Prepare the Perfect Buttermilk Cake: Step-by-Step Guide
- 4. Dietary Substitutions to Customize Your Buttermilk Cake
- 5. Mastering Buttermilk Cake: Advanced Tips and Variations
- 6. How to Store Buttermilk Cake: Best Practices
- 7. FAQs: Frequently Asked Questions About Buttermilk Cake
- 8. Buttermilk Cake
Essential Ingredients for Buttermilk Cake
Creating the perfect buttermilk cake starts with gathering the right ingredients. Each component plays a crucial role in achieving that ideal texture and flavor we’re after. Here’s everything you’ll need to make this delicious cake:
Cake Ingredients:
- 2 ¾ cups all-purpose flour
- 2 cups sugar
- 1 teaspoon salt
- 2 teaspoons baking powder
- ½ teaspoon baking soda
- 1 ½ cups buttermilk (full fat preferred, low fat acceptable)
- 3 large whole eggs
- 1 egg yolk
- 2 teaspoons vanilla extract
- 2 tablespoons vegetable oil
- 1 cup unsalted butter (room temperature)
Glaze Ingredients:
- ½ cup unsalted butter
- ¼ cup packed brown sugar (light or dark)
- 1 teaspoon vanilla extract
- ¼ cup buttermilk
- 2 cups confectioner’s sugar
Main Ingredient Functions
Understanding what each ingredient does can help you become a better baker and make informed substitutions when necessary. The all-purpose flour provides structure and texture to the cake, forming the foundation of our batter. Buttermilk is the star ingredient here, adding moisture and a delightful tangy flavor that makes this cake so special.
Sugar does more than just sweeten the cake; it also aids in browning and helps keep the cake tender by absorbing moisture. Unsalted butter enhances richness and tenderness, while the eggs bind ingredients and contribute to leavening, helping the cake rise properly. Both baking powder and baking soda are essential for lift, with baking soda reacting to the acidity in buttermilk and baking powder providing additional leavening power.
Special Dietary Options
If you need to adapt this recipe for specific dietary needs, there are several options available. For vegan versions, substitute butter with coconut oil and use flax eggs to replace eggs. Those avoiding gluten can use a gluten-free flour blend instead of all-purpose flour, just look for one that contains xanthan gum for best results. For a lower-calorie option, replace sugar with natural sweeteners like stevia and reduce butter quantity slightly, though this may affect the texture somewhat.
How to Prepare the Perfect Buttermilk Cake: Step-by-Step Guide
Now that we have all our ingredients ready, let’s walk through the process of making this incredible buttermilk cake. Follow these detailed steps for foolproof results every time.
Preparation Steps
- Preheat the oven to 325°F (163°C) and grease a 13×9 inch glass pan.
- In a large bowl, whisk together the flour, sugar, salt, baking powder, and baking soda.
- In another bowl, whisk the buttermilk, whole eggs, egg yolk, vanilla extract, and vegetable oil.
Mixing the Batter
Cut the room temperature butter into pieces and gradually mix into the dry ingredients on medium speed until the mixture is crumbly and sandy in texture. This reverse creaming method is key to achieving a tender, velvety crumb. It may look unusual at first, but trust the process!
Add half of the liquid mixture and combine thoroughly, then add the remaining liquid and mix just until incorporated, scraping down the bowl sides and mixing briefly for about 10 seconds. Be careful not to overmix, as this can lead to a tough cake. The batter should be smooth but not overly developed.
Baking Instructions
Pour the batter into the prepared pan and bake for about 45 minutes or until golden brown and a toothpick inserted comes out with a few moist crumbs. Every oven is different, so start checking around the 40-minute mark. The cake is done when it’s golden on top, pulling away slightly from the edges of the pan, and a toothpick inserted in the center comes out clean or with just a few moist crumbs clinging to it.
Preparing for Glazing
Cool the cake on a wire rack for 15 minutes, then poke holes in the cake with a skewer. These holes will allow the glaze to penetrate deep into the cake, creating those moist, flavorful pockets throughout. While the cake cools slightly, you can prepare the glaze.
Making the Glaze
Melt the butter in a saucepan over low to medium heat once the cake is out of the oven. Turn off the heat and immediately stir in the brown sugar, vanilla extract, and buttermilk until the sugar dissolves. The mixture will bubble slightly; this is normal and helps create that delicious caramelized flavor.
Add the confectioner’s sugar and stir until most of the clumps dissolve, leaving some to dissolve as the glaze sets. Let the glaze sit at room temperature until ready to pour. This resting period allows the flavors to meld and the glaze to reach the perfect consistency for pouring.
Final Steps
Pour the warm glaze over the warm cake that has been poked with holes and allow it to soak in and set for about 30 minutes before serving. Watching the glaze seep into those little holes is almost as satisfying as eating the finished cake! The glaze quantity can be adjusted according to sweetness preference, so feel free to use less if you prefer a less sweet version.

Dietary Substitutions to Customize Your Buttermilk Cake
One of the beautiful things about this recipe is its versatility. Whether you’re accommodating allergies, dietary restrictions, or just working with what’s in your pantry, there are numerous ways to customize this buttermilk cake to suit your needs.
Protein and Main Component Alternatives
Replace eggs with flax or chia seed eggs for vegan options. To make a flax egg, simply mix 1 tablespoon of ground flaxseed with 3 tablespoons of water and let it sit for 5 minutes until it becomes gelatinous. Use plant-based butter substitutes or oils in place of dairy butter to accommodate lactose intolerance. Coconut oil works particularly well in this recipe and adds a subtle tropical note.
Vegetable, Sauce, and Seasoning Modifications
Incorporate seasonal fruits or nuts to vary texture and flavor. Fresh berries, chopped pecans, or even a layer of cinnamon in the middle can transform this simple cake into something special. For a chocolate buttermilk cake variation, you might want to check out our chocolate buttermilk cake recipe, which incorporates cocoa powder for a rich twist on the classic.
Substitute traditional buttermilk with almond or soy-based cultured milk alternatives for dairy-free versions. You can also create your own buttermilk substitute by adding 1 tablespoon lemon juice or vinegar to milk and letting it sit for 5 minutes. Adjust spices like cinnamon or nutmeg to cater to personal taste or enhance the cake’s aroma. A pinch of cinnamon pairs beautifully with the vanilla and buttermilk flavors.
Flavor Variations
The basic vanilla version is delicious on its own, but there are endless possibilities for customization. Try adding lemon zest or almond extract for a different flavor profile. For a citrusy twist, our lemon recipes showcase how well lemon pairs with baked goods. You could also incorporate cocoa powder for a chocolate version or add a swirl of fruit preserves for a fruity surprise in every bite.
Mastering Buttermilk Cake: Advanced Tips and Variations
Once you’ve mastered the basic recipe, there are several techniques and variations that can take your buttermilk cake to the next level. These pro tips will help you achieve bakery-quality results in your home kitchen.
Pro Cooking Techniques
Sift dry ingredients twice for a lighter crumb and use room temperature ingredients to ensure even mixing and rise. This is especially important for the butter, which should be room temperature but not heated unevenly. When butter is too cold, it won’t incorporate properly; when too warm, it can make the cake greasy. Eggs can be slightly cold when mixed in, which actually helps maintain the structure of the cake.
The reverse creaming method, cutting butter into the dry ingredients first, yields a crumbly mixture and tender cake. This technique reduces gluten development, resulting in a more delicate crumb than the traditional creaming method. It’s what gives this cake its signature velvety texture.
Presentation Tips
Garnish with fresh berries or a dusting of powdered sugar for an elegant look. A simple arrangement of fresh strawberries or blueberries on top can transform this everyday cake into something suitable for special occasions. For a more rustic presentation, serve it straight from the pan, letting the warm glaze glisten on top.
If you’re hosting a special event, consider pairing this cake with other desserts for a varied spread. Our pecan cheesecake pie makes an excellent companion, offering a different texture and flavor profile that complement the buttermilk cake nicely.
Make-Ahead Options
Prepare the batter a day in advance and refrigerate, allowing flavors to meld and reducing prep time on the day of baking. When you’re ready to bake, simply give the batter a quick stir before pouring it into the prepared pan. This actually improves the flavor as the flour has time to fully hydrate.
The cake itself freezes exceptionally well. Wrap cooled, unglazed cake tightly in plastic wrap and aluminum foil, then freeze for up to 3 months. Thaw overnight in the refrigerator, then bring to room temperature and glaze before serving. This makes it perfect for advance preparation for holidays or gatherings.
How to Store Buttermilk Cake: Best Practices
To ensure your buttermilk cake stays fresh and delicious, proper storage is key. Follow these guidelines to maintain the quality and flavor of your cake for as long as possible.
Refrigeration
Store the cake in an airtight container at room temperature for up to 2 days or refrigerated for up to 5 days to maintain freshness. If you live in a humid climate or your kitchen gets very warm, refrigeration is preferable even for shorter periods. The glaze may become slightly sticky when refrigerated, but this doesn’t affect the taste.
Freezing
Wrap the cake tightly in plastic wrap and aluminum foil, then freeze for up to 3 months; thaw overnight in the refrigerator before serving. For added protection, place the wrapped cake in a freezer-safe bag or container. Label with the date so you can keep track of how long it’s been frozen.
Reheating
Warm slices in a microwave or oven at low temperature to restore softness and flavor without drying. The cake is best served warm, so taking this extra step really enhances the eating experience. Microwave individual slices for 10-15 seconds, or warm larger portions in a 300°F oven for 10-15 minutes.
Meal Prep Considerations
Slice and store in portioned containers for easy grab-and-go servings throughout the week. This makes it perfect for busy mornings or afternoon snacks. Pre-portioned slices also help with portion control if you’re watching your intake. Each slice can be wrapped individually, making it easy to grab just what you need without exposing the rest of the cake to air.
Pro tip: Place a piece of bread in the container with your cake to help keep it moist. The bread will absorb excess moisture while releasing it back into the cake, keeping it fresh longer!
FAQs: Frequently Asked Questions About Buttermilk Cake
What type of butter is best for making buttermilk cake?
Unsalted butter is best for making buttermilk cake because it allows you to control the salt content in the recipe. If you only have salted butter, you can use it, but be sure to omit any additional salt called for. Avoid margarine or butter substitutes, as they can affect the cake’s texture and flavor.
Can I replace buttermilk with something else in the cake recipe?
Yes, if you don’t have buttermilk on hand, you can make a substitute by adding one tablespoon of lemon juice or white vinegar to a measuring cup, then filling it with regular milk up to one cup. Let it sit for five minutes before using. For this recipe, adjust quantities accordingly. This substitute maintains the cake’s moistness and tenderness, though the texture might vary slightly.
Why do I need both baking powder and baking soda in buttermilk cake?
Both baking powder and baking soda serve different roles in buttermilk cake. Baking soda reacts with the acidity in the buttermilk to create lift and tenderness, while baking powder adds extra leavening to help the cake rise properly. Leaving out either one can result in a dense or unevenly risen cake.
Should the cake be warm when I pour the glaze on it?
Yes, it’s best to pour the glaze over the cake when it is warm but not hot. Poke holes in the cake with a skewer or fork before glazing to allow the glaze to soak in evenly, making the cake moist and flavorful. Pour the glaze while it is still warm to help it absorb better.
Can I bake buttermilk cake in different pan types like bundt pans or cupcakes?
The recipe works best in a 13×9-inch or two 8-inch round pans. Bundt pans may cause sticking or breakage due to the batter’s softness, so grease and flour the pan well if you try it, and watch for longer baking times. Cupcakes might also work; bake around 350°F for 12-15 minutes but expect flatter tops. Adjust baking time based on pan size and monitor closely.
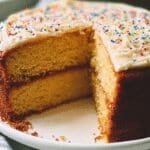
Buttermilk Cake
- Total Time: 1 hour 35 minutes
- Yield: 12 servings 1x
Description
🍰 This Moist Vanilla Buttermilk Cake delivers rich flavor and a soft, tender texture that satisfies every bite.
🥛 The combination of buttermilk and a luscious glaze creates a perfectly moist cake ideal for any occasion.
Ingredients
2 ¾ cups all-purpose flour
2 cups sugar
1 teaspoon salt
2 teaspoons baking powder
½ teaspoon baking soda
1 ½ cups buttermilk (full fat preferred, low fat acceptable)
3 large whole eggs
1 egg yolk
2 teaspoons vanilla extract
2 tablespoons vegetable oil
1 cup unsalted butter (room temperature)
½ cup unsalted butter
¼ cup packed brown sugar (light or dark)
1 teaspoon vanilla extract
¼ cup buttermilk
2 cups confectioner’s sugar
Instructions
1-Preheat the oven: Preheat the oven to 325°F (163°C) and grease a 13×9 inch glass pan.
2-Whisk dry ingredients: In a large bowl, whisk together the flour, sugar, salt, baking powder, and baking soda.
3-Whisk wet ingredients: In another bowl, whisk the buttermilk, whole eggs, egg yolk, vanilla extract, and vegetable oil.
4-Mix the Batter: Cut the room temperature butter into pieces and gradually mix into the dry ingredients on medium speed until the mixture is crumbly and sandy in texture. This reverse creaming method is key to achieving a tender, velvety crumb. It may look unusual at first, but trust the process! Add half of the liquid mixture and combine thoroughly, then add the remaining liquid and mix just until incorporated, scraping down the bowl sides and mixing briefly for about 10 seconds. Be careful not to overmix, as this can lead to a tough cake. The batter should be smooth but not overly developed.
5-Bake the cake: Pour the batter into the prepared pan and bake for about 45 minutes or until golden brown and a toothpick inserted comes out with a few moist crumbs. Every oven is different, so start checking around the 40-minute mark. The cake is done when it’s golden on top, pulling away slightly from the edges of the pan, and a toothpick inserted in the center comes out clean or with just a few moist crumbs clinging to it.
6-Prepare for glazing: Cool the cake on a wire rack for 15 minutes, then poke holes in the cake with a skewer. These holes will allow the glaze to penetrate deep into the cake, creating those moist, flavorful pockets throughout. While the cake cools slightly, you can prepare the glaze.
7-Make the glaze: Melt the butter in a saucepan over low to medium heat once the cake is out of the oven. Turn off the heat and immediately stir in the brown sugar, vanilla extract, and buttermilk until the sugar dissolves. The mixture will bubble slightly; this is normal and helps create that delicious caramelized flavor. Add the confectioner’s sugar and stir until most of the clumps dissolve, leaving some to dissolve as the glaze sets. Let the glaze sit at room temperature until ready to pour. This resting period allows the flavors to meld and the glaze to reach the perfect consistency for pouring.
8-Final steps: Pour the warm glaze over the warm cake that has been poked with holes and allow it to soak in and set for about 30 minutes before serving. Watching the glaze seep into those little holes is almost as satisfying as eating the finished cake! The glaze quantity can be adjusted according to sweetness preference, so feel free to use less if you prefer a less sweet version.
Notes
🧈 Use unsalted butter for best results; omit added salt if using salted butter.
🍳 Butter should be room temperature but not unevenly heated.
🥛 Use both baking powder and baking soda for optimal rise and texture.
🍋 Substitute buttermilk by adding 1 tablespoon lemon juice or vinegar to milk, letting sit 5 minutes.
💡 Reverse creaming, cutting butter into dry ingredients first, yields tender cake.
🔥 Best served warm; refrigerate leftovers and reheat gently.
🍬 Adjust glaze quantity according to desired sweetness.
- Prep Time: 20 minutes
- Glaze setting time: 30 minutes
- Cook Time: 45 minutes
- Category: Dessert
- Method: Baking
- Cuisine: American
Nutrition
- Serving Size: 1 slice
Keywords: Vanilla Buttermilk Cake, Moist Cake, Soft Texture Cake, Buttermilk Dessert