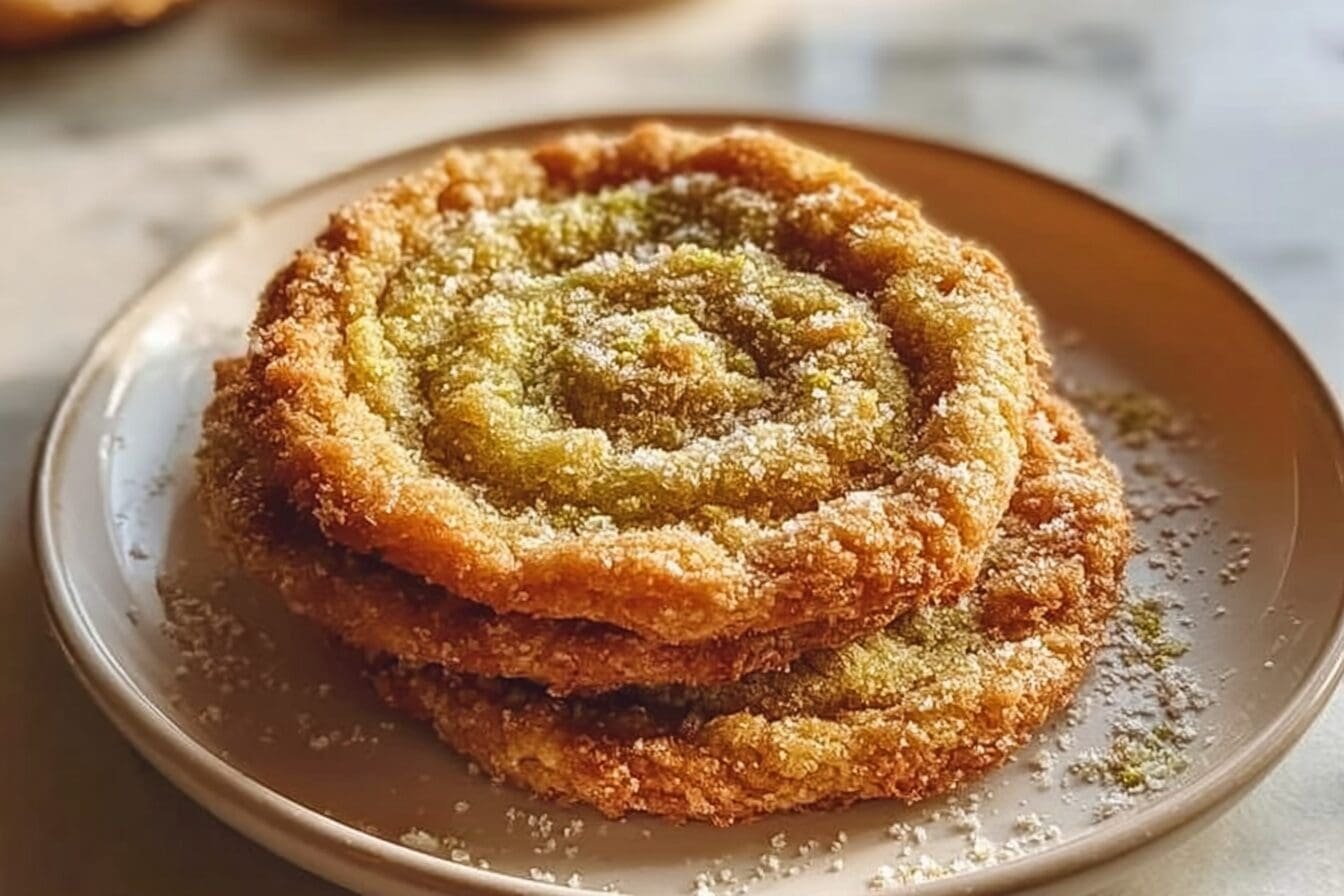
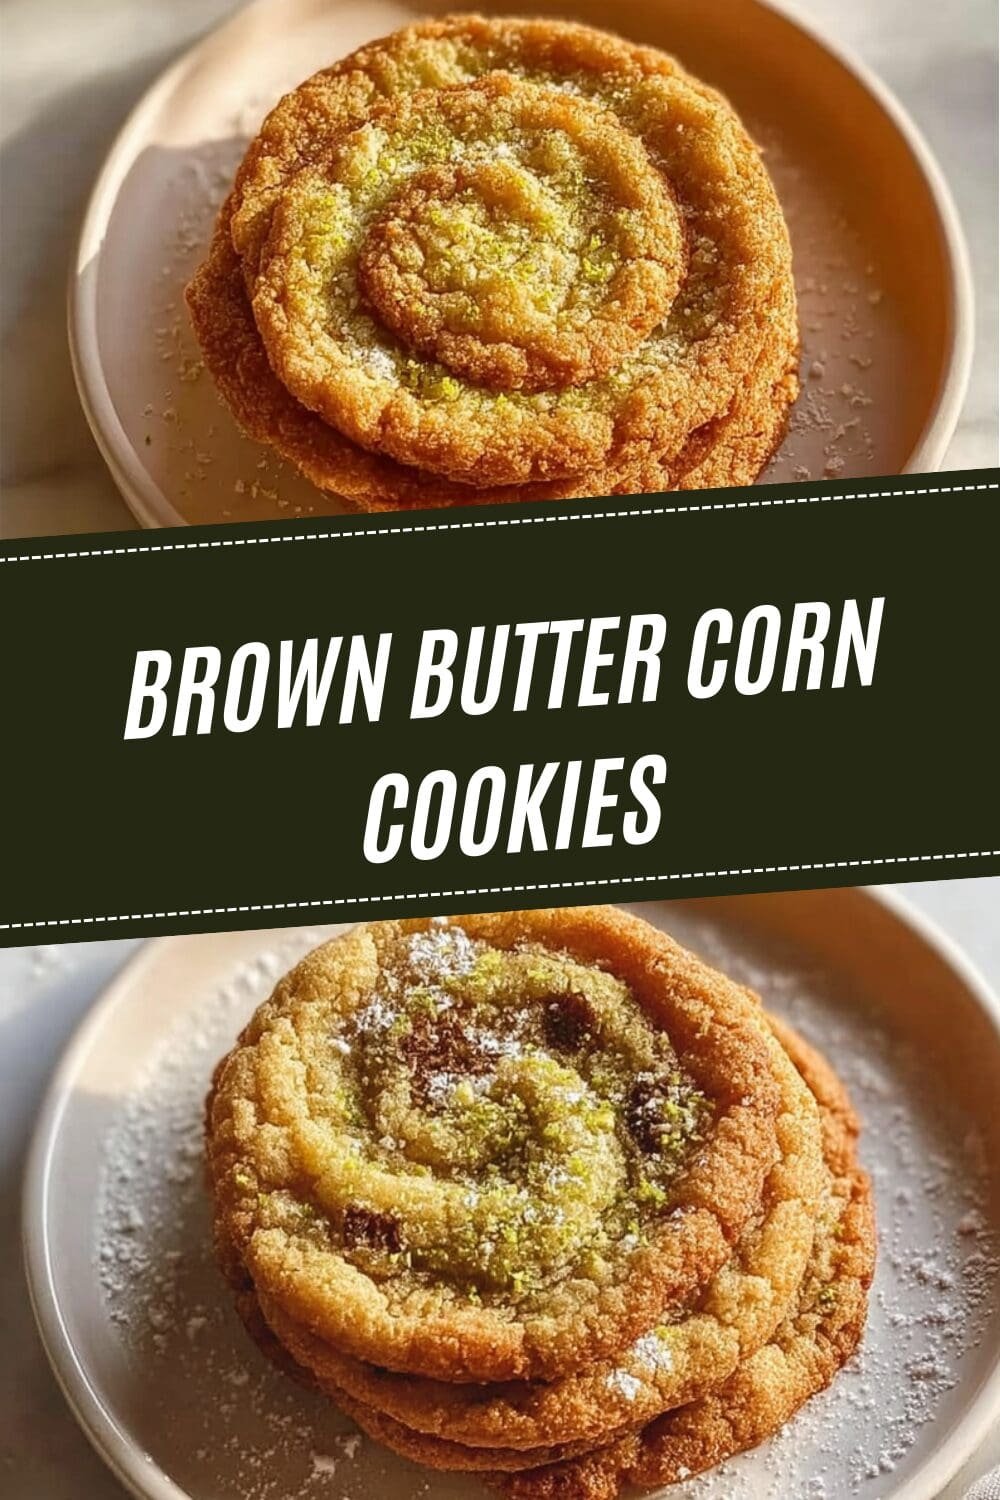
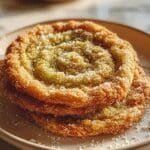
Why You’ll Love This Brown Butter Corn Cookies
If you’re looking for a unique cookie that will surprise and delight your taste buds, Brown Butter Corn Cookies are the perfect choice. These cookies combine the nutty, rich flavor of browned butter with the subtle sweetness of fresh corn kernels, creating a taste experience unlike any other cookie you’ve tried. What makes these cookies truly special is how they balance sophistication with comfort in every bite.
The brown butter adds depth and nuttiness that provides the perfect backdrop for the corn’s natural sweetness. While some might be skeptical about corn in a dessert, these cookies convert even the most doubtful tasters into fans. The texture is exceptional too, with crispy edges giving way to a soft, chewy center that melts in your mouth. Similar to our lemon oatmeal cookies, these treats offer a perfect texture contrast that makes them irresistible.
These cookies are perfect for summer gatherings when fresh corn is at its peak, but they can be enjoyed year-round with frozen corn. The recipe comes together relatively quickly, making them ideal for both experienced bakers looking for something new and beginners wanting to try their hand at a slightly unusual but thoroughly delicious cookie. Once you taste them, you’ll understand why they’re becoming increasingly popular in bakeries and home kitchens alike.
Ease of Preparation
This brown butter corn cookies recipe is designed for simplicity and quick cooking, making it perfect for both beginners and busy bakers. The straightforward steps minimize prep time and use common kitchen tools, ensuring a smooth baking experience. Unlike some complex desserts that require specialized equipment or techniques, these cookies only need basic mixing bowls, a baking sheet, and a sauté pan for browning the butter.
Even the process of browning butter is easier than many people think, and we provide clear instructions to guide you through this flavor-enhancing step. The dough comes together quickly and doesn’t require lengthy resting periods beyond the brief chilling time to ensure the cookies hold their shape in the oven. From start to finish, you can have these delicious treats ready to enjoy in just under an hour.
Health Benefits
Packed with wholesome ingredients, these brown butter corn cookies offer nutritional advantages beyond their delicious taste. The corn provides fiber and essential vitamins, including B vitamins and antioxidants that support overall health. Corn is surprisingly nutritious and adds a natural sweetness that reduces the need for excessive sugar in the recipe.
The rolled oats contribute additional fiber, protein, and important minerals like manganese and phosphorus. While these are still cookies meant to be enjoyed as an occasional treat, they contain more nutritional value than many traditional cookie recipes. The use of both granulated and dark brown sugar provides a balanced sweetness, while the moderate amount of butter ensures richness without going overboard on saturated fats.
For those who are mindful of portion sizes, the recipe yields approximately 15 cookies, making it easy to enjoy one or two without excessive indulgence. The protein from the egg and yolk, combined with the fiber from the oats and corn, also provides some satiety that can help prevent overeating.
Versatility
Adaptable to various dietary needs, this recipe can easily be modified to suit different preferences while maintaining the cookies’ delightful texture and taste. Whether you need to accommodate dietary restrictions or simply want to experiment with new flavors, these cookies provide an excellent base for creativity. The basic recipe works beautifully on its own, but it also welcomes additions and substitutions that can make it your own signature cookie.
For those who prefer a stronger corn flavor, you can increase the amount of corn kernels slightly or even incorporate some corn flour or cornmeal into the mix. If you’re a fan of nuts, toasted pecans or walnuts complement the corn and brown butter flavors perfectly. Chocolate lovers might find that white chocolate chips enhance the natural sweetness of the corn without overpowering the delicate flavor profile.
Distinctive Flavor
The combination of nutty brown butter and sweet corn creates a unique flavor profile that stands out from traditional cookies. This balance of rich and fresh notes promises a memorable treat for any occasion. While the idea of corn in a cookie might seem unusual at first, the flavor is surprisingly sophisticated and appealing to a wide range of palates.
The brown butter provides toasted, nutty notes that pair beautifully with the slightly sweet, vegetal flavor of the corn. It’s reminiscent of sweet cornbread but in a lighter, more delicate cookie form. The sugars caramelize nicely during baking, creating golden edges with a satisfying crunch that contrasts with the tender center. This complexity of flavors and textures is what makes these brown butter corn cookies truly special and worth trying.
“The surprising combination of brown butter and corn creates a cookie that’s both sophisticated and comforting. Your family and friends will be asking for the recipe after just one bite!”
Jump To
- 1. Why You’ll Love This Brown Butter Corn Cookies
- 2. Essential Ingredients for Brown Butter Corn Cookies
- 3. How to Prepare the Perfect Brown Butter Corn Cookies: Step-by-Step Guide
- 4. Dietary Substitutions to Customize Your Brown Butter Corn Cookies
- 5. Mastering Brown Butter Corn Cookies: Advanced Tips and Variations
- 6. How to Store Brown Butter Corn Cookies: Best Practices
- 7. FAQs: Frequently Asked Questions About Brown Butter Corn Cookies
- 8. Brown Butter Corn Cookies
Essential Ingredients for Brown Butter Corn Cookies
Before we dive into the baking process, let’s gather all the necessary ingredients. The success of your brown butter corn cookies depends on using the right quantities and quality ingredients. Each component plays a specific role in creating the perfect texture and flavor that makes these cookies so special.
Ingredients List
- 3/4 cup unsalted butter (170 grams)
- 1/2 cup rolled oats (50 grams)
- 1 ear of corn kernels, roughly chopped (110 grams)
- 1 large egg
- 1 large egg yolk
- 3/4 cup plus 1 tablespoon granulated sugar (170 grams)
- 1/4 cup dark brown sugar (50 grams)
- 1 teaspoon kosher salt (use half if a coarser salt variety is used)
- 1/2 teaspoon baking soda
- 1/2 teaspoon baking powder
- 1 cup all-purpose flour (145 grams)
- Flaky salt (optional for topping)
Main Ingredients
Unsalted butter is the foundation of these cookies, as browning enhances the nutty flavor crucial to the cookies’ unique taste. If you haven’t browned butter before, this guide explains the process in detail. The rolled oats add both texture and nutrition while providing a subtle earthiness that complements the corn. The fresh corn kernels provide the characteristic sweetness that makes these cookies special, and when roughly chopped, they distribute evenly throughout the dough for consistent flavor in every bite.
Using unsalted butter allows you to control the salt content precisely, which is important because the salt balances the sweetness and enhances the overall flavor profile. The combination of both an egg and an additional egg yolk creates a rich texture while providing structure and moisture. The granulated sugar contributes to crispiness, while the dark brown sugar adds moisture and a subtle molasses flavor that deepens the overall taste.
Leavening and Flavor Agents
Baking powder and baking soda work together to help the cookies rise and become light with a slightly crispy edge. The baking soda also reacts with the brown sugar’s molasses content to promote spreading and browning, giving the cookies their attractive appearance and texture. The kosher salt might seem like a small detail, but it’s essential for bringing out the flavors of the other ingredients, particularly the corn and brown butter.
The optional flaky salt on top creates a professional finishing touch and provides a satisfying crunch that contrasts with the soft cookie. This garnish is optional but highly recommended for the complete flavor experience, especially if you enjoy the sweet and salty combination that’s popular in many modern desserts.
Binder and Structure
The egg and egg yolk bind the ingredients and give moisture to the dough, while the all-purpose flour adds structure and chewiness. Using both whole egg and additional yolk creates the perfect balance of richness and structure the proteins in the egg white help bind the ingredients, while the yolk adds fat for tenderness and richness. The flour provides the gluten network that gives the cookies their structure while preventing them from spreading too thin.
Weighing your ingredients rather than measuring by volume is recommended for best results, as it ensures accuracy and ideal dough texture. This is particularly important for the flour, as different measuring methods can result in significantly different amounts, affecting the final texture of your cookies.
How to Prepare the Perfect Brown Butter Corn Cookies: Step-by-Step Guide
Now that we have all our ingredients ready, let’s walk through the process of making these delicious cookies. Follow these steps carefully for the best results, and don’t worry while browning butter might sound intimidating, it’s actually quite simple once you understand the process.
Preparation and Cooking Time
| Task | Time |
|---|---|
| Preparation | 30 minutes |
| Cooking | 15 minutes |
| Total Time | 45 minutes |
| Yield | Approximately 15 cookies |
Step 1: Brown the Butter, Oats, and Corn
In a medium sauté pan over medium-low heat, combine butter, oats, and corn kernels. Cook, stirring occasionally, until the butter solids brown and oats turn golden, about 4-5 minutes. This step is essential for the deep flavor profile of the brown butter corn cookies and creates the toasty, nutty base that makes these treats special. You’ll notice the butter foaming and then subsiding as the milk solids brown this is when the magic happens.
Be patient during this step and keep a close eye on the pan, as the butter can go from perfectly browned to burnt quickly. The smell should be nutty and toasty, not acrid or burnt. The oats will also toast nicely, adding to the overall flavor profile. Once browned, remove from heat immediately to prevent further cooking.
Step 2: Cool the Mixture
Transfer the mixture to a small heat-proof bowl and cool it in a larger bowl of ice water until the butter mixture firms to a softened paste, about 4-5 minutes. Whisk the brown butter mixture once cooled. This cooling process is important because it prevents the dough from spreading too much during baking.
If you add hot butter to your eggs and sugar, you might end up with scrambled eggs or dough that spreads too much in the oven. The ice water bath helps cool the mixture quickly while preventing it from becoming too cold and solid. The goal is to achieve a softened paste consistency that will cream nicely with the sugars.
Step 3: Cream the Butter and Sugars
In a large bowl, beat the cooled brown butter mixture with the egg, egg yolk, granulated sugar, and brown sugar using an electric mixer until light and fluffy, about 3-4 minutes. This step incorporates air into the dough, creating a lighter texture in the finished cookies. Don’t rush this process the light and fluffy appearance indicates that enough air has been incorporated.
For best results, use room-temperature eggs, as they incorporate more easily and create a more uniform batter. The mixture should increase in volume and become paler in color as you beat it. This aeration is what helps give the cookies their light texture while maintaining a chewy interior.
Step 4: Add Dry Ingredients
Add salt, baking powder, and baking soda. Then add flour and mix on the lowest setting until just combined and fluffy. Be careful not to overmix, which can result in tough cookies. The dough should be soft but hold its shape when scooped.
It’s better to slightly undermix than to overmix at this stage. Once you no longer see streaks of dry flour, stop mixing. The dough will be slightly sticky, but this is normal. Chilling the dough in the next step will make it easier to handle and help control spread during baking.
Step 5: Form and Chill the Dough
Scoop dough into 45-gram balls and chill in the refrigerator while preheating the oven to 350°F (175°C). Chilling the dough balls before baking improves texture and helps the cookies maintain their shape. This brief chilling period solidifies the fat in the dough, which affects how the cookies spread in the oven.
Using a cookie scoop ensures uniform size, which means all your cookies will bake at the same rate. If you don’t have a scoop, you can use tablespoons to measure equal portions. The 45-gram size yields a nice, generously sized cookie that’s satisfying without being overwhelming.
Step 6: Bake the Cookies
Bake the dough balls at 350°F for 11-13 minutes or until the centers no longer look wet. After baking, tap the sheet pan firmly on the counter to deflate the cookies and create crinkled tops. Optionally sprinkle with flaky salt for that professional touch. This tapping technique creates the attractive cracked surface that makes these cookies look professionally made.
Watch the cookies closely at the end of the baking time, as they can go from perfectly done to overbaked quickly. The edges should be golden brown, but the centers should still look slightly soft. They will continue to set as they cool on the baking sheet.
Step 7: Cool and Serve
Let cookies cool before serving. They will continue to set slightly as they cool. These brown butter corn cookies are best enjoyed shortly after cooling but can be stored for later enjoyment. The cooling time allows the structure to firm up, so the cookies don’t fall apart when you pick them up.
For the best eating experience, serve the cookies at room temperature or slightly warm. If you’ve stored them, a quick 10-second stint in the microwave can bring back some of that freshly baked warmth and softness. Enjoy them on their own or with a glass of milk, cup of coffee, or your favorite tea.

Dietary Substitutions to Customize Your Brown Butter Corn Cookies
One of the wonderful things about this recipe is its adaptability to various dietary needs and preferences. Here are some substitutions you can make to customize these cookies while keeping their delicious character.
Vegan Options
Consider swapping the butter with coconut oil or vegan margarine and replacing the egg with flaxseed meal mixed with water or aquafaba for vegan baking. These plant-based alternatives can maintain richness while keeping the recipe animal-product free. To create the brown butter flavor that’s central to this recipe, you might brown the vegan margarine carefully, or add a small amount of toasted nut butter or nutritional yeast to mimic the nutty notes.
For the egg, a flax egg (1 tablespoon ground flaxseed mixed with 3 tablespoons water and allowed to sit for 15 minutes) works well as a binder. Commercial egg replacers are also available and can be used according to package directions. Keep in mind that vegan versions may have slightly different texture and flavor than the original, but they can still be delicious.
Gluten-Free Alternatives
For gluten-free diets, a certified gluten-free flour blend ensures the cookies remain safe and maintain the desired texture. You may also need to ensure your oats are certified gluten-free, as regular oats are often processed in facilities that handle wheat. Look for a flour blend that includes xanthan gum or add a small amount yourself to help with structure and binding.
When making gluten-free substitutions, the texture might be slightly different from the original, but the flavors will still shine through. The cookies might be a bit more delicate, so handle them gently when transferring from the baking sheet.
Lower Sugar Variations
For those watching their sugar intake, you can reduce the amount of sugar or use alternative sweeteners like erythritol or stevia. While this may slightly change the texture of the cookies, the corn’s natural sweetness will help maintain the overall flavor profile. Keep in mind that sugar contributes to texture as well as sweetness, so reducing it significantly may result in cookies that spread less and have a different consistency.
If you choose to use alternative sweeteners, check package instructions for conversion rates, as they may not substitute 1:1 with regular sugar. Some alternative sweeteners can also have a cooling effect or aftertaste that you might want to account for when adjusting the recipe.
Flavor Enhancements
Experiment with cinnamon or nutmeg to add warmth and spice. A teaspoon of cinnamon pairs beautifully with both corn and brown butter, creating a cozy, comforting flavor profile. Nutmeg adds a more subtle warmth that enhances the buttery notes without overpowering the delicate corn flavor.
To enhance flavor variances, a touch of vanilla or almond extract provides depth. A teaspoon of vanilla extract is a classic addition that rounds out the flavors, while a small amount of almond extract can add a sophisticated nutty note that complements the brown butter perfectly. These additions can transform the basic recipe into something uniquely yours.
Mastering Brown Butter Corn Cookies: Advanced Tips and Variations
Once you’ve mastered the basic recipe, you might want to explore these advanced tips and variations to take your brown butter corn cookies to the next level. These suggestions will help you customize the cookies to your preferences and ensure consistent results every time you bake.
Pro Cooking Techniques
Achieve a more intense flavor by carefully monitoring the butter’s browning process to avoid burning. The difference between perfectly browned butter and burnt butter is just a matter of seconds, so stay attentive during this crucial step. Some bakers find that using a light-colored stainless steel pan makes it easier to see the color changes in the butter compared to darker pans.
Chilling the dough for 30 minutes before baking can improve texture and enhance flavor absorption. This allows the flour to fully hydrate and the flavors to meld, resulting in cookies with better structure and more developed taste. For even better results, you can let the dough rest in the refrigerator overnight, though you may need to let it come to slightly cooler than room temperature before scooping.
For the most consistent results, use a kitchen scale to weigh your ingredients rather than measuring by volume. This is especially important for flour, which can vary greatly in density depending on how it’s measured. Weighing ensures accuracy and ideal dough texture every time.
Flavor Variations
Incorporate mix-ins such as toasted pecans, white chocolate chips, or dried cranberries for added complexity. Toasted pecans complement the nutty brown butter flavor, white chocolate enhances the sweetness of the corn, and dried cranberries add a tart contrast that balances the richness.
Alternatively, try rolling dough in cornmeal or cornflakes for extra texture. This creates a crunchy exterior that contrasts beautifully with the soft interior. You can also experiment with different types of corn try sweet white corn for a milder flavor or colorful varieties like blue or red corn for visual interest and slightly different taste profiles.
If you’re looking for more unique cookie recipes, our churro cheesecake cookies offer another creative twist on traditional treats. Having several specialty cookie recipes in your repertoire allows you to impress friends and family with unexpected flavors and textures.
Presentation Tips
Serve the cookies dusted with powdered sugar or alongside a scoop of vanilla ice cream for an elegant dessert. The contrast between the rustic cookies and an elegant presentation makes for a memorable dessert experience. You can also create a cookie sandwich by placing a small amount of vanilla buttercream or cream cheese frosting between two cookies.
Garnish with fresh mint or edible flowers for visual appeal at special gatherings. A sprig of mint or a few edible pansies can transform a simple plate of cookies into an impressive dessert presentation. If serving for a special occasion, consider arranging the cookies on a wooden board or slate platter with a few ears of decorative corn or stalks of wheat for a harvest-inspired presentation.
Make-Ahead Options
Dough can be prepared in advance and refrigerated for up to 3 days, or frozen for up to 1 month. This makes it easy to have fresh-baked cookies whenever the craving strikes. If freezing the dough balls, arrange them in a single layer on a baking sheet until firm, then transfer to a freezer bag to prevent them from sticking together.
Bake directly from frozen by adding a couple of extra minutes to baking time, perfect for busy schedules. This method is excellent for holiday baking or when you want to be prepared for unexpected guests. You can also pre-portion the dough and freeze it in log form, then slice and bake as needed.
How to Store Brown Butter Corn Cookies: Best Practices
To ensure your brown butter corn cookies remain delicious for as long as possible, proper storage is essential. Here are the best methods for keeping your cookies fresh and tasty so you can enjoy them at their best.
Room Temperature Storage
Store cookies in an airtight container at room temperature for up to 3 days to maintain crispness and moisture balance. This storage method preserves the texture while keeping the cookies readily accessible for snacking. If you prefer your cookies on the softer side, place a slice of white bread in the container with the cookies the bread will absorb excess moisture and keep the cookies soft without making them soggy.
Choose a container that’s just large enough to hold the cookies without excessive empty space. Too much air in the container can accelerate staleness. If you’re stacking the cookies, place a piece of parchment paper between layers to prevent them from sticking together.
Refrigeration Options
For slightly longer storage, you can keep cookies in the refrigerator for up to a week. Be sure to bring them to room temperature before serving for the best texture and flavor experience. The cold can cause the butter in the cookies to firm up, making them harder and less flavorful than when at room temperature.
When refrigerating, use an airtight container to prevent the cookies from absorbing odors from other foods in the refrigerator. You might also want to place a paper towel in the container to absorb excess moisture, which can make the cookies soggy.
Freezing Methods
For longer storage, freeze baked cookies in a sealed freezer-safe bag or container for up to 3 months. To avoid freezer burn, separate layers with parchment paper. This method allows you to enjoy these treats well beyond their fresh-baked date. Freezing is particularly useful if you’ve baked a large batch or want to prepare cookies in advance for a special occasion.
Label the container with the date and type of cookie so you can keep track of what’s in your freezer. When thawing frozen cookies, place them in a single layer on a wire rack at room temperature for about 30 minutes before serving.
Reheating Instructions
Warm cookies in a preheated oven at 300°F (150°C) for 5-7 minutes to restore freshness and softness without compromising texture. This step is especially helpful if your cookies have become slightly stale during storage. Avoid microwaving, as this can make cookies tough and unevenly warmed.
For a quick refresh, you can also place cookies in a 350°F oven for just 2-3 minutes. Watch carefully to prevent burning. The goal is just to warm them through and revive the texture, not to recook them.
Meal Prep Considerations
Bake large batches and freeze dough balls, baking fresh cookies as needed. This strategy ensures a constant supply of fresh brown butter corn cookies with minimal daily effort, making it perfect for busy households. Having ready-to-bake cookie dough on hand means you can enjoy freshly baked cookies without starting the entire recipe from scratch each time.
For ultimate convenience, freeze the dough balls on a baking sheet until firm, then transfer to a freezer bag. This prevents them from sticking together and allows you to bake just as many cookies as you need at a time. This method is particularly useful during the holiday season or when unexpected guests arrive.
FAQs: Frequently Asked Questions About Brown Butter Corn Cookies
What type of butter should I use to make brown butter corn cookies?
Use unsalted butter for the best control over the saltiness in brown butter corn cookies. Brown the butter slowly over medium heat until it turns golden brown and has a nutty aroma. Cooling the browned butter to a softened paste before mixing helps prevent the dough from spreading too much during baking.
Can I use frozen corn instead of fresh corn for brown butter corn cookies?
Yes, frozen corn can be used as a substitute for fresh corn. Thaw the frozen corn completely and drain any excess moisture to avoid soggy dough. Raw frozen corn is preferred, but pre-cooked frozen corn will also work in the recipe with good results.
How can I store leftover brown butter corn cookies to keep them fresh?
Store the cookies in an airtight container at room temperature for up to 3 days. To keep them fresh longer, place them in the refrigerator for up to a week or freeze for up to 3 months. When freezing, separate layers with parchment paper to avoid sticking.
What can I do if my brown butter corn cookie dough spreads too much while baking?
If the dough spreads excessively, ensure the browned butter has cooled properly to a softened paste before mixing. Chilling the dough for 30 minutes before scooping can also help maintain the cookie shape. Additionally, avoid adding extra butter or liquids that can increase spread.
Is it possible to make a vegan version of brown butter corn cookies?
Yes, you can make a vegan version by substituting regular butter with vegan butter or coconut oil and replacing eggs with flax eggs (1 tablespoon flaxseed meal mixed with 3 tablespoons water per egg). These substitutions deliver similar texture and flavor while keeping the cookies vegan-friendly.
Brown Butter Corn Cookies
- Total Time: 45 minutes
- Yield: Approximately 15 cookies
- Diet: Vegetarian
Description
🍪 Discover the unique combination of crispy oats and sweet corn in these Butter Oat Corn Cookies for a delightful treat.
🌽 This recipe offers a rich buttery flavor with a satisfying crunch that makes for a perfect snack or dessert anytime.
Ingredients
– 3/4 cup unsalted butter (170 grams)
– 1/2 cup rolled oats (50 grams)
– 1 ear of corn kernels, roughly chopped (110 grams)
– 1 large egg
– 1 large egg yolk
– 3/4 cup plus 1 tablespoon granulated sugar (170 grams)
– 1/4 cup dark brown sugar (50 grams)
– 1 teaspoon kosher salt (use half if a coarser salt variety is used)
– 1/2 teaspoon baking soda
– 1/2 teaspoon baking powder
– 1 cup all-purpose flour (145 grams)
– Flaky salt (optional for topping)
Instructions
Step 1: Brown the Butter, Oats, and Corn In a medium sauté pan over medium-low heat, combine butter, oats, and corn kernels. Cook, stirring occasionally, until the butter solids brown and oats turn golden, about 4-5 minutes. This step is essential for the deep flavor profile of the brown butter corn cookies and creates the toasty, nutty base that makes these treats special. You’ll notice the butter foaming and then subsiding as the milk solids brown this is when the magic happens. Be patient during this step and keep a close eye on the pan, as the butter can go from perfectly browned to burnt quickly. The smell should be nutty and toasty, not acrid or burnt. The oats will also toast nicely, adding to the overall flavor profile. Once browned, remove from heat immediately to prevent further cooking.
Step 2: Cool the Mixture Transfer the mixture to a small heat-proof bowl and cool it in a larger bowl of ice water until the butter mixture firms to a softened paste, about 4-5 minutes. Whisk the brown butter mixture once cooled. This cooling process is important because it prevents the dough from spreading too much during baking. If you add hot butter to your eggs and sugar, you might end up with scrambled eggs or dough that spreads too much in the oven. The ice water bath helps cool the mixture quickly while preventing it from becoming too cold and solid. The goal is to achieve a softened paste consistency that will cream nicely with the sugars.
Step 3: Cream the Butter and Sugars In a large bowl, beat the cooled brown butter mixture with the egg, egg yolk, granulated sugar, and brown sugar using an electric mixer until light and fluffy, about 3-4 minutes. This step incorporates air into the dough, creating a lighter texture in the finished cookies. Don’t rush this process the light and fluffy appearance indicates that enough air has been incorporated. For best results, use room-temperature eggs, as they incorporate more easily and create a more uniform batter. The mixture should increase in volume and become paler in color as you beat it. This aeration is what helps give the cookies their light texture while maintaining a chewy interior.
Step 4: Add Dry Ingredients Add salt, baking powder, and baking soda. Then add flour and mix on the lowest setting until just combined and fluffy. Be careful not to overmix, which can result in tough cookies. The dough should be soft but hold its shape when scooped. It’s better to slightly undermix than to overmix at this stage. Once you no longer see streaks of dry flour, stop mixing. The dough will be slightly sticky, but this is normal. Chilling the dough in the next step will make it easier to handle and help control spread during baking.
Step 5: Form and Chill the Dough Scoop dough into 45-gram balls and chill in the refrigerator while preheating the oven to 350°F (175°C). Chilling the dough balls before baking improves texture and helps the cookies maintain their shape. This brief chilling period solidifies the fat in the dough, which affects how the cookies spread in the oven. Using a cookie scoop ensures uniform size, which means all your cookies will bake at the same rate. If you don’t have a scoop, you can use tablespoons to measure equal portions. The 45-gram size yields a nice, generously sized cookie that’s satisfying without being overwhelming.
Step 6: Bake the Cookies Bake the dough balls at 350°F for 11-13 minutes or until the centers no longer look wet. After baking, tap the sheet pan firmly on the counter to deflate the cookies and create crinkled tops. Optionally sprinkle with flaky salt for that professional touch. This tapping technique creates the attractive cracked surface that makes these cookies look professionally made. Watch the cookies closely at the end of the baking time, as they can go from perfectly done to overbaked quickly. The edges should be golden brown, but the centers should still look slightly soft. They will continue to set as they cool on the baking sheet.
Step 7: Cool and Serve Let cookies cool before serving. They will continue to set slightly as they cool. These brown butter corn cookies are best enjoyed shortly after cooling but can be stored for later enjoyment. The cooling time allows the structure to firm up, so the cookies don’t fall apart when you pick them up. For the best eating experience, serve the cookies at room temperature or slightly warm. If you’ve stored them, a quick 10-second stint in the microwave can bring back some of that freshly baked warmth and softness. Enjoy them on their own or with a glass of milk, cup of coffee, or your favorite tea.
Notes
⚖️ Weigh ingredients for accuracy and ideal dough texture.
❄️ If using frozen corn, thaw and drain excess water; raw frozen corn is preferred.
🕒 Chilling dough balls before baking improves texture and allows better shaping.
- Prep Time: 30 minutes
- Cook Time: 15 minutes
- Category: Dessert
- Method: Baking, sautéing
- Cuisine: American
Nutrition
- Serving Size: 1 cookie
- Calories: 150 calories
- Sugar: 10g
- Sodium: 150mg
- Fat: 8g
- Saturated Fat: 5g
- Unsaturated Fat: 2.5g
- Trans Fat: 0g
- Carbohydrates: 18g
- Fiber: 1g
- Protein: 2g
- Cholesterol: 40mg
Keywords: Butter Oat Cookies, Corn Cookies, Crispy Treat, Flavorful Cookies