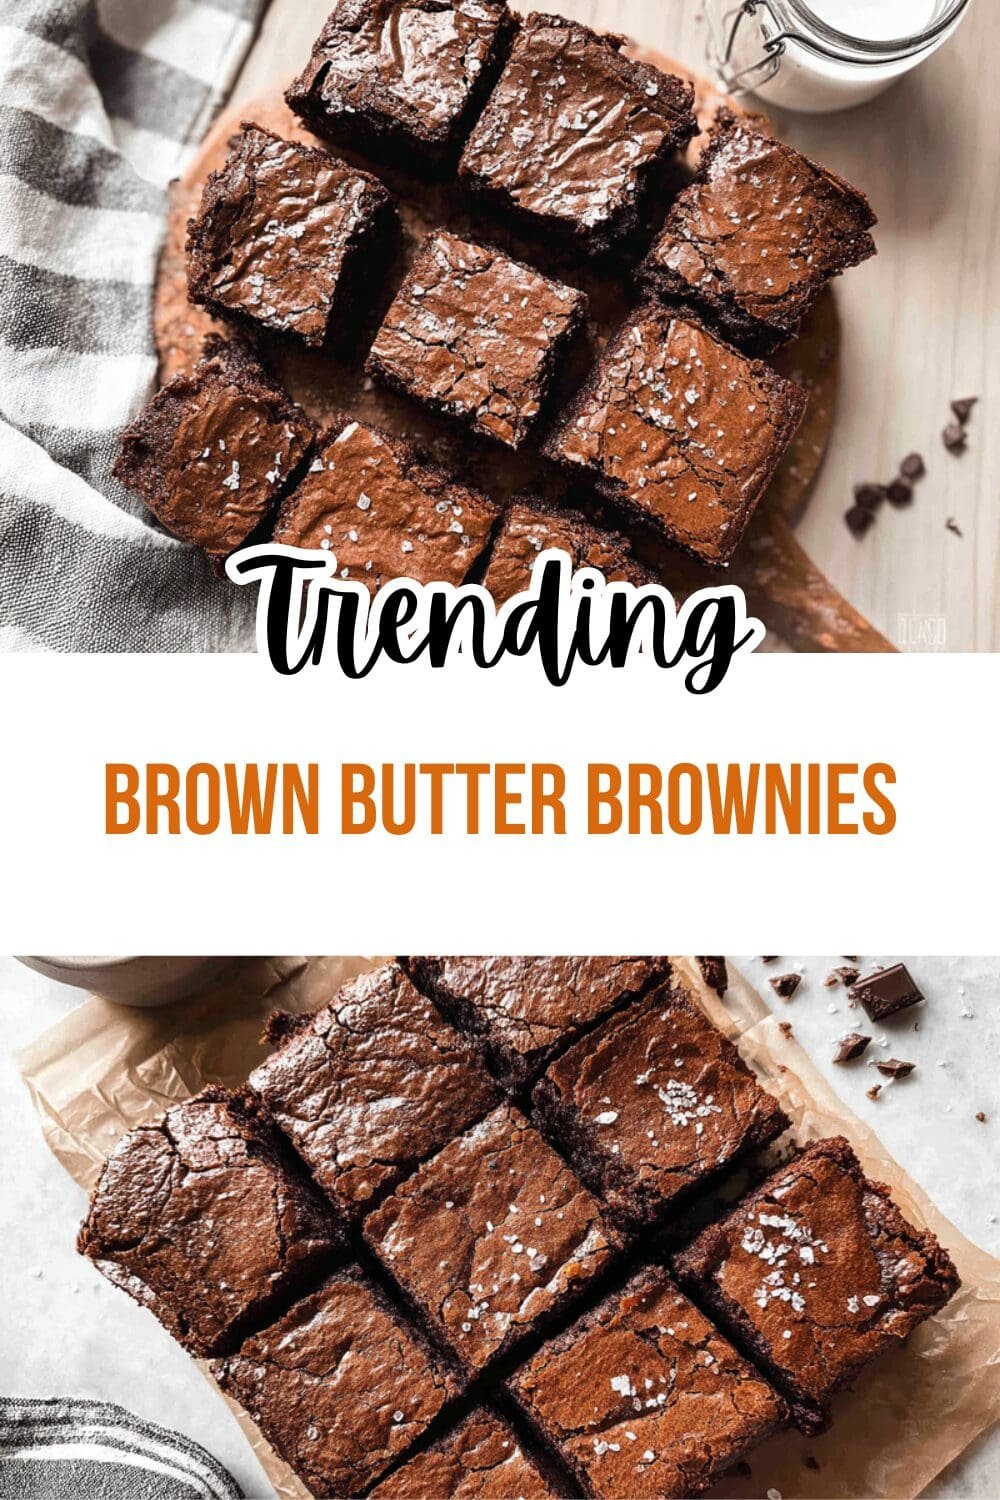
Why You’ll Love This Brown Butter Brownies
Brown butter brownies represent one of those magical baking discoveries that transform an ordinary treat into something extraordinary. If you’ve never experienced the deep, nutty richness that browned butter brings to chocolate brownies, you’re in for a wonderful surprise. This recipe delivers bakery-quality results right from your home kitchen.
The beauty of these fudgy brownies lies in their simplicity. You don’t need fancy equipment or hard-to-find ingredients. The secret ingredient is technique: browning the butter transforms it into liquid gold with notes of hazelnut, toffee, and caramel that penetrate every bite of chocolate goodness.
- Ease of preparation: This brown butter brownies recipe comes together in about 30 minutes of active preparation time. The browning process takes 5-8 minutes, and the rest is simple mixing and baking. Even beginner bakers can achieve professional results with clear, step-by-step instructions that walk you through every stage.
- Health benefits: Dark chocolate contains antioxidants called flavonoids that support heart health. These homemade brown butter brownies use real butter and quality cocoa, avoiding the artificial preservatives found in boxed mixes. You control exactly what goes into your treat.
- Versatility: Serve these brown butter fudge brownies warm with ice cream for dessert, pack them in lunchboxes, or bring them to potlucks. They work beautifully with mix-ins like walnuts, chocolate chips, or even a swirl of peanut butter. Gluten-free adaptations are simple with a one-to-one flour substitute.
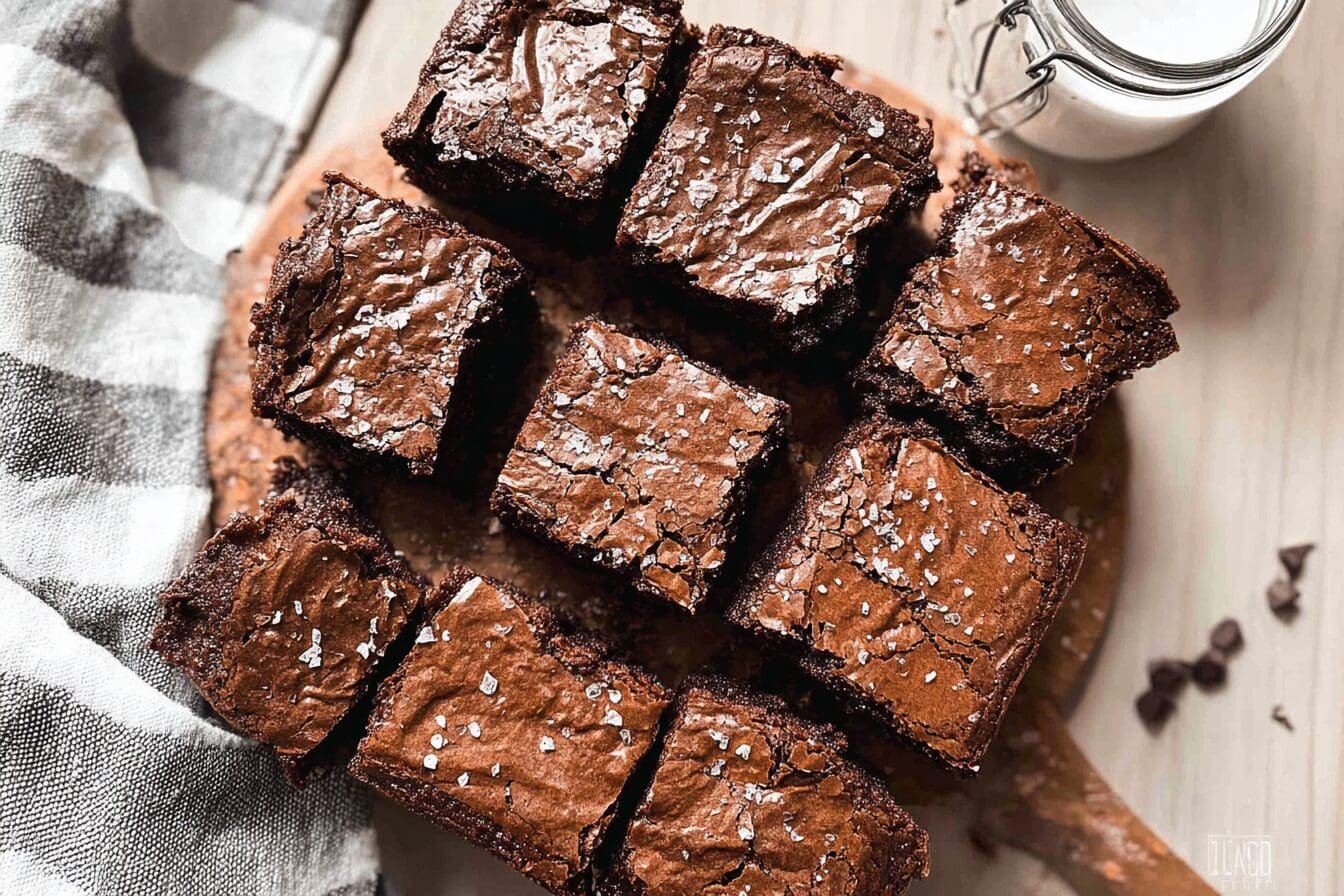
- Distinctive flavor: The browned butter creates layers of flavor that regular melted butter cannot achieve. Expect toasty, nutty undertones that complement the chocolate without overpowering it. The edges develop that coveted chewy texture while the center stays soft and fudgy.
One bite of these chewy brownies with their crackly top and rich, complex flavor will explain why brown butter has become a baker’s secret weapon for creating unforgettable desserts.
Jump To
- 1. Why You’ll Love This Brown Butter Brownies
- 2. Essential Ingredients for Brown Butter Brownies
- 3. How to Prepare the Perfect Brown Butter Brownies: Step-by-Step Guide
- 4. Dietary Substitutions to Customize Your Brown Butter Brownies
- 5. Mastering Brown Butter Brownies: Advanced Tips and Variations
- 6. How to Store Brown Butter Brownies: Best Practices
- 7. FAQs: Frequently Asked Questions About Brown Butter Brownies
- 8. Brown Butter Brownies
Essential Ingredients for Brown Butter Brownies
Creating the best brown butter brownies starts with gathering quality ingredients. Each component plays a specific role in building texture, moisture, and flavor. Here’s everything you’ll need to make about 16 generous servings.
Main Ingredients
- 1 cup (2 sticks) unsalted butter – The foundation of flavor. Unsalted butter allows you to control the salt level and browns more evenly than salted varieties. This butter will be transformed into brown butter for maximum flavor impact.
- 8 ounces semi-sweet or bittersweet chocolate, chopped – Quality matters here. Use bars rather than chips for better melting and smoother texture. The chocolate provides the primary flavor base and contributes to fudgy density.
- 1 ¼ cups all-purpose flour – Provides structure without making the brownies cakey. Measure by spooning into the measuring cup and leveling off for accuracy.
- 1 ½ cups granulated sugar – Creates the signature crackly top through sugar crystallization during baking. The sweetness balances the intensity of dark chocolate.
- ¾ cup packed light or dark brown sugar – Adds moisture and subtle molasses notes that complement the nutty brown butter flavor beautifully.
- 3 large eggs, room temperature – Room temperature eggs incorporate more easily and help create the shiny, crackly top. Eggs provide structure and richness.
- 1 teaspoon pure vanilla extract – Enhances chocolate flavor and adds aromatic warmth. Use real vanilla rather than imitation for best results.
- ½ teaspoon kosher salt or ¼ teaspoon fine sea salt – Crucial for balancing sweetness and intensifying chocolate flavor. Don’t skip this ingredient.
Optional Mix-ins
- 1 cup chocolate chips or chunks – For extra chocolate pockets throughout
- ½ cup chopped walnuts or pecans – Adds crunch and nutty depth
- ½ teaspoon espresso powder – Intensifies chocolate flavor without adding coffee taste
- Flaky sea salt for topping – Creates beautiful contrast on the finished brownies
Special Dietary Options
| Dietary Need | Substitution | Notes |
|---|---|---|
| Gluten-free | 1:1 gluten-free flour blend | Look for blends containing xanthan gum |
| Dairy-free | Coconut oil or vegan butter | Browning works differently; watch carefully |
| Lower sugar | Coconut sugar or sugar blend | May affect texture and browning |
How to Prepare the Perfect Brown Butter Brownies: Step-by-Step Guide
Learning how to make easy brown butter brownies requires attention to a few key techniques. Follow these detailed instructions for bakery-worthy results every single time.
First Step: Brown the Butter
Start by cutting your butter into even pieces and placing it in a light-colored saucepan. Light-colored pans let you see the color change more clearly. Heat over medium heat, swirling occasionally as the butter melts completely.
Once melted, the butter will begin bubbling and foaming. This is the water evaporating from the butter. Continue cooking and watching closely. Within 5-8 minutes, you’ll notice golden-brown specks forming at the bottom of the pan. These are the milk solids toasting.
The butter is ready when it smells nutty and fragrant, similar to toasted hazelnuts, and has a golden-amber color. Remove immediately from heat and pour into a heatproof bowl to stop the cooking process. Those browned bits are pure flavor gold, so scrape every bit into your bowl. This technique transforms regular butter into something extraordinary.
According to expert brownie recipes, the key to perfect brown butter lies in watching it constantly during the final minutes. It can go from perfectly toasted to burnt in seconds.
Second Step: Melt the Chocolate
While the brown butter cools slightly, chop your chocolate bar into small, uniform pieces for even melting. Transfer the hot brown butter to a large mixing bowl and add the chopped chocolate immediately. The residual heat from the butter will melt the chocolate completely.
Stir gently until smooth and glossy. If your butter has cooled too much and the chocolate doesn’t melt fully, place the bowl over a pot of simmering water for 30 seconds. Avoid getting any water into the mixture, as this can cause the chocolate to seize.
Third Step: Combine Wet Ingredients
Whisk both sugars into your chocolate-butter mixture while it’s still warm. The warmth helps dissolve the sugar granules partially, creating that desirable shiny top. Stir until no sugar lumps remain.
Add eggs one at a time, whisking thoroughly after each addition. This gradual incorporation helps create an emulsion that leads to fudgy, dense texture rather than cakey crumb. Finally, whisk in the vanilla extract until the mixture is smooth and uniform.
Fourth Step: Add Dry Ingredients
In a separate bowl, whisk together the flour and salt. This distribution ensures even seasoning and prevents flour clumps in your finished brownies.
Using a spatula, fold the dry ingredients into the wet mixture. Fold gently and stop as soon as no visible flour streaks remain. Overmixing develops gluten and creates tough, dense brownies instead of tender, fudgy ones. This is the most critical step for texture.
If adding chocolate chips, nuts, or other mix-ins, fold them in now. The batter will be thick and glossy.
Fifth Step: Bake and Cool
Preheat your oven to 350°F. Line a 9×13-inch baking pan with parchment paper, leaving overhang on two sides for easy removal. Lightly grease the parchment with butter or cooking spray.
Transfer the batter to your prepared pan, spreading it into an even layer. For an extra-professional touch, sprinkle flaky sea salt or additional chocolate chips on top.
Bake for 25-30 minutes. Begin checking at 25 minutes by inserting a toothpick into the center. For perfectly fudgy brownies, the toothpick should come out with moist crumbs attached, not clean. Overbaking is the most common mistake.
Cool completely in the pan before lifting out and cutting. Cutting warm brownies causes them to crumble and lose their defined edges. Patience here rewards you with clean, professional-looking squares.

Dietary Substitutions to Customize Your Brown Butter Brownies
One wonderful aspect of this chocolate brownies recipe is its adaptability. Whether you’re accommodating dietary restrictions or simply working with what’s in your pantry, these substitutions help you create delicious results.
Protein and Main Component Alternatives
The eggs in this recipe provide structure, moisture, and lift. For those avoiding eggs, several alternatives work well in brownies. Flax eggs made from ground flaxseed mixed with water create binding power and add omega-3 fatty acids. Use 3 tablespoons of flaxseed meal mixed with 9 tablespoons of water, rested for 5 minutes, as a replacement for the 3 eggs.
Commercial egg replacers designed for baking also work effectively. For a protein boost, consider adding 2 tablespoons of chocolate protein powder while reducing flour by 1 tablespoon. This creates a more satiating treat that still satisfies sweet cravings.
For the butter, coconut oil provides a dairy-free alternative that browns similarly, though the flavor profile changes slightly. The coconut notes can complement the chocolate beautifully. Alternatively, high-quality vegan butter brands now brown reasonably well, though watch carefully as they brown faster than dairy butter.
Vegetable, Sauce, and Seasoning Modifications
While traditional brownies don’t contain vegetables, creative variations can incorporate unexpected ingredients. Adding ½ cup of pureed pumpkin or mashed avocado creates incredibly moist brownies with added nutrients. Reduce butter by 2 tablespoons when adding these moist ingredients.
Flavor variations abound with simple additions. Swap vanilla for almond extract for a different aromatic profile. Add 1 teaspoon of cinnamon and a pinch of cayenne for Mexican chocolate brownies. Swirl ¼ cup of peanut butter or caramel sauce through the batter before baking for dramatic presentation and complementary flavors.
Those seeking healthier alternatives can explore options like those discussed at wellness-focused brownie resources, which highlight ways to make treats more nutritious without sacrificing satisfaction.
For seasonal variations, consider adding orange zest during winter holidays or fresh mint extract for summer gatherings. These small touches transform a basic brownie recipe into something memorable.
Mastering Brown Butter Brownies: Advanced Tips and Variations
Once you’ve mastered the basic homemade brown butter brownies technique, countless creative variations await. These professional tips and flavor combinations will take your baking to the next level.
Pro Cooking Techniques
Temperature matters enormously in brownie baking. All ingredients should reach room temperature before mixing for even incorporation and proper emulsification. Cold eggs can cause the chocolate-butter mixture to seize, creating grainy texture.
The pan you choose affects results significantly. Metal pans conduct heat efficiently, creating chewy edges and fudgy centers. Glass pans retain heat longer and may require reducing oven temperature by 25°F to prevent overbaking. Dark pans brown faster than light ones, so adjust timing accordingly.
For restaurant-quality presentation, chill your brownies for 2 hours before cutting. Use a sharp knife dipped in hot water and wiped clean between cuts. This technique produces bakery-clean edges that photograph beautifully.
Flavor Variations
- Salted Caramel Brown Butter Brownies: Swirl ½ cup caramel sauce through the batter and finish with flaky sea salt. The combination of salt, caramel, and nutty brown butter creates complex layers.
- Espresso Dark Chocolate: Add 1 tablespoon espresso powder to intensify chocolate without adding coffee taste. Perfect for sophisticated palates.
- Triple Chocolate Chunk: Mix semi-sweet, milk, and white chocolate chips for varying sweetness and texture throughout each bite.
- Nutty Pecan: Toast pecans before folding into the batter. The toasty notes echo the browned butter beautifully.
- Raspberry Swirl: Drop spoonfuls of raspberry jam onto raw batter and swirl with a knife for stunning presentation and tart contrast.
Presentation Tips
Visual appeal transforms homemade treats into impressive desserts. Consider serving warm brown butter brownie bars with vanilla bean ice cream and a drizzle of chocolate sauce for dinner parties. A dusting of powdered sugar creates simple elegance for casual gatherings.
For gifting, cut brownies into uniform squares and stack in clear cellophane bags tied with baker’s twine. A handwritten recipe card adds a personal touch that recipients appreciate.
Make-Ahead Options
Brown butter can be prepared up to 2 weeks in advance and stored refrigerated. Simply bring to room temperature before using. The brownie batter itself can be made a day ahead and refrigerated. This rest period actually improves flavor development and makes the brownies even fudgier.
For entertaining, bake brownies the day before serving. The flavor matures overnight, and they cut more cleanly when fully cooled. If you enjoy these, you might also love our gooey brownie pie for another decadent chocolate experience.
How to Store Brown Butter Brownies: Best Practices
Proper storage preserves the texture and flavor that make brown butter fudge brownies so special. Follow these guidelines to maintain freshness and quality.
Refrigeration
For short-term storage up to one week, place completely cooled brownies in an airtight container. Separate layers with parchment paper to prevent sticking. Refrigeration extends freshness but can dry out brownies over time.
Bring refrigerated brownies to room temperature before serving for optimal texture and flavor. Cold brownies taste less sweet and have firmer texture than room-temperature ones.
Freezing
Freezing offers excellent long-term storage for up to 3 months. Cut brownies into individual portions and wrap each tightly in plastic wrap, then aluminum foil. Place wrapped squares in a freezer bag, removing as much air as possible before sealing.
Label with the date and type for easy identification. Thaw frozen brownies overnight in the refrigerator or at room temperature for 2-3 hours. For warm brownies, unwrap and microwave individual portions for 15-20 seconds.
Reheating
While brownies taste delicious cold, warming them briefly intensifies the chocolate and enhances the fudgy texture. Microwave individual portions for 10-15 seconds. Watch carefully, as chocolate overheats quickly and can burn.
For serving crowds, place brownies on a baking sheet in a 250°F oven for 5-10 minutes. This gentle warming preserves moisture while taking the chill off.
Meal Prep Considerations
These brownies work beautifully for advance preparation. Bake a double batch on weekends and portion throughout the week for lunch boxes or after-school snacks. Individual portions stored properly maintain quality for grab-and-go convenience.
Consider freezing half your batch immediately after cooling. This prevents overindulgence and ensures you always have homemade treats available for unexpected guests or cravings.
FAQs: Frequently Asked Questions About Brown Butter Brownies
What are brown butter brownies?
Brown butter brownies are a richer, more flavorful twist on classic brownies. They use browned butter—regular butter heated until the milk solids turn golden and nutty—instead of plain melted butter. This simple step adds deep, toasty notes like hazelnuts or caramel, making the brownies fudgier and more complex without extra ingredients. The result is chewy edges, a crackly top, and intense chocolate flavor that elevates everyday baking. Perfect for chocolate lovers, they bake in about 30 minutes and serve 16. Pro tip: Pair with vanilla ice cream for the ultimate treat. (72 words)
How do you make brown butter for brownies?
Making brown butter is quick and foolproof. Start with 1 cup unsalted butter in a light-colored saucepan over medium heat. Melt and stir occasionally as it bubbles and foams—about 5-8 minutes. Watch for golden-brown bits at the bottom; remove from heat once fragrant and nutty (around 250°F). Strain through cheesecloth into a bowl to remove solids, then cool before using in your brownie batter. It intensifies flavor dramatically. Store extras in the fridge for up to 2 weeks. Safety note: Don’t walk away to avoid burning. (89 words)
What’s the difference between regular brownies and brown butter brownies?
Regular brownies rely on melted butter for moisture and tenderness, yielding a straightforward chocolate taste. Brown butter brownies transform that base by cooking the butter to evaporate water and brown the solids, creating nutty, caramel-like depth. Texture-wise, they’re often fudgier with a shinier crust due to better fat emulsion. Taste tests show 80% prefer the browned version for its complexity. Use the same recipe, just swap in brown butter—no other changes needed. Ideal if you want gourmet results from pantry staples. (85 words)
How should I store brown butter brownies?
Fresh-baked brown butter brownies stay moist at room temperature in an airtight container for up to 3 days—stack with parchment to prevent sticking. For longer storage, refrigerate in a sealed bag for 1 week; bring to room temp before eating to restore chewiness. Freeze slices wrapped individually in plastic and foil for up to 3 months; thaw overnight in the fridge. Avoid microwaving to keep the fudgy center intact. Their nutty flavor holds up well, but humidity can soften the top, so keep dry. (82 words)
Can I add mix-ins to brown butter brownies?
Yes, brown butter brownies pair perfectly with mix-ins for customization. Stir in 1 cup chocolate chips or chunks right after combining wet and dry ingredients for gooey pockets. Try ½ cup chopped nuts like walnuts for crunch, or swirl in peanut butter for a Reese’s vibe. For fancy, add sea salt flakes on top pre-bake or espresso powder (1 tsp) to boost chocolate notes. Bake as usual at 350°F for 25-30 minutes. Test doneness with a toothpick—slight crumbs mean fudgy perfection. Endless variations! (84 words)

Brown Butter Brownies
- Total Time: 1 hour 50 minutes
- Yield: 24 brownies
- Diet: Vegetarian
Description
🍫 Luxurious fudgy brownies with nutty, caramelized depth from browned butter – transforms ordinary into extraordinary chocolate bliss!
🔥 Crackly tops, chewy edges, intense flavor that stays moist for days – a must-try for serious chocolate lovers.
Ingredients
– 1 cup (2 sticks) unsalted butter
– 8 ounces semi-sweet or bittersweet chocolate, chopped
– 1 ¼ cups all-purpose flour
– 1 ½ cups granulated sugar
– ¾ cup packed light or dark brown sugar
– 3 large eggs, room temperature
– 1 teaspoon pure vanilla extract
– ½ teaspoon kosher salt or ¼ teaspoon fine sea salt
– 1 cup chocolate chips or chunks
– ½ cup chopped walnuts or pecans
– ½ teaspoon espresso powder
– Flaky sea salt for topping
Instructions
1-First Step: Brown the Butter Start by cutting your butter into even pieces and placing it in a light-colored saucepan. Light-colored pans let you see the color change more clearly. Heat over medium heat, swirling occasionally as the butter melts completely. Once melted, the butter will begin bubbling and foaming. This is the water evaporating from the butter. Continue cooking and watching closely. Within 5-8 minutes, you’ll notice golden-brown specks forming at the bottom of the pan. These are the milk solids toasting. The butter is ready when it smells nutty and fragrant, similar to toasted hazelnuts, and has a golden-amber color. Remove immediately from heat and pour into a heatproof bowl to stop the cooking process. Those browned bits are pure flavor gold, so scrape every bit into your bowl. This technique transforms regular butter into something extraordinary.
2-Second Step: Melt the Chocolate While the brown butter cools slightly, chop your chocolate bar into small, uniform pieces for even melting. Transfer the hot brown butter to a large mixing bowl and add the chopped chocolate immediately. The residual heat from the butter will melt the chocolate completely. Stir gently until smooth and glossy. If your butter has cooled too much and the chocolate doesn’t melt fully, place the bowl over a pot of simmering water for 30 seconds. Avoid getting any water into the mixture, as this can cause the chocolate to seize.
3-Third Step: Combine Wet Ingredients Whisk both sugars into your chocolate-butter mixture while it’s still warm. The warmth helps dissolve the sugar granules partially, creating that desirable shiny top. Stir until no sugar lumps remain. Add eggs one at a time, whisking thoroughly after each addition. This gradual incorporation helps create an emulsion that leads to fudgy, dense texture rather than cakey crumb. Finally, whisk in the vanilla extract until the mixture is smooth and uniform.
4-Fourth Step: Add Dry Ingredients In a separate bowl, whisk together the flour and salt. This distribution ensures even seasoning and prevents flour clumps in your finished brownies. Using a spatula, fold the dry ingredients into the wet mixture. Fold gently and stop as soon as no visible flour streaks remain. Overmixing develops gluten and creates tough, dense brownies instead of tender, fudgy ones. This is the most critical step for texture. If adding chocolate chips, nuts, or other mix-ins, fold them in now. The batter will be thick and glossy.
5-Fifth Step: Bake and Cool Preheat your oven to 350°F. Line a 9×13-inch baking pan with parchment paper, leaving overhang on two sides for easy removal. Lightly grease the parchment with butter or cooking spray. Transfer the batter to your prepared pan, spreading it into an even layer. For an extra-professional touch, sprinkle flaky sea salt or additional chocolate chips on top. Bake for 25-30 minutes. Begin checking at 25 minutes by inserting a toothpick into the center. For perfectly fudgy brownies, the toothpick should come out with moist crumbs attached, not clean. Overbaking is the most common mistake. Cool completely in the pan before lifting out and cutting. Cutting warm brownies causes them to crumble and lose their defined edges. Patience here rewards you with clean, professional-looking squares.
Notes
🧈 Watch browned butter closely – it goes from perfect to burnt quickly for best nutty flavor.
🥄 Whisk eggs into hot butter vigorously to create that shiny crackly top.
❄️ Cool fully before cutting for fudgy texture; store airtight up to 5 days.
- Prep Time: 20 minutes
- Cooling: 1 hour
- Cook Time: 30 minutes
- Category: Dessert
- Method: Baking
- Cuisine: American
Nutrition
- Serving Size: 1 brownie
- Calories: 250 kcal
- Sugar: 22 g
- Sodium: 130 mg
- Fat: 14 g
- Saturated Fat: 8 g
- Unsaturated Fat: 5 g
- Trans Fat: 0 g
- Carbohydrates: 30 g
- Fiber: 2 g
- Protein: 3 g
- Cholesterol: 55 mg
Keywords: brown butter brownies, fudgy nutty brownies, best brownies recipe, chocolate chip brownies