Why You’ll Love This Blood Orange Bars
There’s something truly special about blood orange bars, a dessert that combines simplicity with a burst of fresh, zesty flavor. This blood orange bars recipe stands out for its ease of preparation, making it perfect for anyone who wants a tasty treat without a lot of fuss. You’ll love how it turns basic ingredients into something that feels like a professional bake.
The recipe is packed with the natural goodness of blood oranges, which bring vitamin C and antioxidants to the table. This not only supports your health but also adds a guilt-free twist to your dessert options. Whether you’re a beginner in the kitchen or just short on time, these bars offer a fun way to enjoy a bright, citrusy snack that’s versatile for any occasion.
Plus, blood orange bars have a unique taste that mixes tart and sweet notes in every bite. They fit into various diets and can be tweaked to meet different needs, so everyone from busy parents to baking enthusiasts can join in the fun. Try this recipe and see how it adds a pop of color and flavor to your day.
Jump To
- 1. Why You’ll Love This Blood Orange Bars
- 2. Essential Ingredients for Blood Orange Bars
- 3. How to Prepare the Perfect Blood Orange Bars: Step-by-Step Guide
- 4. Dietary Substitutions to Customize Your Blood Orange Bars
- 5. Mastering Blood Orange Bars: Advanced Tips and Variations
- 6. How to Store Blood Orange Bars: Best Practices
- 7. FAQs: Frequently Asked Questions About Blood Orange Bars
- 8. Blood Orange Bars
Essential Ingredients for Blood Orange Bars
Gathering the right ingredients is the first step to making perfect blood orange bars. This recipe features a buttery crust and a zesty citrus filling that bring everything together. Below, you’ll find a structured list of all the ingredients needed, pulled directly from the recipe for clear and precise measurements.
- For the crust:
- 1 1/2 cups all-purpose flour
- 1/2 cup powdered sugar
- 3/4 cup unsalted butter (softened)
- For the filling:
- 2 tablespoons blood orange zest (from 1 orange)
- 1/2 cup blood orange juice (from 2 oranges)
- 1 cup granulated sugar
- 2 tablespoons all-purpose flour
- 1/4 teaspoon salt
- 2 large eggs
- Optional: burgundy gel food coloring
- For the garnish:
- 1/4 cup powdered sugar
This list covers everything you need for a full batch. Make sure to measure each item accurately to get the best results, as the crust relies on the right balance for its texture and the filling needs those citrus elements to shine.
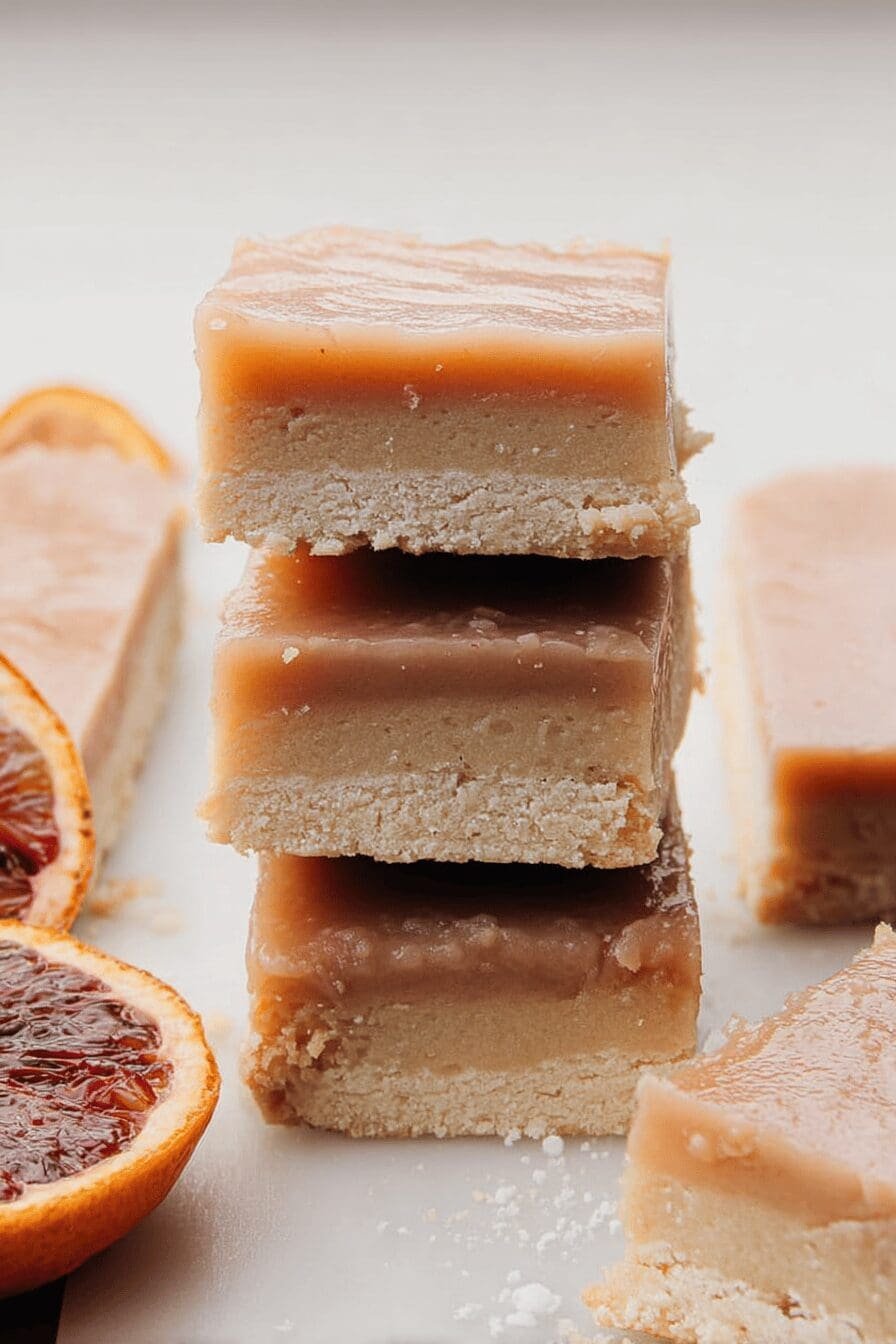
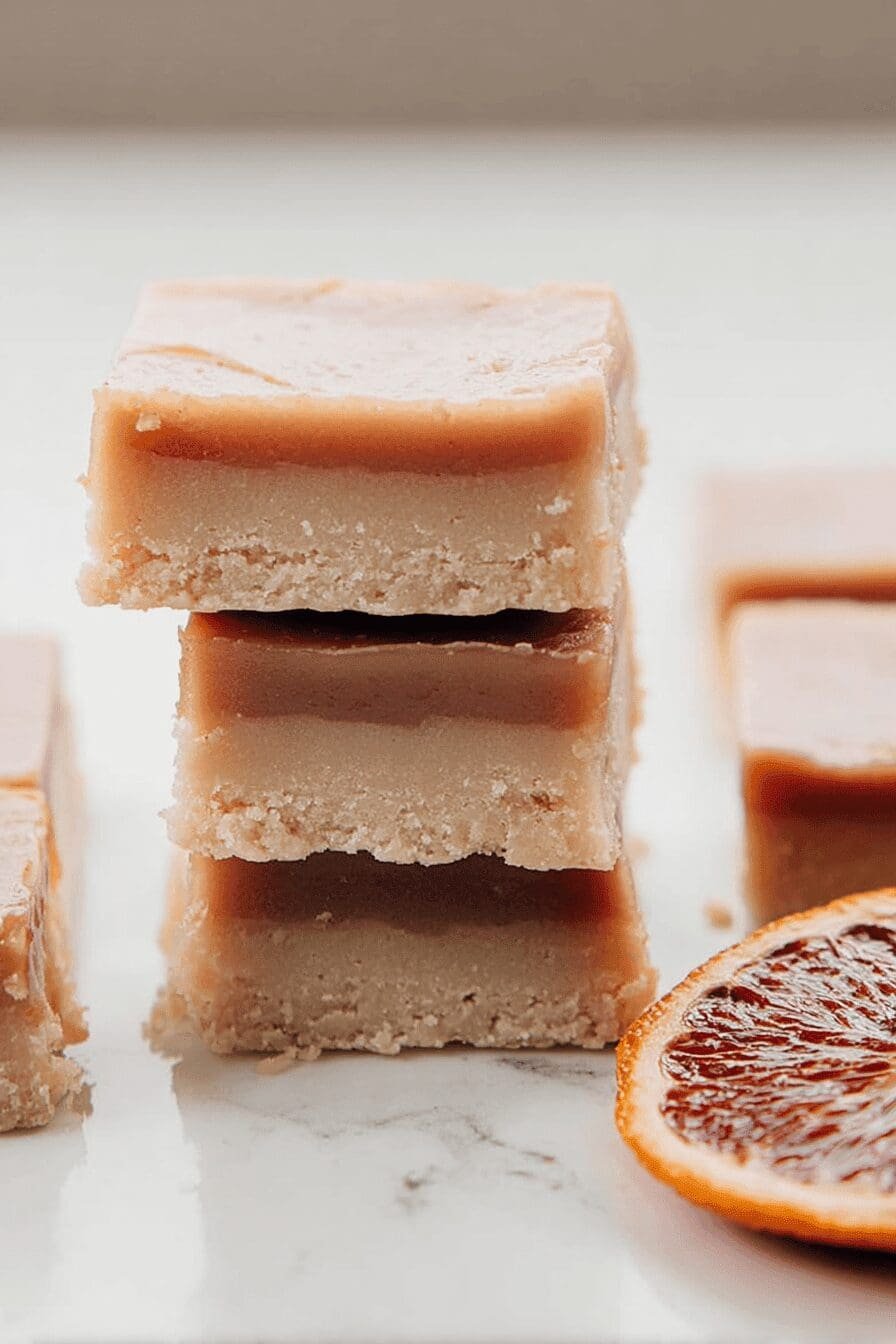
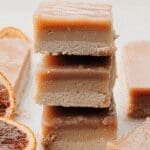
How to Prepare the Perfect Blood Orange Bars: Step-by-Step Guide
Getting started with blood orange bars is straightforward and fun, especially if you’re new to baking. This recipe features a buttery crust and a citrus filling that create a delightful treat. Follow these steps to make your own batch and enjoy the process from start to finish.
Preheat the oven to 350°F (175°C) and line an 8×8 inch pan with foil, then spray it with nonstick cooking spray. In a bowl, mix 1 1/2 cups all-purpose flour, 1/2 cup powdered sugar, and 3/4 cup softened unsalted butter to form a dough, and press it evenly into the pan. Bake the crust for 25 minutes until it’s golden and firm.
While the crust bakes, prepare the filling by combining 2 tablespoons blood orange zest, 1/2 cup blood orange juice, 1 cup granulated sugar, 2 tablespoons all-purpose flour, 1/4 teaspoon salt, and 2 large eggs in a blender. Pulse until the mixture is frothy, and add optional burgundy gel food coloring if you want a deeper color. Once the crust is ready, pour the filling over it and bake for another 25 to 30 minutes.
After baking, let the bars cool completely in the pan. To serve, sprinkle 1/4 cup powdered sugar on top for a sweet finish. For the best texture, let the filling rest briefly to reduce bubbles and press the crust evenly. The filling will firm up as it cools and may jiggle slightly when done, which means it’s ready. If you’re looking for more citrus ideas, check out our lemon oatmeal cookies recipe for another easy treat.

Dietary Substitutions to Customize Your Blood Orange Bars
Blood orange bars are versatile, so you can tweak them to fit different needs without losing that great taste. Whether you’re vegan, gluten-free, or watching calories, small changes make a big difference. Let’s look at some simple swaps to personalize your recipe.
One way to adapt is by replacing eggs with flaxseed or chia seed options for a vegan version. You can also swap out traditional butter for vegan butter or coconut oil to keep things rich and creamy. For gluten-free diets, use a gluten-free flour blend in place of all-purpose flour to maintain the structure.
If you want to play with flavors, add a bit of lemon or lime juice for extra zest. Sweeteners like maple syrup can replace granulated sugar for a natural twist, and for low-calorie options, try erythritol instead. These adjustments ensure everyone can enjoy blood orange bars just the way they like.
Mastering Blood Orange Bars: Advanced Tips and Variations
Once you’re comfortable with the basics, you can take blood orange bars to the next level with some pro tips. Use a food processor to mix the crust ingredients for a smoother texture, and consider blind-baking with pie weights to keep it even. These tricks help avoid common pitfalls and make your bars look and taste amazing.
For flavor twists, add spices like cardamom or ginger to the filling for an exotic kick. You could also sprinkle chopped pistachios on top for added crunch and interest. When it comes to serving, try garnishing with thin blood orange slices and a light dusting of powdered sugar to make them pop. If you enjoy similar desserts, our cannoli cheesecake bars offer another fun option for variety.
Make-ahead ideas are great for busy days, like prepping the crust and filling separately ahead of time. This way, you can assemble and bake when needed, keeping things fresh and simple. Experimenting with these variations keeps the recipe exciting and suits different tastes.
How to Store Blood Orange Bars: Best Practices
Refrigeration and Freezing Options
Proper storage keeps your blood orange bars fresh and tasty for longer. Each serving has about 204 calories, with 9 g total fat, 6 g saturated fat, 46 mg cholesterol, and 28 g carbohydrates, so handling them right maintains those nutritional benefits. Store them in an airtight container in the fridge for up to a few days to lock in flavor.
For freezing, let the bars cool and slice them first, then wrap each piece tightly. They can last up to 2 months in the freezer, which is perfect for meal prep. To revive them, thaw overnight in the fridge and warm gently in a low oven.
| Storage Method | Duration | Tips |
|---|---|---|
| Refrigeration | Up to 5 days | Keep in an airtight container to maintain freshness |
| Freezing | Up to 2 months | Wrap individually and thaw slowly for best texture |
This table helps you plan ahead, especially if you’re a working professional or busy parent. Remember, the filling firms up nicely when cooled, so patience is key.
FAQs: Frequently Asked Questions About Blood Orange Bars
Can I prepare Blood Orange Bars in advance and how should I store them?
Yes, you can prepare Blood Orange Bars ahead of time. After baking, allow the bars to cool completely to room temperature before covering them. Store the bars in an airtight container in the refrigerator for up to 3-4 days. When ready to serve, bring them back to room temperature or enjoy them chilled. This helps maintain the texture of the citrus custard filling and the buttery crust.
Should Blood Orange Bars be refrigerated or kept at room temperature?
Blood Orange Bars contain a custard-like filling that is best kept refrigerated to maintain freshness and prevent spoilage. If serving on the same day, they can safely sit out at room temperature for a few hours, such as during a party. For longer storage, keep them in the refrigerator and serve cold or allow them to warm slightly before eating.
How can I freeze Blood Orange Bars without losing flavor or texture?
To freeze Blood Orange Bars, first cool them completely, then cut into individual squares. Place the bars on a baking sheet and freeze until solid to prevent sticking. Wrap each piece tightly in plastic wrap, then place all wrapped bars into a freezer-safe bag. They can be frozen for up to 2 months. Thaw bars at room temperature before serving and add powdered sugar after thawing to preserve freshness.
What makes Blood Orange Bars different from regular orange or lemon bars in taste and texture?
Blood Orange Bars have a distinct flavor due to the blood orange juice and zest, which provide a sweeter, slightly raspberry-like note compared to regular orange or lemon bars. The texture remains similar with a buttery shortbread crust and smooth citrus custard filling, but the unique color and subtle berry undertones make Blood Orange Bars stand out.
Can Blood Orange Bars be made gluten-free or vegan without compromising taste?
Yes, you can make Blood Orange Bars gluten-free by substituting the traditional flour with a gluten-free blend in the crust. For vegan versions, use plant-based butter and replace eggs in the filling with alternatives like silken tofu or a cornstarch-based mixture to mimic the custard texture. These substitutions can still deliver a tasty, satisfying citrus bar while accommodating dietary needs.
Blood Orange Bars
- Total Time: 1 hour 5 minutes
- Yield: 16 bars
- Diet: Vegetarian
Description
🍊 Enjoy the refreshing taste of blood orange with a zesty citrus filling that brightens every bite.
🧈 The buttery crust adds a delightful texture contrast, making these bars perfect for any dessert or snack time.
Ingredients
– 1 1/2 cups all-purpose flour for the crust
– 1/2 cup powdered sugar for the crust
– 3/4 cup unsalted butter (softened) for the crust
– 2 tablespoons blood orange zest (from 1 orange) for the filling
– 1/2 cup blood orange juice (from 2 oranges) for the filling
– 1 cup granulated sugar for the filling
– 2 tablespoons all-purpose flour for the filling
– 1/4 teaspoon salt for the filling
– 2 large eggs for the filling
– burgundy gel food coloring for the filling (optional)
– 1/4 cup powdered sugar for the garnish
Instructions
1-Preheat the oven: Preheat the oven to 350°F (175°C) and line an 8×8 inch pan with foil, then spray it with nonstick cooking spray. In a bowl, mix 1 1/2 cups all-purpose flour, 1/2 cup powdered sugar, and 3/4 cup softened unsalted butter to form a dough, and press it evenly into the pan. Bake the crust for 25 minutes until it’s golden and firm.
2-Prepare the filling: While the crust bakes, prepare the filling by combining 2 tablespoons blood orange zest, 1/2 cup blood orange juice, 1 cup granulated sugar, 2 tablespoons all-purpose flour, 1/4 teaspoon salt, and 2 large eggs in a blender. Pulse until the mixture is frothy, and add optional burgundy gel food coloring if you want a deeper color. Once the crust is ready, pour the filling over it and bake for another 25 to 30 minutes.
3-Cool and serve: After baking, let the bars cool completely in the pan. To serve, sprinkle 1/4 cup powdered sugar on top for a sweet finish. For the best texture, let the filling rest briefly to reduce bubbles and press the crust evenly. The filling will firm up as it cools and may jiggle slightly when done, which means it’s ready.
Notes
🍊 Press the crust firmly and evenly to ensure uniform baking.
⏳ Let the filling mixture rest briefly before baking to reduce bubbles.
❄️ Store bars in the refrigerator for a few days or freeze for up to 2 months after cooling and slicing.
- Prep Time: 10 minutes
- Baking Time: 55 minutes
- Cook Time: 55 minutes
- Category: Dessert
- Method: Baking
- Cuisine: American
Nutrition
- Serving Size: 1 bar
- Calories: 204 calories
- Sugar: 18 grams
- Sodium: 44 mg
- Fat: 9 grams
- Saturated Fat: 6 grams
- Unsaturated Fat: 3 grams
- Trans Fat: 0 grams
- Carbohydrates: 28 grams
- Fiber: 0 grams
- Protein: 2 grams
- Cholesterol: 46 mg
Keywords: Blood Orange Bars, Citrus Dessert, Buttery Crust, Zesty Bars