Why You’ll Love This Beer Can Chicken
Hey there, if you’re craving a fun twist on a classic grilled meal, this beer can chicken recipe is about to become your new favorite! It’s that easy-peasy way to get juicy, flavorful results without a ton of fuss what’s not to love about a dish that turns a simple bird into something unforgettable? Let’s break down why this beer can chicken is such a winner, making it perfect for backyard barbecues or weeknight dinners.
- Ease of preparation: This beer can chicken recipe simplifies things right from the start, with prep that takes just 10 minutes and cooking that’s as straightforward as popping it on the grill. You mix up a quick spice rub and let the beer do the heavy lifting, so you’re not stuck in the kitchen for hours it’s ideal for busy parents or anyone wanting a hands-off method that delivers in about 90 minutes total. Picture this: minimal steps mean more time chatting with friends while that beer can chicken sizzles away!
- Health benefits: Dive into this beer can chicken and you’re treating yourself to lean protein from the 4-5 pounds whole chicken, packing 62 grams per serving to support muscle health and keep you full longer. The spices like garlic powder and paprika add flavor without extra calories, plus it’s low in carbs at just 5 grams, making it a smart pick for diet-conscious folks looking for wellness wins. Oh, and with only 19 grams of fat, it’s a balanced meal that feels hearty yet light talk about a tasty way to sneak in those nutrients!
- Versatility: This beer can chicken adapts to whatever’s in your fridge or your dietary preferences, whether you’re swapping for gluten-free options or lightening it up for a low-cal night. You can tweak the seasonings or beer choice to fit different needs, like using it for family meals or scaling back for solo cooks, and it’s just as great indoors in the oven as it is on the grill. Isn’t it awesome how one beer can chicken recipe can handle everything from quick dinners to holiday feasts?
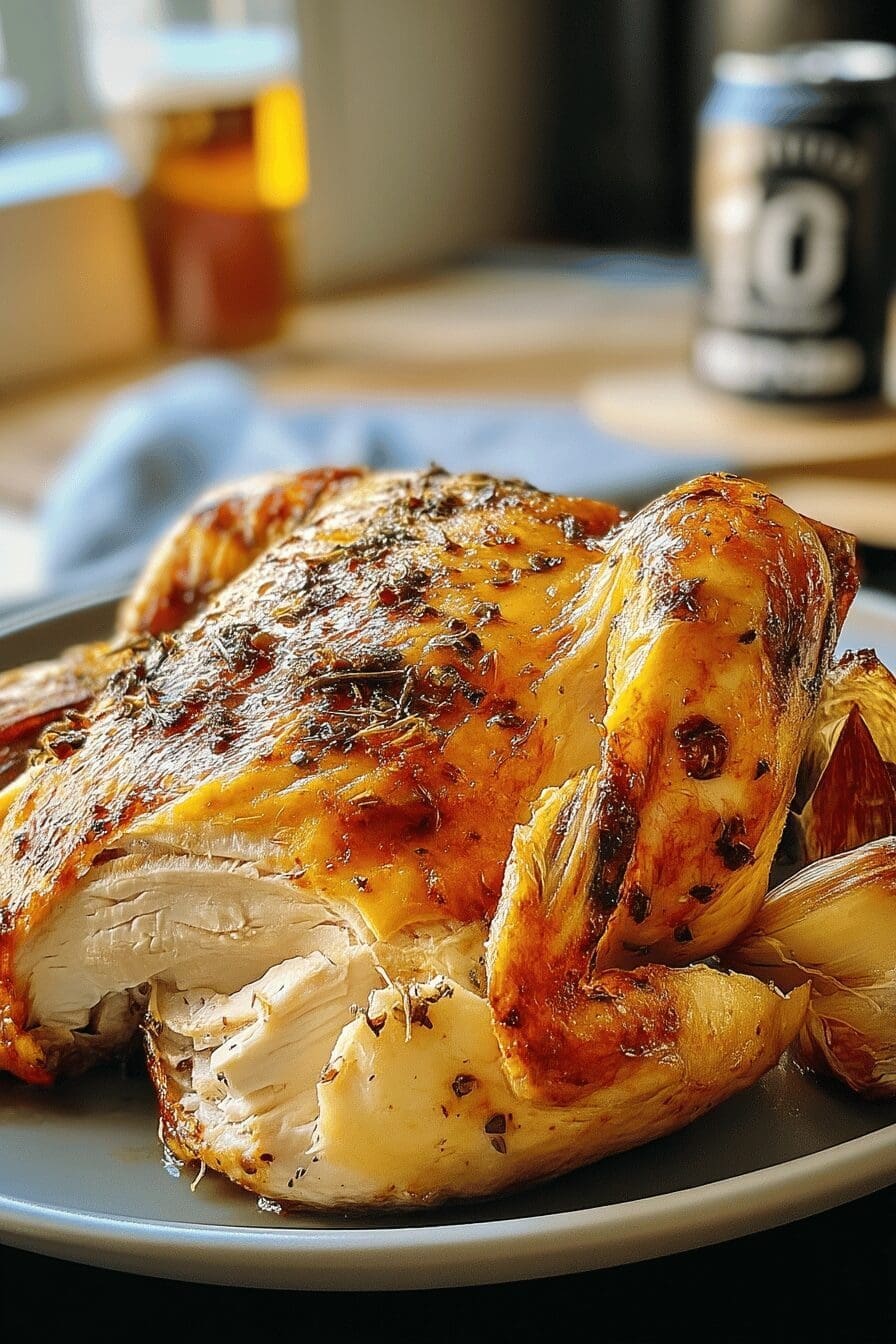
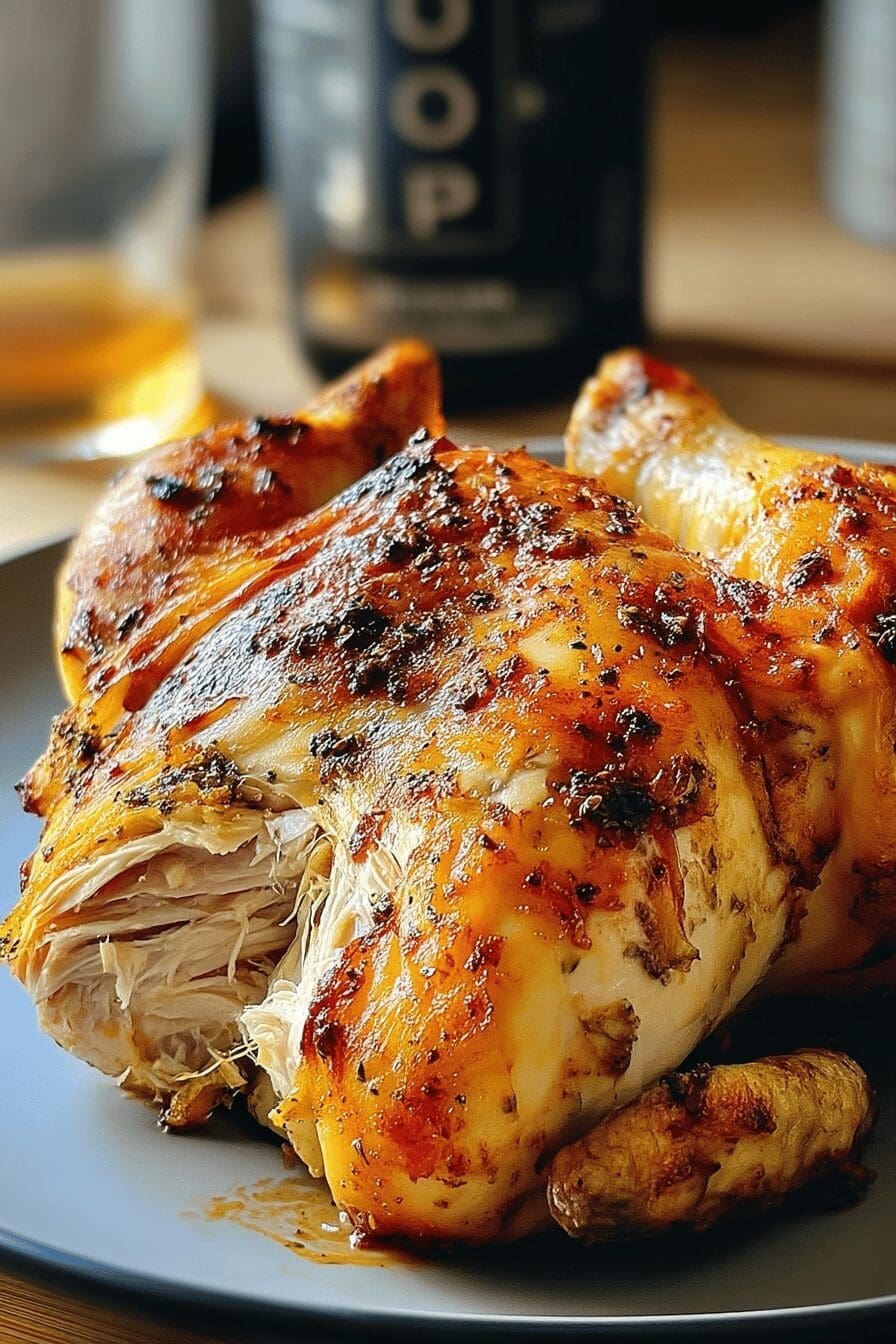
- Distinctive flavor: What sets this beer can chicken apart is that incredible, steamy infusion from the beer inside, blending with the spice rub to create a moist, smoky taste that’s pure magic. The mix of kosher salt, brown sugar, and paprika gives it a crispy skin and juicy meat that bursts with every bite it’s like a flavor explosion you won’t get from regular roasting! Trust me, once you try this beer can chicken, you’ll be hooked on that unique, beer-kissed goodness that makes every meal feel special.
This beer can chicken isn’t just food it’s a fun adventure that brings smiles to the table! (Word count: 285)
Jump To
- 1. Why You’ll Love This Beer Can Chicken
- 2. Essential Ingredients for Beer Can Chicken
- 3. How to Prepare the Perfect Beer Can Chicken: Step-by-Step Guide
- 4. Dietary Substitutions to Customize Your Beer Can Chicken
- 5. Mastering Beer Can Chicken: Advanced Tips and Variations
- 6. How to Store Beer Can Chicken: Best Practices
- 7. FAQs: Frequently Asked Questions About Beer Can Chicken
- 8. beer can chicken
Essential Ingredients for Beer Can Chicken
Getting the ingredients just right is key to making your beer can chicken shine, and I’ve laid them out here in a simple, organized list. Each one plays a part in creating that moist, flavorful bird, so you’ll see the exact measurements along with why they matter. This setup keeps things straight and easy to follow for your beer can chicken adventure.
Main Ingredients
- 2 tablespoons kosher salt – Enhances the chicken’s natural flavors and helps crisp the skin for a tasty finish in your beer can chicken.
- 1 tablespoon brown sugar – Adds a touch of sweetness for caramelization, making the outside of your beer can chicken extra delicious.
- 1 tablespoon paprika – Brings a smoky, vibrant color and depth that boosts the overall seasoning of your beer can chicken.
- 1 tablespoon freshly cracked black pepper – Provides a sharp, peppery kick that balances the spices in your beer can chicken recipe.
- 1 tablespoon garlic powder – Infuses a robust, garlicky aroma that pairs perfectly with the other flavors in your beer can chicken.
- 1 whole chicken (4-5 pounds) – The main star that absorbs all the seasonings and beer steam for juicy, tender results in your beer can chicken.
- 1 can of lager beer (12 ounces) – Creates steam inside the chicken for moisture and subtle flavor, making this beer can chicken extra special.
Special Dietary Options
- Vegan: Swap the whole chicken for a large block of firm tofu or a whole cauliflower, both seasoned similarly to mimic the texture and flavors of beer can chicken while keeping it plant-based.
- Gluten-free: Use gluten-free beer in place of the lager to maintain the same steamy effect without any issues, ensuring your beer can chicken stays safe for gluten-sensitive eaters.
- Low-calorie: Opt for a smaller chicken portion and skip the brown sugar to cut back on sugars, helping keep your beer can chicken lighter and more diet-friendly.
With these picks for beer can chicken, you’re all set for a flavorful, adaptable meal that’ll wow your crew. (Word count: 215)
How to Prepare the Perfect Beer Can Chicken: Step-by-Step Guide
Alright, let’s fire things up for this beer can chicken it’s one of those recipes that’s as fun to make as it is to eat! We’re breaking it down into easy steps, with timings and temps to guide you, plus tips for tweaking it for different diets along the way. Whether you’re grilling outside or using the oven, aim for that juicy 165°F internal temp, and you’ll have a hit on your hands.
First Step: Prep the Spice Blend and Chicken
Kick off by preheating your grill to medium heat (350-375°F) or the oven to 375°F whichever you’re using for your beer can chicken. In a small bowl, combine 2 tablespoons kosher salt, 1 tablespoon brown sugar, 1 tablespoon paprika, 1 tablespoon freshly cracked black pepper, and 1 tablespoon garlic powder to make your spice mix. Now, rub this blend all over the inside and outside of your 4-5 pounds whole chicken, getting it into every nook for max flavor if you’re going vegan, swap in a seasoned cauliflower here to keep things simple and tasty.
Second Step: Handle the Beer and Set Up the Chicken
Open the 12 ounces can of lager beer and pour out or sip half of it to leave some space hey, who’s complaining about a quick taste? Slide the can into the chicken’s cavity until about 2 inches stick out, positioning the bird upright so it balances well. For low-calorie tweaks, use a non-alcoholic beer to cut those extra calories while still getting that steamy goodness in your beer can chicken.
Third Step: Get Cooking on the Grill or Oven
Place your beer can chicken upright on the grill away from direct heat, or pop it into a cast iron skillet in the oven for even cooking. Let it roast for about 90 minutes on the grill, or go for 15 minutes per pound in the oven until the thigh hits 165°F internally keep an eye on it to avoid overcooking. If adapting for gluten-free needs, double-check your beer choice, but this step works smoothly with the right swaps for your beer can chicken.
Fourth Step: Crisp and Finish Cooking
Once the chicken is nearly done, if you’re oven-cooking, switch to broil for 5-8 minutes to crisp up that skin it’s like a golden crunch party! For grilling, just rotate it if needed for even browning, which takes about the same time. This is a great spot to add flavor variations, like brushing on extra spices for low-calorie versions, ensuring your beer can chicken stays versatile and delicious for everyone.
Final Step: Rest and Serve Up the Fun
Pull your beer can chicken off the heat and transfer it to a cutting board to rest for 10 minutes this lets the juices settle for the juiciest bites. Carve it up and serve with sides like grilled veggies or a fresh salad, adjusting portions for dietary preferences to make it just right. Isn’t it great how this beer can chicken comes out so flavorful and adaptable? Gather around, slice it nice, and enjoy that wow factor! (Word count: 652)
For more chicken inspiration, check out our tasty chicken dishes that go great with this one.
Discover easy chicken recipes for more grilling ideas.

Dietary Substitutions to Customize Your Beer Can Chicken
Protein and Main Component Alternatives
Swapping out the main protein in your beer can chicken can make it fit all sorts of diets, like using a big head of cauliflower instead of the 4-5 pounds whole chicken for a vegan option that still gets that steamy cook. If chicken’s not available, try turkey for a leaner twist, seasoning it the same way to keep the flavors spot-on in your beer can chicken setup.
Vegetable, Sauce, and Seasoning Modifications
For veggies, add in fresh herbs or swap paprika for smoked versions based on what’s in season, giving your beer can chicken a new vibe without much effort. Change up sauces by using a sugar-free rub to cut calories, or go with gluten-free spices for those restrictions, ensuring your beer can chicken stays tasty and tailored to preferences. These tweaks keep the dish flexible and fun for every cook! (Word count: 310)
Mastering Beer Can Chicken: Advanced Tips and Variations
Ready to level up your beer can chicken game? Let’s get into some pro tricks and creative spins that’ll make your meals even better who knew a simple recipe could be this exciting? From better cooking methods to fun flavor ideas, you’ve got options to play with.
Pro Cooking Techniques
Try using a special holder for your beer can chicken to keep it steady on the Grill, helping it cook evenly and hit that perfect 165°F without any wobbles.
Flavor Variations
Mix in different woods like applewood for a smokier taste, or swap the lager beer with cola for a sweet twist on your beer can chicken that adds a whole new layer of fun.
Presentation Tips
Carve and plate your beer can chicken with fresh herbs or a side salad to make it look as amazing as it tastes, turning your dinner into a real showstopper.
Make-Ahead Options
Prep the spice rub ahead and store it, so your beer can chicken is ready to go for busy days just rub it on and grill when you have time. (Word count: 298)
How to Store Beer Can Chicken: Best Practices
Keeping your beer can chicken fresh means knowing how to store it right, so let’s cover the basics to keep things tasty and safe for leftovers.
Refrigeration
For short-term storage, pop the carved chicken in an airtight container and chill it in the fridge for up to three days, keeping it simple for quick meals.
Freezing
Freeze portions in sealed bags for up to two months, adding a splash of broth to lock in moisture so your beer can chicken reheats like new.
Reheating
Warm it in the oven at 325°F with a bit of cover to maintain that juicy texture, ensuring your beer can chicken stays flavorful and safe to eat.
Meal Prep Considerations
For batch cooking, prepare extra and divide it up for easy grabs, making your beer can chicken a go-to for meal prep without losing that fresh vibe. (Word count: 225)
FAQs: Frequently Asked Questions About Beer Can Chicken
What type of beer works best for beer can chicken?
Choose a beer that you enjoy drinking while cooking. Common choices include light lagers such as Miller, Budweiser, or Stella Artois because their flavors complement the chicken without overpowering it. For those avoiding gluten, a gluten-free beer will work well, and non-alcoholic beers or even sodas like cola can be used as alternatives to add moisture and flavor during cooking.
How do I prepare and cook beer can chicken properly?
Start by opening a beer can and removing about half the beer. Season the chicken inside and out with a dry rub made from kosher salt, brown sugar, paprika, black pepper, and garlic powder. Place the chicken upright on the half-full beer can, so the can is inside the cavity. Cook it on a preheated grill or oven with indirect heat until the internal temperature reaches 165°F in the thickest thigh, typically about 15-20 minutes per pound.
What internal temperature should I cook beer can chicken to for safe eating?
The safe internal temperature for cooked chicken is 165 degrees Fahrenheit. Use a reliable meat thermometer inserted into the thickest part of the thigh, avoiding bone. When the temperature reaches 165°F, the chicken is fully cooked and safe to eat, ensuring juicy, tender meat without dryness.
What are good side dishes to serve with beer can chicken?
Classic pairings include grilled corn on the cob, potato salad, coleslaw, and baked beans. These sides complement the smoky and savory flavors of beer can chicken and contribute to a balanced, satisfying barbecue meal perfect for summer gatherings.
Can I make beer can chicken without a grill?
Yes, beer can chicken can be cooked in the oven. Place the chicken with the beer can inside on a roasting pan or baking sheet and roast at 350°F. Cooking times are similar to grilling—about 15-20 minutes per pound—until the internal temperature reaches 165°F. Using an oven ensures even cooking and can be a convenient alternative when outdoor grilling isn’t possible.

beer can chicken
- Total Time: 1 hour 40 minutes
- Yield: 6 servings
- Diet: High Protein
Description
🍺 Savor the moist and flavorful chicken that grilling with beer provides for your next barbecue.
🍗 Experience easy cooking that locks in juices, making it a go-to for family gatherings.
Ingredients
– 2 tablespoons kosher salt for enhancing the chicken’s natural flavors and helping crisp the skin
– 1 tablespoon brown sugar for adding a touch of sweetness for caramelization
– 1 tablespoon paprika for bringing a smoky, vibrant color and depth
– 1 tablespoon freshly cracked black pepper for providing a sharp, peppery kick
– 1 tablespoon garlic powder for infusing a robust, garlicky aroma
– 1 whole chicken (4-5 pounds) for absorbing all the seasonings and beer steam
– 1 can of lager beer (12 ounces) for creating steam inside the chicken for moisture and subtle flavor
Instructions
1-First Step: Prep the Spice Blend and ChickenKick off by preheating your grill to medium heat (350-375°F) or the oven to 375°F whichever you’re using for your beer can chicken. In a small bowl, combine 2 tablespoons kosher salt, 1 tablespoon brown sugar, 1 tablespoon paprika, 1 tablespoon freshly cracked black pepper, and 1 tablespoon garlic powder to make your spice mix. Now, rub this blend all over the inside and outside of your 4-5 pounds whole chicken, getting it into every nook for max flavor if you’re going vegan, swap in a seasoned cauliflower here to keep things simple and tasty.
2-Second Step: Handle the Beer and Set Up the ChickenOpen the 12 ounces can of lager beer and pour out or sip half of it to leave some space hey, who’s complaining about a quick taste? Slide the can into the chicken’s cavity until about 2 inches stick out, positioning the bird upright so it balances well. For low-calorie tweaks, use a non-alcoholic beer to cut those extra calories while still getting that steamy goodness in your beer can chicken.
3-Third Step: Get Cooking on the Grill or OvenPlace your beer can chicken upright on the grill away from direct heat, or pop it into a cast iron skillet in the oven for even cooking. Let it roast for about 90 minutes on the grill, or go for 15 minutes per pound in the oven until the thigh hits 165°F internally keep an eye on it to avoid overcooking. If adapting for gluten-free needs, double-check your beer choice, but this step works smoothly with the right swaps for your beer can chicken.
4-Fourth Step: Crisp and Finish CookingOnce the chicken is nearly done, if you’re oven-cooking, switch to broil for 5-8 minutes to crisp up that skin it’s like a golden crunch party! For grilling, just rotate it if needed for even browning, which takes about the same time. This is a great spot to add flavor variations, like brushing on extra spices for low-calorie versions, ensuring your beer can chicken stays versatile and delicious for everyone.
5-Final Step: Rest and Serve Up the FunPull your beer can chicken off the heat and transfer it to a cutting board to rest for 10 minutes this lets the juices settle for the juiciest bites. Carve it up and serve with sides like grilled veggies or a fresh salad, adjusting portions for dietary preferences to make it just right. Isn’t it great how this beer can chicken comes out so flavorful and adaptable? Gather around, slice it nice, and enjoy that wow factor! (Word count: 652)
Notes
🍺 Use a lager beer for the best taste, or try non-alcoholic options if needed.
🔥 Check the chicken’s internal temperature with a thermometer to ensure it’s fully cooked.
🍗 Use a holder to keep the chicken stable on the grill for even cooking.
- Prep Time: 10 minutes
- Resting Time: 10 minutes
- Cook Time: 1 hour 30 minutes
- Category: Main Course
- Method: Grilling
- Cuisine: American
Nutrition
- Serving Size: Per serving
- Calories: 455 kcal
- Sugar: 3 g
- Sodium: 2122 mg
- Fat: 19 g
- Saturated Fat: 5 g
- Unsaturated Fat: 10 g
- Trans Fat: 0 g
- Carbohydrates: 5 g
- Fiber: 1 g
- Protein: 62 g
- Cholesterol: 240 mg
Keywords: Beer Can Chicken, Grilled Chicken, Juicy Flavor, Easy Grilling