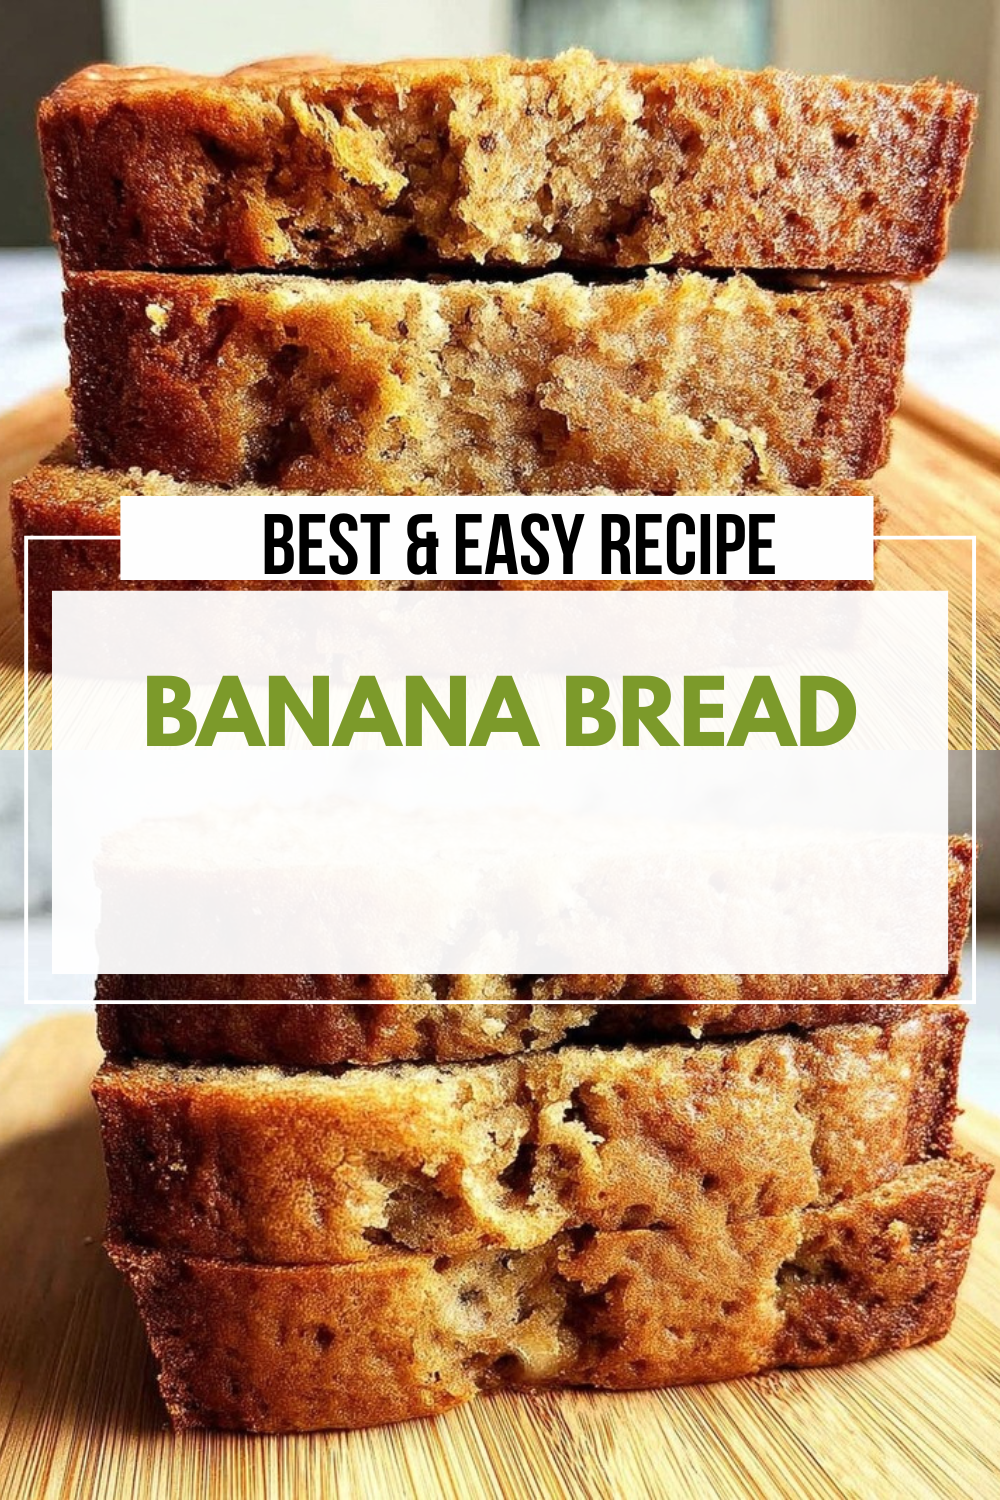
Why You’ll Love This Banana Bread
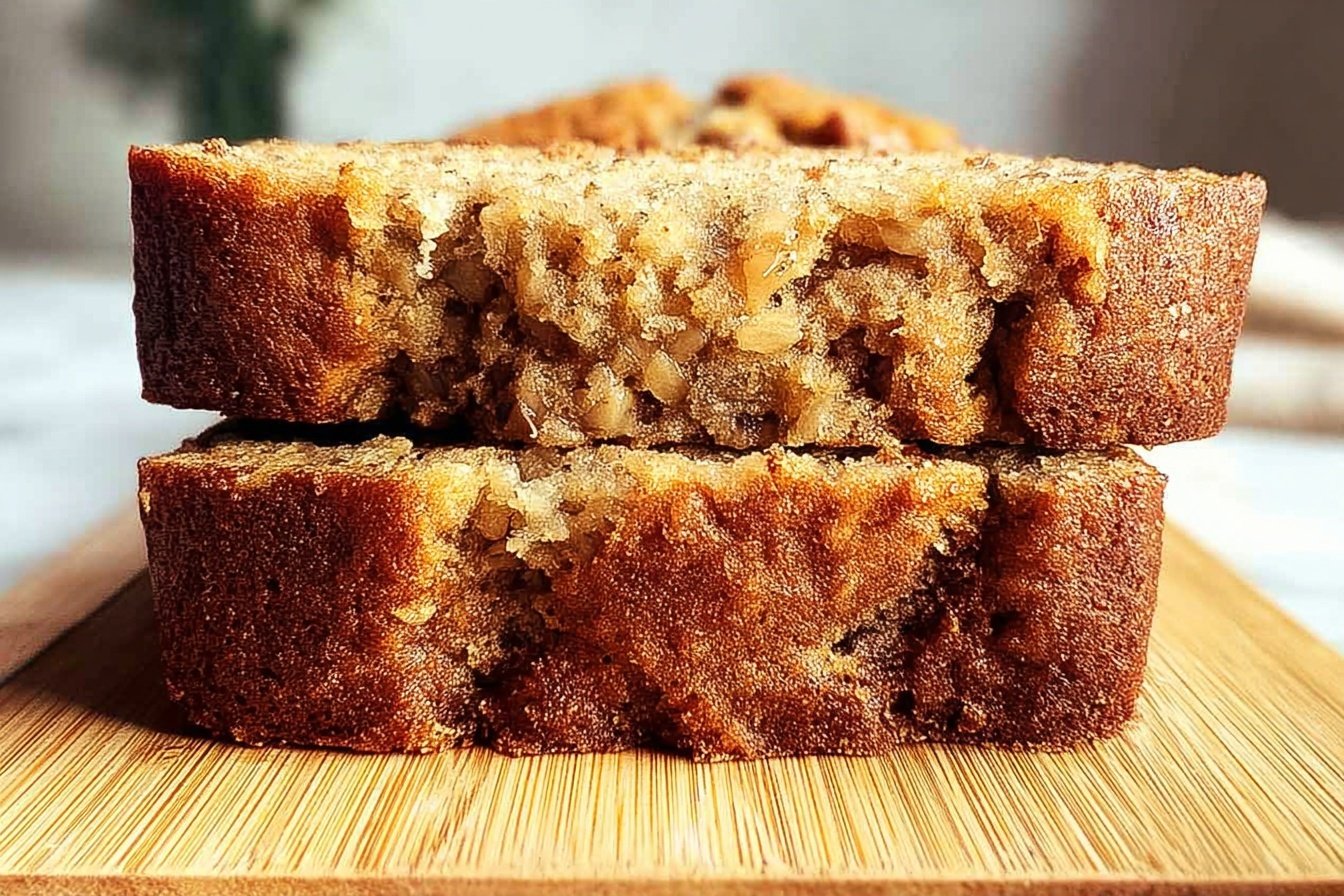
There’s something truly magical about a freshly baked loaf of banana bread coming out of the oven. The sweet aroma fills your kitchen, and that first warm slice brings instant comfort. This particular banana bread recipe stands out for several wonderful reasons that make it a go-to favorite for home cooks everywhere.
- Ease of Preparation: This banana bread comes together in just 10 minutes of prep time. You don’t need a stand mixer or any fancy equipment just a couple of bowls, a fork for mashing, and a wooden spoon. The straightforward steps make this recipe accessible even for beginner bakers who might feel nervous about baking from scratch. With a total time of just 1 hour and 10 minutes from start to finish, you can have homemade banana bread ready for breakfast or an afternoon snack without spending hours in the kitchen.
- Health Benefits: Bananas bring natural sweetness and valuable nutrients to this bread. Each serving provides 270 milligrams of potassium, 3 grams of fiber, and essential vitamins like vitamin A and vitamin C. While this is definitely a treat, the bananas contribute real fruit goodness that you won’t find in store-bought alternatives. For those watching their intake, this recipe offers 5 grams of protein per slice, making it more satisfying than many other baked goods.
- Versatility: One of the best things about this banana bread is how easily it adapts to different preferences and dietary needs. You can make it with or without nuts, swap walnuts for pecans, add chocolate chips instead of raisins, or even substitute honey for sugar. The recipe works beautifully with whole wheat flour for added nutrition, and you can reduce the sugar amount when using very ripe bananas since they provide natural sweetness.
- Distinctive Flavor: Using very ripe bananas creates a depth of flavor that simply cannot be replicated with artificial flavorings. The natural caramelized notes from spotted bananas give this bread a rich, moist crumb that stays delicious for days. When you lightly roast the walnuts before adding them, you get an extra layer of toasty flavor that makes each bite memorable.
Whether you’re a busy parent looking for a wholesome snack, a student needing a quick breakfast option, or a baking enthusiast wanting a reliable recipe in your collection, this banana bread delivers on every front. For more sweet treats that are just as easy to make, check out this classic peach cobbler recipe that’s perfect for using fresh seasonal fruit.
Jump To
- 1. Why You’ll Love This Banana Bread
- 2. Essential Ingredients for Banana Bread
- 3. How to Prepare the Perfect Banana Bread: Step-by-Step Guide
- 4. Dietary Substitutions to Customize Your Banana Bread
- 5. Mastering Banana Bread: Advanced Tips and Variations
- 6. How to Store Banana Bread: Best Practices
- 7. FAQs: Frequently Asked Questions About Banana Bread
- 8. Banana Bread
Essential Ingredients for Banana Bread
Quality ingredients make all the difference when baking banana bread. Each component plays a specific role in creating that perfect texture and flavor we all crave. Here’s a complete breakdown of everything you’ll need for this recipe, along with the exact measurements.
Main Ingredients
- 3 very ripe medium/large bananas The star of the show! Very ripe bananas with brown spots provide maximum sweetness, moisture, and that authentic banana flavor. Their natural sugars caramelize during baking for incredible taste.
- ½ cup (8 Tbsp) unsalted butter at room temperature Butter adds richness and helps create a tender crumb. Room temperature butter creams more easily with sugar, creating tiny air pockets that help the bread rise beautifully.
- ¾ cup sugar (or honey for substitution) Sugar provides sweetness and helps with browning. Honey works as a natural alternative and adds its own subtle floral notes while keeping the bread moist.
- 2 large eggs lightly beaten Eggs bind the ingredients together and contribute to the structure. They also add richness and help the bread maintain its shape while staying tender.
- 1 ½ cups flour All-purpose flour provides the foundation. It gives banana bread its characteristic dense yet soft texture that makes each slice satisfying.
- 1 tsp baking soda This leavening agent helps the bread rise and creates a lighter texture. It reacts with the acidity in bananas to produce carbon dioxide bubbles.
- ½ tsp salt Salt enhances all the other flavors and balances the sweetness. Never skip this ingredient it makes a noticeable difference in the final taste.
- ½ tsp vanilla extract Vanilla adds warmth and depth to the flavor profile. It bridges the banana and butter notes for a more complex, rounded taste.
- 1 cup chopped walnuts (optional) Walnuts add wonderful crunch and nutty flavor. Toasting them lightly before chopping intensifies their taste and adds an extra dimension to each bite.
- ½ cup raisins (optional) Raisins provide chewy sweetness throughout the loaf. They pair beautifully with the banana flavor and add interesting texture.
Special Dietary Options
This banana bread recipe is quite adaptable for various dietary needs. Here are some simple modifications you can make:
Gluten-Free Option: Substitute the all-purpose flour with a 1-to-1 gluten-free flour blend. These blends are designed to work exactly like regular flour, so you won’t need to adjust any other measurements.
Lower Sugar Option: When your bananas are very ripe with lots of brown spots, you can reduce the sugar to ½ cup without sacrificing taste. The natural sweetness from the bananas does a lot of the work!
Whole Wheat Option: Replace some or all of the white flour with whole wheat flour. Start with a 50/50 blend if you’re new to whole wheat baking, as it has a stronger flavor and denser texture.
Added Nutrition: Mix in 2 tablespoons of ground flaxseed for omega-3 fatty acids and extra fiber. This addition won’t significantly change the taste or texture.
How to Prepare the Perfect Banana Bread: Step-by-Step Guide
Making banana bread from scratch is simpler than you might think. Follow these detailed steps, and you’ll have a beautiful, moist loaf ready to enjoy in just over an hour.
Step 1: Prepare Your Oven and Pan
Start by preheating your oven to 350°F. This temperature is ideal for banana bread because it allows the loaf to bake evenly without browning too quickly on the outside. While the oven heats, prepare your loaf pan. You’ll need a pan approximately 9.25 x 5.25 x 2.75 inches for this recipe.
Grease the pan thoroughly with butter or cooking spray, then dust it with flour. Tap out any excess flour. This step might seem small, but it ensures your banana bread releases cleanly after baking. Nothing is more disappointing than a perfectly baked loaf that sticks to the pan!
Step 2: Toast the Walnuts
If you’re including walnuts in your banana bread, take a few minutes to toast them first. Spread the whole walnuts on a baking sheet and place them in the oven while it preheats, or use a dry skillet on the stove over medium heat. Stir continuously for about 5 minutes until you smell that wonderful nutty aroma.
Let the walnuts cool completely, then chop them into pieces. Toasting intensifies the natural oils in nuts and gives your banana bread a deeper, more complex flavor. If you’re making the nut-free version, simply skip this step.
Step 3: Cream the Butter and Sugar
In a large mixing bowl, combine your softened butter and sugar. Using a wooden spoon or hand mixer, cream them together until the mixture becomes light and fluffy. This usually takes 2-3 minutes of mixing. The process incorporates air into the batter, which helps create a lighter texture in your finished banana bread.
Make sure your butter is truly at room temperature for the best results. Cold butter won’t cream properly, and melted butter will change the texture of your bread. If you press your finger into the butter and it leaves an indentation without resistance, it’s ready.
Step 4: Prepare the Bananas
Peel your very ripe bananas and place them in a separate bowl. Using a fork, mash them until they reach a chunky applesauce consistency. You don’t want completely smooth bananas leaving some small chunks creates nice pockets of banana flavor throughout the bread.
Add the mashed bananas to your butter and sugar mixture along with the lightly beaten eggs. Stir everything together until well combined. The eggs should be fully incorporated, but don’t overmix at this stage.
Step 5: Combine Dry Ingredients
In another bowl, whisk together the flour, baking soda, and salt. This step ensures that the leavening agent and salt are evenly distributed throughout the flour before adding them to the wet ingredients. Even distribution prevents bitter spots from concentrated baking soda and ensures consistent rising.
Step 6: Mix the Batter
Gradually add the dry ingredients to your wet mixture. Stir gently with a wooden spoon or spatula just until the flour is incorporated. The key here is not to overmix. When you see no more streaks of dry flour, stop stirring. Overmixing develops gluten in the flour, which can make your banana bread tough and dense instead of tender and moist.
Fold in the vanilla extract, chopped walnuts, and raisins. Use a gentle motion, cutting through the center and folding over, to distribute these ingredients without overworking the batter.
Step 7: Bake Your Banana Bread
Pour the batter into your prepared loaf pan, spreading it evenly with a spatula. Tap the pan gently on the counter a couple of times to release any large air bubbles. Place the pan in your preheated oven and bake for 55 to 60 minutes.
Every oven bakes slightly differently, so start checking your banana bread at the 50-minute mark. Insert a toothpick or wooden skewer into the center of the loaf. If it comes out clean or with just a few moist crumbs, your bread is done. If there’s wet batter on the toothpick, give it another 5-10 minutes and check again.
Step 8: Cool and Serve
Once baked, let the banana bread rest in the pan for 10 minutes. This resting period allows the structure to set so the loaf holds its shape when removed. After 10 minutes, run a thin knife around the edges to loosen any spots that might have stuck, then turn the pan upside down onto a wire rack.
Let the bread cool completely before slicing for the cleanest cuts. However, if you simply can’t wait, warm banana bread fresh from the oven is one of life’s greatest pleasures! Just know that warm bread tends to crumble more easily when cut.
Pro Tip: If the top of your banana bread is browning too quickly before the center is fully baked, tent a piece of aluminum foil loosely over the top. This protects the crust while allowing the inside to finish cooking.
For another delicious banana-based dessert, try this double chocolate banana layer cake that transforms ripe bananas into an impressive celebration-worthy treat.

Dietary Substitutions to Customize Your Banana Bread
One of the wonderful things about banana bread is how accommodating it is to modifications. Whether you’re adapting for dietary restrictions or simply working with what you have on hand, these substitutions help you create a loaf that fits your needs.
Protein and Main Component Alternatives
The main ingredients in banana bread can be adjusted in several ways without sacrificing the qualities that make this bread so beloved.
Sugar Alternatives: Honey makes an excellent substitute for granulated sugar. Use ¾ cup of honey in place of the sugar, but reduce your other liquids slightly since honey adds moisture. Maple syrup works too, though it will impart its own distinct flavor. For a lower glycemic option, coconut sugar can replace white sugar in a 1:1 ratio.
Butter Substitutes: If you need to avoid dairy, coconut oil works beautifully in banana bread. Use the same amount (½ cup) of melted coconut oil. For a lower calorie option, unsweetened applesauce can replace half the butter. Just know that this will make the bread slightly denser.
Egg Replacements: For each egg, you can use 1 tablespoon of ground flaxseed mixed with 3 tablespoons of water. Let it sit for a few minutes until it thickens. This adds extra fiber and omega-3s while keeping the bread moist. Mashed avocado (¼ cup per egg) is another surprising but effective substitute that adds healthy fats.
Vegetable, Sauce, and Seasoning Modifications
Beyond the basics, there are many ways to add extra nutrition or different flavors to your banana bread.
Add-In Variations: Instead of walnuts and raisins, try 1 cup of chocolate chips for a sweeter treat. Dried cranberries add tartness that balances the sweet bananas. Shredded coconut brings tropical flavor, and diced dried apricots offer a chewy texture with a different fruit profile.
Flavor Boosters: Add ½ teaspoon of cinnamon for warmth, or try ¼ teaspoon of nutmeg for a more subtle spice note. A tablespoon of dark rum or bourbon in the batter creates a sophisticated adult version. Grated orange zest brightens the overall flavor and pairs surprisingly well with banana.
Healthy Additions: Stir in 2 tablespoons of ground flaxseed or chia seeds for extra nutrition. Shredded carrots or zucchini can be added for more vegetables in your diet use about ½ cup and squeeze out excess moisture first. A handful of rolled oats adds fiber and a heartier texture.
| Original Ingredient | Substitution Option | Notes |
|---|---|---|
| ¾ cup sugar | ¾ cup honey | Reduce other liquids slightly |
| ½ cup butter | ½ cup coconut oil | Use melted, cooled oil |
| 2 eggs | 2 tbsp flaxseed + 6 tbsp water | Let mixture thicken before adding |
| 1 ½ cups flour | 1 ½ cups gluten-free blend | Use 1:1 baking blend |
| 1 cup walnuts | 1 cup chocolate chips | Add at the same step |
Mastering Banana Bread: Advanced Tips and Variations
Once you’ve mastered the basic recipe, you can take your banana bread to new heights with these expert techniques and creative variations. These tips will help you achieve bakery-quality results in your own kitchen.
Choose the Right Bananas: The best banana bread starts with the right bananas. Look for fruit with lots of brown spots the more spotted, the sweeter and more flavorful your bread will be. Green or yellow bananas haven’t developed enough natural sugars and will give your bread a less intense banana flavor and firmer texture.
Room Temperature Ingredients: All your ingredients should be at room temperature before you begin mixing. Cold eggs won’t incorporate as well into the batter, and cold butter won’t cream properly with the sugar. Take everything out of the refrigerator at least 30 minutes before you plan to bake.
Don’t Overmix: This is perhaps the most important tip for tender banana bread. Mix just until the flour disappears. Overmixing develops gluten strands that make bread tough and chewy rather than tender and moist. A few small streaks of banana are fine they create nice flavor pockets.
Know Your Oven: Ovens vary significantly in their actual temperature versus the dial setting. If your banana bread consistently takes longer or shorter than the recipe indicates, invest in an oven thermometer to check. Convection ovens bake faster than conventional ones, so reduce the temperature by 25°F if using convection.
Flavor Variations to Try:
- Chocolate Chip Banana Bread: Replace walnuts and raisins with 1 cup of semi-sweet chocolate chips for an indulgent treat that kids especially love.
- Double Chocolate Banana Bread: Add ¼ cup of cocoa powder to the dry ingredients and use chocolate chips for a rich, chocolatey version.
- Cinnamon Walnut Banana Bread: Add 1 teaspoon of cinnamon to the flour mixture and increase the walnuts to 1 ½ cups for extra crunch.
- Tropical Banana Bread: Use macadamia nuts instead of walnuts, add ½ cup of shredded coconut, and replace the raisins with diced dried pineapple.
Presentation Tips: For a beautiful loaf that looks as good as it tastes, save a few slices of banana to arrange on top of the batter before baking. You can also sprinkle extra chopped walnuts or a cinnamon-sugar mixture on top. A simple glaze made from powdered sugar and a splash of milk drizzled over the cooled loaf adds an elegant touch for special occasions.
Make-Ahead Options: Banana bread batter can be mixed and refrigerated overnight before baking. In fact, the resting period allows the flavors to develop even more. You can also bake the bread, cool it completely, and freeze it for up to 3 months. This makes it perfect for meal prep or for having homemade bread ready when guests arrive unexpectedly.
How to Store Banana Bread: Best Practices
Proper storage keeps your banana bread fresh and delicious for as long as possible. Whether you’re saving some for later or meal prepping for the week, these methods will help maintain quality.
Room Temperature Storage: For short-term storage, wrap your completely cooled banana bread tightly in plastic wrap or aluminum foil. You can also place it in an airtight container. Stored this way at room temperature, banana bread stays fresh for 3-4 days. Keep it in a cool, dry place away from direct sunlight and heat sources.
Refrigeration: If your kitchen is warm or you want to extend the shelf life, refrigeration works well. Wrap the bread tightly and place it in the refrigerator for up to a week. The cold temperature may make the bread slightly denser, so bring slices to room temperature before eating for the best texture.
Freezing: For longer storage, freezing is your best option. Wrap the whole loaf or individual slices tightly in plastic wrap, then place in a freezer bag or wrap in foil. Squeeze out as much air as possible to prevent freezer burn. Frozen banana bread keeps for up to 3 months. Thaw overnight in the refrigerator or at room temperature for 1-2 hours.
Reheating: Warm banana bread tastes amazing, so don’t hesitate to reheat leftovers. For slices, a 10-20 second zap in the microwave does the trick. For a whole loaf, wrap it in foil and warm in a 300°F oven for about 10-15 minutes. You can also toast individual slices for a slightly crispy exterior.
Meal Prep Considerations: Banana bread is excellent for batch cooking. Bake multiple loaves at once when you have overripe bananas, then freeze the extras. Slice before freezing so you can grab individual portions as needed. This approach saves time and ensures you always have a homemade snack or breakfast option ready.
FAQs: Frequently Asked Questions About Banana Bread
Can I skip nuts and raisins in banana bread?
Yes, you can easily omit walnuts and raisins from banana bread. The recipe still turns out soft, moist, and flavorful without them. Nuts add crunch and raisins provide chewiness, but skipping both keeps the loaf tender and lets the banana flavor shine. For variety, swap in chocolate chips, dried cranberries, or shredded coconut in the same amount—about 1/2 cup total. Always fold add-ins gently into the batter at the end to avoid overmixing, which can make the bread tough. This flexibility makes the recipe great for allergies or preferences. Bake as directed, and you’ll have a delicious plain or customized loaf ready in about an hour. Test doneness with a toothpick inserted in the center—it should come out clean or with a few moist crumbs. Store leftovers wrapped tightly for up to 4 days at room temperature.
How do I ripen bananas fast for banana bread?
Ripen bananas quickly using the oven method: Preheat to 250°F (120°C). Place whole, unpeeled bananas on a lined baking sheet. Bake for 15-20 minutes, checking after 15—peels should darken and pull away from the fruit, and bananas will feel soft when squeezed. Let cool slightly before peeling; they’ll be perfectly mushy and sweet for mashing into batter. This works for slightly green bananas and takes under 30 minutes total. Avoid microwaving, as it cooks the fruit unevenly. For best results, use 3 medium bananas (about 1 1/2 cups mashed) per loaf. Overripe bananas give the most flavor and moisture, mimicking spots naturally found after 5-7 days on the counter. Save peels for compost. Your banana bread will have that authentic sweet, caramelized taste every time.
How do I ripen bananas overnight for baking?
For natural ripening in 24 hours, keep the banana bunch intact and place it in a paper bag. Fold the top closed to trap ethylene gas, which speeds ripening. Add an apple or tomato inside to accelerate the process—fruits release ethylene naturally. Leave the bag at room temperature (around 70°F) away from direct sun. Check after 12-24 hours; bananas should have brown spots and soften for easy mashing. This method avoids heat damage and preserves nutrients better than ovens. Expect 2-3 days normally, but the bag cuts it to one. Use for banana bread by mashing 3-4 ripe ones until smooth—no lumps for even texture. If too ripe, freeze extras. This simple trick ensures you never waste bananas and always have fresh ones ready for moist, flavorful loaves.
Can I freeze overripe bananas for banana bread?
Yes, freeze overripe bananas to use later in banana bread—they thaw perfectly mushy. Keep peels on, place in a freezer bag, squeeze out air, and freeze flat for up to 3 months. Thaw overnight in the fridge or under warm water for 30 minutes; peels slip off easily, and the fruit mashes smoothly despite some water release—drain if needed. For convenience, peel, slice, and freeze in portions (1 cup per bag) for smoothies or direct baking. Label bags with dates. Thawed bananas intensify sweetness, mimicking peak ripeness. In recipes, substitute 1:1 for fresh mashed. Avoid refreezing. This saves money—bananas peak at 99 cents per pound—and reduces waste. Pro tip: Blend thawed bananas into batter for ultra-moist bread that stays fresh longer.
Can you freeze banana bread and how?
Yes, freeze banana bread to enjoy it fresh-tasting for months. Cool completely first to avoid sogginess. Wrap slices or the whole loaf tightly in plastic wrap, then foil or a freezer bag—double-layer prevents freezer burn. Squeeze out air and label with date. Freeze up to 3 months; it tastes best within 1-2. Thaw at room temperature for 1-2 hours or overnight in the fridge. For quick serving, microwave slices 10-20 seconds. Slices thaw faster and portion easily. Freezing preserves moisture better than room storage, where it dries in 3-4 days. Revive thawed bread by warming at 300°F for 5 minutes or toasting. This method works for loaves with or without add-ins like nuts. Always slice before freezing for grab-and-go breakfasts packed with banana goodness.
Banana Bread
- Total Time: 1 hour 10 minutes
- Yield: 10 servings
- Diet: Vegetarian
Description
🍌 Savor the ultimate moist banana bread bursting with natural sweetness from overripe bananas, staying tender and fresh for days without drying out.
🥖 Easy one-bowl recipe perfect for breakfast or snacks, customizable with nuts or chocolate for a wholesome treat everyone loves!
Ingredients
– 3 very ripe medium/large bananas
– ½ cup (8 Tbsp) unsalted butter at room temperature
– ¾ cup sugar (or honey for substitution)
– 2 large eggs lightly beaten
– 1 ½ cups flour
– 1 tsp baking soda
– ½ tsp salt
– ½ tsp vanilla extract
– 1 cup chopped walnuts (optional)
– ½ cup raisins (optional)
Instructions
1-Step 1: Prepare Your Oven and Pan Start by preheating your oven to 350°F. This temperature is ideal for banana bread because it allows the loaf to bake evenly without browning too quickly on the outside. While the oven heats, prepare your loaf pan. You’ll need a pan approximately 9.25 x 5.25 x 2.75 inches for this recipe. Grease the pan thoroughly with butter or cooking spray, then dust it with flour. Tap out any excess flour. This step might seem small, but it ensures your banana bread releases cleanly after baking. Nothing is more disappointing than a perfectly baked loaf that sticks to the pan!
2-Step 2: Toast the Walnuts If you’re including walnuts in your banana bread, take a few minutes to toast them first. Spread the whole walnuts on a baking sheet and place them in the oven while it preheats, or use a dry skillet on the stove over medium heat. Stir continuously for about 5 minutes until you smell that wonderful nutty aroma. Let the walnuts cool completely, then chop them into pieces. Toasting intensifies the natural oils in nuts and gives your banana bread a deeper, more complex flavor. If you’re making the nut-free version, simply skip this step.
3-Step 3: Cream the Butter and Sugar In a large mixing bowl, combine your softened butter and sugar. Using a wooden spoon or hand mixer, cream them together until the mixture becomes light and fluffy. This usually takes 2-3 minutes of mixing. The process incorporates air into the batter, which helps create a lighter texture in your finished banana bread. Make sure your butter is truly at room temperature for the best results. Cold butter won’t cream properly, and melted butter will change the texture of your bread. If you press your finger into the butter and it leaves an indentation without resistance, it’s ready.
4-Step 4: Prepare the Bananas Peel your very ripe bananas and place them in a separate bowl. Using a fork, mash them until they reach a chunky applesauce consistency. You don’t want completely smooth bananas leaving some small chunks creates nice pockets of banana flavor throughout the bread. Add the mashed bananas to your butter and sugar mixture along with the lightly beaten eggs. Stir everything together until well combined. The eggs should be fully incorporated, but don’t overmix at this stage.
5-Step 5: Combine Dry Ingredients In another bowl, whisk together the flour, baking soda, and salt. This step ensures that the leavening agent and salt are evenly distributed throughout the flour before adding them to the wet ingredients. Even distribution prevents bitter spots from concentrated baking soda and ensures consistent rising.
6-Step 6: Mix the Batter Gradually add the dry ingredients to your wet mixture. Stir gently with a wooden spoon or spatula just until the flour is incorporated. The key here is not to overmix. When you see no more streaks of dry flour, stop stirring. Overmixing develops gluten in the flour, which can make your banana bread tough and dense instead of tender and moist. Fold in the vanilla extract, chopped walnuts, and raisins. Use a gentle motion, cutting through the center and folding over, to distribute these ingredients without overworking the batter.
7-Step 7: Bake Your Banana Bread Pour the batter into your prepared loaf pan, spreading it evenly with a spatula. Tap the pan gently on the counter a couple of times to release any large air bubbles. Place the pan in your preheated oven and bake for 55 to 60 minutes. Every oven bakes slightly differently, so start checking your banana bread at the 50-minute mark. Insert a toothpick or wooden skewer into the center of the loaf. If it comes out clean or with just a few moist crumbs, your bread is done. If there’s wet batter on the toothpick, give it another 5-10 minutes and check again.
8-Step 8: Cool and Serve Once baked, let the banana bread rest in the pan for 10 minutes. This resting period allows the structure to set so the loaf holds its shape when removed. After 10 minutes, run a thin knife around the edges to loosen any spots that might have stuck, then turn the pan upside down onto a wire rack. Let the bread cool completely before slicing for the cleanest cuts. However, if you simply can’t wait, warm banana bread fresh from the oven is one of life’s greatest pleasures! Just know that warm bread tends to crumble more easily when cut.
Notes
🍌 Speed-ripen bananas by baking at 250°F for 15-20 minutes or in a paper bag with an apple.
🥜 Swap walnuts and raisins for chocolate chips for a fun twist, or omit for nut-free.
🔥 Adjust baking time based on oven type; check early to avoid overbaking.
- Prep Time: 10 minutes
- Cooling: 10 minutes
- Cook Time: 60 minutes
- Category: Bread
- Method: Bake
- Cuisine: American
Nutrition
- Serving Size: 1 slice
- Calories: 350
- Sugar: 20g
- Sodium: 243mg
- Fat: 18g
- Saturated Fat: 7g
- Unsaturated Fat: 11g
- Trans Fat: 0g
- Carbohydrates: 45g
- Fiber: 3g
- Protein: 5g
- Cholesterol: 57mg
Keywords: moist banana bread, banana bread recipe, easy banana bread, best banana bread