Why You’ll Love This Baked Piroshki Recipe
This baked pirozhki recipe is a fantastic choice for anyone wanting a tasty, homemade treat that’s simple to make. You’ll appreciate how it comes together quickly, making it ideal for busy parents or students cooking after a long day. Plus, the mix of savory fillings like ground beef and mashed potatoes delivers a comforting flavor that feels just right for family gatherings or a quick snack.
One of the best parts is the health benefits you get from baking instead of frying. You can say goodbye to extra oil while still enjoying a crispy, golden exterior and a soft inside. The recipe also shines with its versatility, adapting to different dietary needs without losing that delicious taste. Whether you’re a food enthusiast trying new flavors or a working professional prepping meals ahead, this baked pirozhki recipe will become a go-to favorite.
What really sets it apart is the ease of preparation, letting beginners and baking enthusiasts create something special. Imagine pulling warm pirozhki from the oven, filled with hearty ingredients that make every bite satisfying. It’s perfect for travelers looking for portable meals or seniors who enjoy simple, comforting foods. With a total prep time of about 2 hours, including rising and baking, you can whip up a batch and enjoy them warm or at room temperature.
Jump To
- 1. Why You’ll Love This Baked Piroshki Recipe
- 2. Essential Ingredients for Baked Piroshki Recipe
- 3. How to Prepare the Perfect Baked Piroshki Recipe: Step-by-Step Guide
- 4. Dietary Substitutions to Customize Your Baked Piroshki Recipe
- 5. Mastering Baked Piroshki Recipe: Advanced Tips and Variations
- 6. How to Store Baked Piroshki Recipe: Best Practices
- 7. FAQs: Frequently Asked Questions About Baked Piroshki Recipe
- 8. Baked Piroshki Recipe
Essential Ingredients for Baked Piroshki Recipe
Gathering the right ingredients is key to making perfect baked pirozhki. They come together to create a soft dough and flavorful filling that make this recipe shine. Let’s break down what’s needed, focusing on fresh, simple items that are easy to find in your kitchen.
For the dough, you’ll use a mix that ensures a light and fluffy texture. Here’s the complete list, with precise measurements for accuracy:
- 4 cups (500 g) all-purpose flour
- 1 tablespoon granulated sugar
- 1 packet instant dry yeast
- ½ teaspoon coarse kosher salt
- ½ cup (120 g) sour cream at room temperature
- 2 large eggs at room temperature
- 2/3 cup (160 ml) milk at room temperature
Now, for the filling, these ingredients add savory depth and make the pirozhki hearty:
- 1 tablespoon olive oil
- 1 lb (450 g) lean ground beef
- 1 to 3 garlic cloves, pressed
- 1 teaspoon coarse kosher salt
- ½ onion, chopped
- 1 cup leftover mashed potatoes (or alternative fillings such as cooked rice, stewed cabbage, or mushrooms)
This structured list ensures you have everything measured out clearly, making it straightforward for home cooks. For special tweaks, like vegan options, swap eggs with flaxseed meal and use plant-based milk. Remember, the sour cream in the dough adds a nice texture, so don’t skip it if you can.
Why These Ingredients Work
Each item plays a role in creating the perfect balance. For instance, the flour and yeast build a strong base, while the filling ingredients like ground beef and garlic bring bold flavors. Diet-conscious individuals might appreciate using lean beef or swapping for veggies, keeping things nutritious and tasty.
How to Prepare the Perfect Baked Piroshki Recipe: Step-by-Step Guide
Getting started with baked pirozhki is fun and rewarding, especially for newlyweds or busy parents wanting a homemade meal. Begin by combining the flour, sugar, yeast, and salt in a mixing bowl to create the dough base. In another bowl, whisk the sour cream and eggs until smooth, then add this mixture along with half the milk to the dry ingredients, mixing until a smooth dough forms. Add the remaining milk as needed to get the right consistency.
Once the dough is ready, coat it with oil, cover it, and let it rise in a warm spot for 30 to 60 minutes until it doubles in size. To speed this up, place it near a microwave with a cup of hot water or use a yogurt setting on your electric cooker. While the dough rises, prepare the filling by heating olive oil in a skillet over medium-high heat and cooking the ground beef, onion, garlic, and salt until the meat browns and cooks through. Then, mix in the cooled meat with mashed potatoes or your chosen alternative like cooked rice or stewed cabbage.
Preheat your oven to 350°F (180°C) and line a baking sheet with parchment paper for easy cleanup. Divide the risen dough into 12 equal pieces for even portions, flatten and cut it like a pizza. Shape each piece into a ball, then flatten it, add filling in the center, fold the dough over, and pinch the edges to seal, gently flattening into hand pies. Arrange them on the baking sheet, brush with an egg wash made from egg yolk and water, and bake for 20 to 25 minutes until golden brown. Serve warm or at room temperature, and if you’re reheating, cover with a damp paper towel in the microwave to keep them moist.
Tips for Success
If you don’t have a stand mixer, knead the dough by hand for about 5 minutes after it comes together it’s a great way for baking enthusiasts to get hands-on. For variations, the dough works well with sweet fillings too, like fruit preserves. To add value, if you’re exploring more ideas for fillings, check out our cabbage eggs recipe for a simple veggie twist.
The whole process takes around 2 hours, including rising and baking, making it manageable for working professionals. This step-by-step guide ensures even students can master it with practice. Baking these pirozhki in the oven gives a lighter result compared to frying, which is why it’s popular among diet-conscious folks.

Dietary Substitutions to Customize Your Baked Piroshki Recipe
Making baked pirozhki your own is easy with a few swaps, perfect for food enthusiasts or those with specific needs. For protein, try ground turkey or chicken instead of beef for a leaner option, or go plant-based with lentils and chickpeas. These changes keep the recipe hearty while fitting vegan diets seamlessly.
When it comes to veggies and seasonings, mushrooms or spinach can replace onions for a milder taste. Add moisture with tomato sauce or use herbs like dill for extra flavor. These adjustments let seniors or busy parents tailor the recipe without much fuss, ensuring everyone enjoys a delicious meal.
- Protein alternatives: Ground turkey, lentils, or tofu
- Veggie swaps: Mushrooms, cabbage, or spinach
- Seasoning ideas: Paprika, garlic powder, or fresh herbs
With these tweaks, your baked pirozhki stay flexible and fun, ideal for gatherings or daily meals.
Mastering Baked Piroshki Recipe: Advanced Tips and Variations
Once you’re comfortable with the basics, dive into advanced techniques to elevate your baked pirozhki. Use an instant-read thermometer to check dough temperature for the best yeast activity, ensuring a perfect rise. For deeper flavor, try a slow, cold rise in the fridge overnight it makes the texture even better and is great for meal prepping.
Experiment with fillings like curried potatoes for a twist or sweet options such as fruit preserves for dessert versions. Brush the tops with garlic butter or sprinkle sesame seeds before baking to boost appeal, making them a hit at parties. The dough is versatile, so it pairs well with various sweet and savory ideas, like using leftovers creatively.
| Technique | Benefit |
|---|---|
| Cold rise | Enhances flavor and texture |
| Freezing unbaked | Allows quick baking later |
For more sweet inspiration, explore our blueberry cottage cheese breakfast bake to pair with your pirozhki variations.
How to Store Baked Piroshki Recipe: Best Practices
Proper storage keeps your baked pirozhki fresh and tasty for days. Store them in an airtight container in the fridge for up to 5 days, or freeze them for up to 3 months after cooling. Reheat in the oven at 350°F for 10-15 minutes to keep that crispy crust, though microwaving works if you’re in a rush just use a damp paper towel to avoid drying them out.
For meal prep, batch cook and portion them out, which is ideal for working professionals or families. These methods ensure your pirozhki remain enjoyable, whether you’re grabbing a quick bite or planning ahead.
FAQs: Frequently Asked Questions About Baked Piroshki Recipe
What are baked piroshki and how do they differ from fried ones?
Baked piroshki are Russian hand pies made from yeast dough filled with various sweet or savory fillings. Unlike fried piroshki, which are cooked in oil until crispy, baked versions are cooked in the oven, resulting in a lighter, less greasy texture while still maintaining a soft and fluffy dough. Both types are delicious, but baking offers a healthier alternative without sacrificing flavor.
What are some popular fillings for baked piroshki?
Baked piroshki can be filled with a wide range of ingredients. Savory options include mashed potatoes with ground beef, stewed cabbage, rice with meat, or cheesy potatoes. For sweet versions, common fillings are apple, blueberry, or homemade jam. The yeast dough used is versatile and complements both sweet and savory tastes, making it suitable for leftovers or fresh ingredients.
How should I store baked piroshki to keep them fresh?
To keep baked piroshki fresh, store them in an airtight container in the refrigerator for up to 5 days. When reheating, cover them with a damp paper towel and microwave in 30-second intervals to prevent drying out or becoming rubbery. This method maintains their softness and flavor, making them easy to prepare ahead of time.
Can baked piroshki be frozen, and how do I reheat them properly?
Yes, baked piroshki freeze well. After cooling, place them in a freezer-safe bag and store for up to 3 months. To reheat, thaw in the refrigerator or microwave directly from frozen, covering with a damp paper towel. Heat for about 1 minute initially, then in 30-second increments until warmed through, avoiding overcooking to maintain texture.
Is it possible to make gluten-free baked piroshki dough?
Gluten-free baked piroshki dough can be made using a blend of gluten-free flours such as rice flour, tapioca starch, and xanthan gum to mimic the elasticity of wheat dough. Using gluten-free yeast dough recipes ensures a soft, fluffy texture similar to traditional piroshki. Allow for proper rising time and handle dough gently, as gluten-free dough tends to be more delicate.

Baked Piroshki Recipe
- Total Time: 2 hours
- Yield: 12 pirozhki 1x
- Diet: Contains meat and dairy
Description
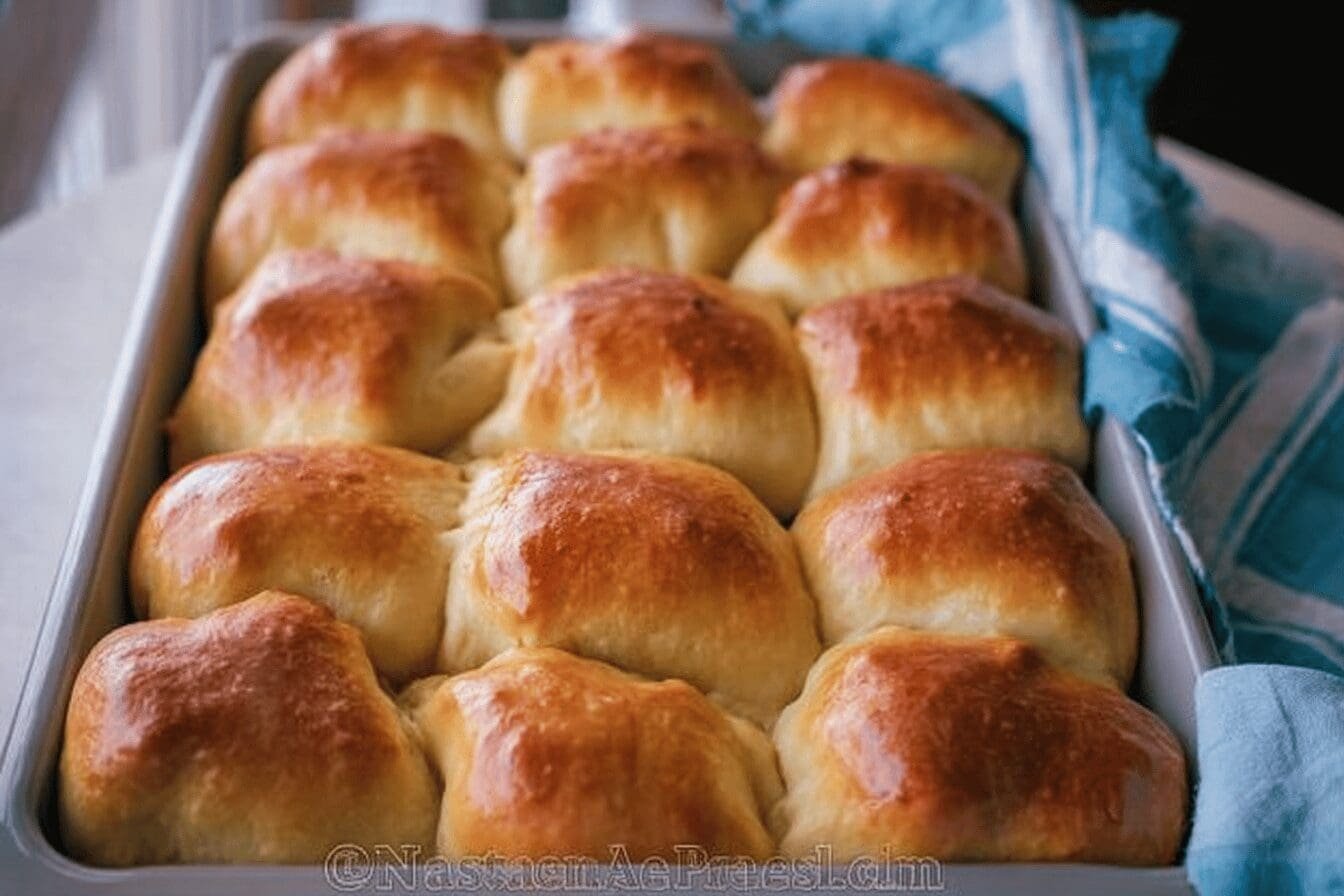
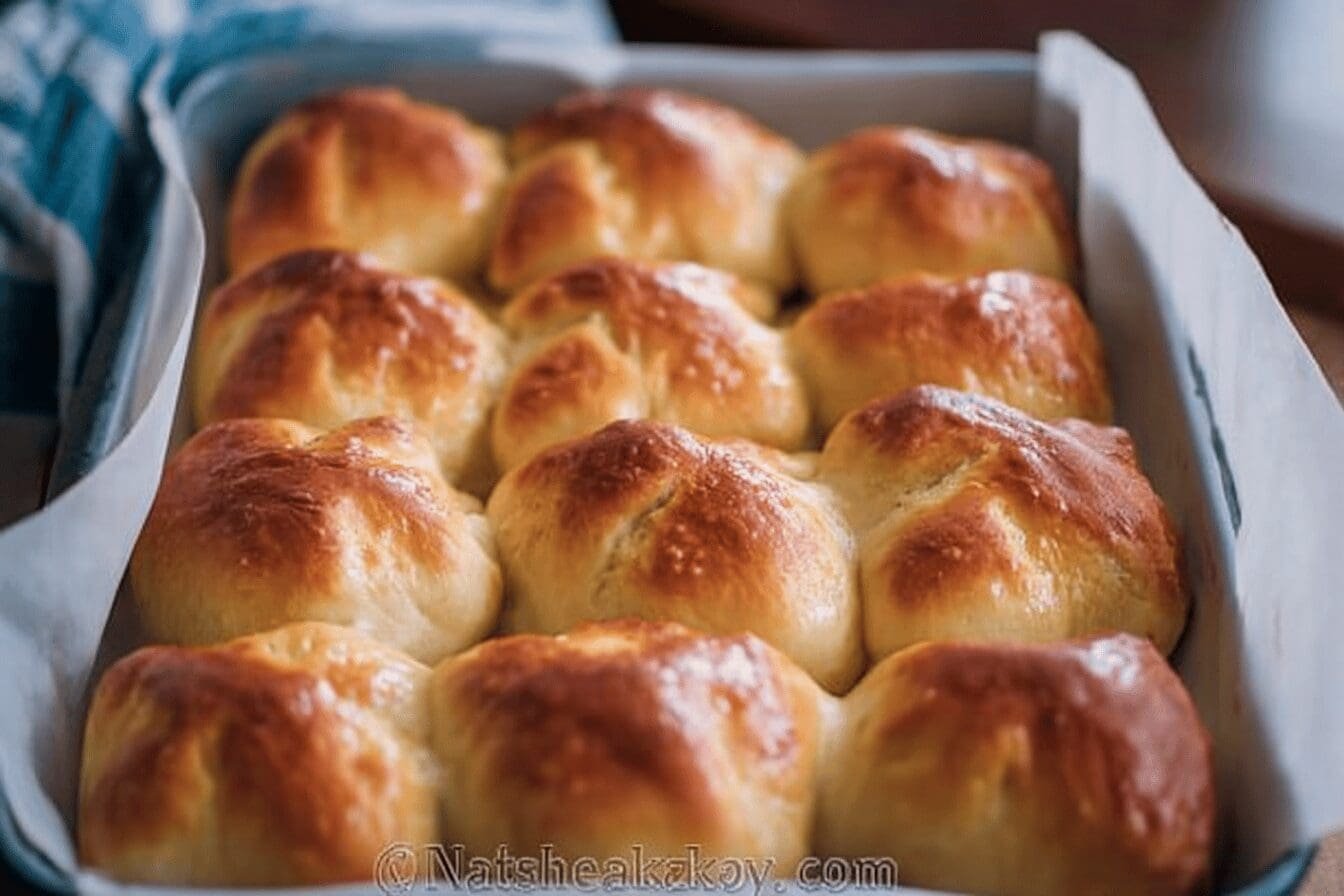
🥟 Baked Pirozhki offer delicious versatility with both savory and sweet filling options perfect for any occasion.
🍽️ This recipe features a soft sour cream dough that creates tender, golden hand pies that satisfy various tastes easily.
Ingredients
4 cups (500 g) all-purpose flour
1 tablespoon granulated sugar
1 packet instant dry yeast
½ teaspoon coarse kosher salt
½ cup (120 g) sour cream at room temperature
2 large eggs at room temperature
2/3 cup (160 ml) milk at room temperature
1 tablespoon olive oil
1 lb (450 g) lean ground beef
1 to 3 garlic cloves, pressed
1 teaspoon coarse kosher salt
½ onion, chopped
1 cup leftover mashed potatoes (or alternative fillings such as cooked rice, stewed cabbage, or mushrooms)
Instructions
1-Getting started: Begin by combining the flour, sugar, yeast, and salt in a mixing bowl to create the dough base. In another bowl, whisk the sour cream and eggs until smooth, then add this mixture along with half the milk to the dry ingredients, mixing until a smooth dough forms. Add the remaining milk as needed to get the right consistency.
2-Rising the dough: Once the dough is ready, coat it with oil, cover it, and let it rise in a warm spot for 30 to 60 minutes until it doubles in size. To speed this up, place it near a microwave with a cup of hot water or use a yogurt setting on your electric cooker.
3-Preparing the filling: While the dough rises, prepare the filling by heating olive oil in a skillet over medium-high heat and cooking the ground beef, onion, garlic, and salt until the meat browns and cooks through. Then, mix in the cooled meat with mashed potatoes or your chosen alternative like cooked rice or stewed cabbage.
4-Assembling and baking: Preheat your oven to 350°F (180°C) and line a baking sheet with parchment paper for easy cleanup. Divide the risen dough into 12 equal pieces for even portions, flatten and cut it like a pizza. Shape each piece into a ball, then flatten it, add filling in the center, fold the dough over, and pinch the edges to seal, gently flattening into hand pies. Arrange them on the baking sheet, brush with an egg wash made from egg yolk and water, and bake for 20 to 25 minutes until golden brown. Serve warm or at room temperature, and if you’re reheating, cover with a damp paper towel in the microwave to keep them moist.
Notes
🔥 Place dough in warm spots like near a microwave with hot water to speed rising.
🍴 Flatten and cut dough like pizza for equal portions.
☁️ Cover pirozhki with damp paper towel when reheating to prevent drying out.
- Prep Time: 30 minutes
- Dough rising time: 30-60 minutes
- Cook Time: 25 minutes
- Category: Snack
- Method: Baking
- Cuisine: Russian
Nutrition
- Serving Size: 1 pirozhki
Keywords: Baked pirozhki, Savory hand pies, Sweet and savory pastries, Russian pirozhki