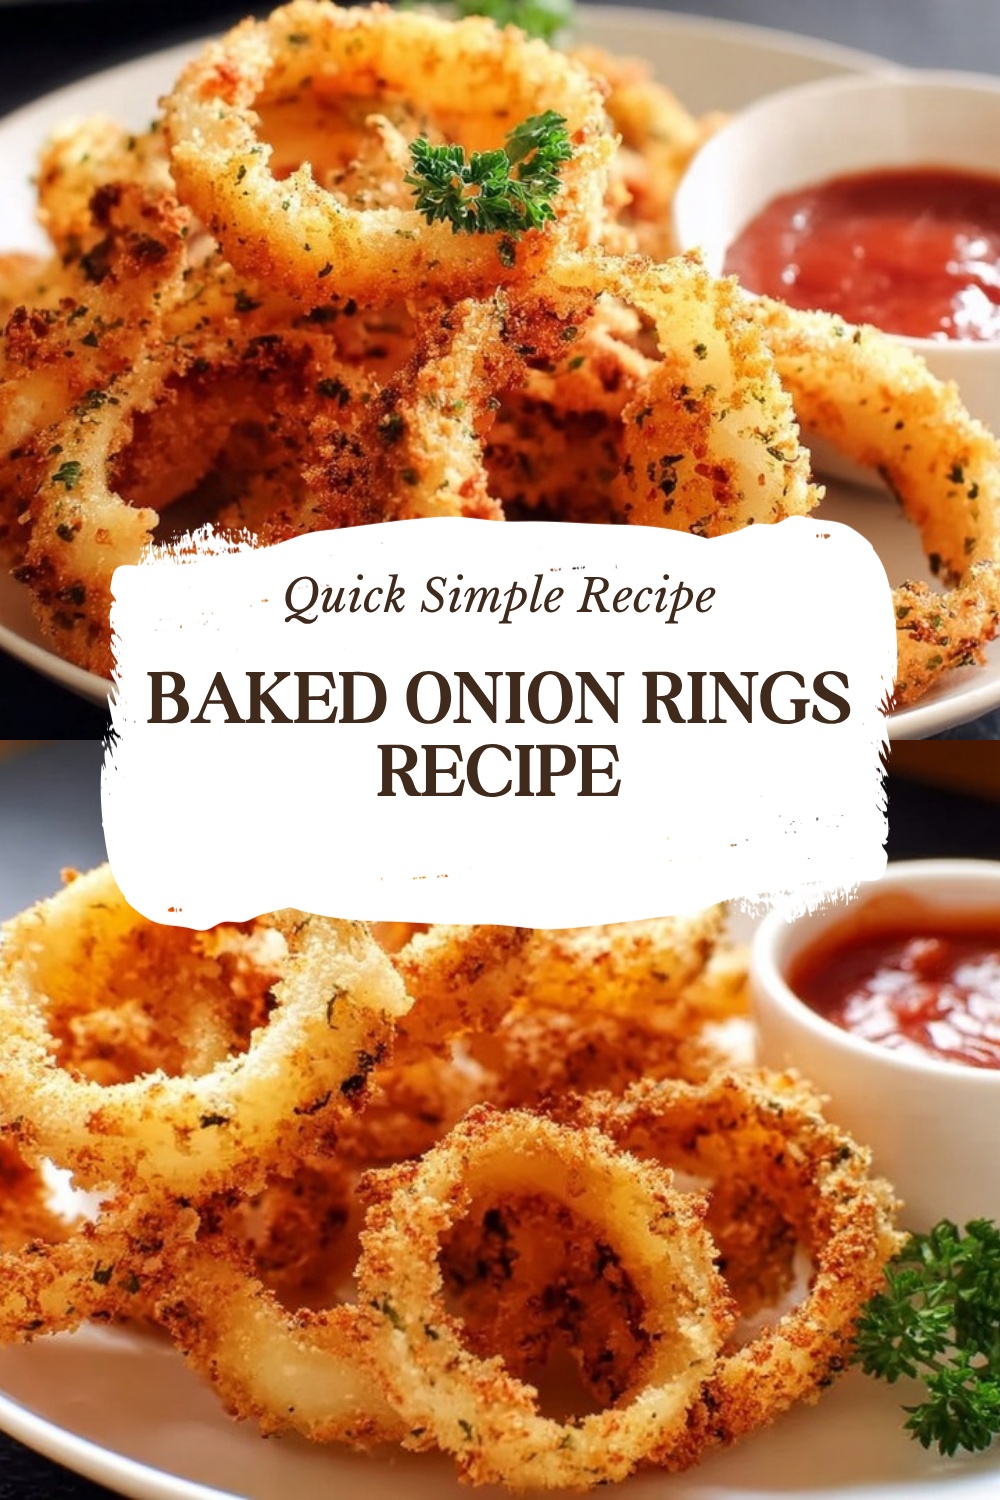
Why You’ll Love This Baked Onion Rings Recipe
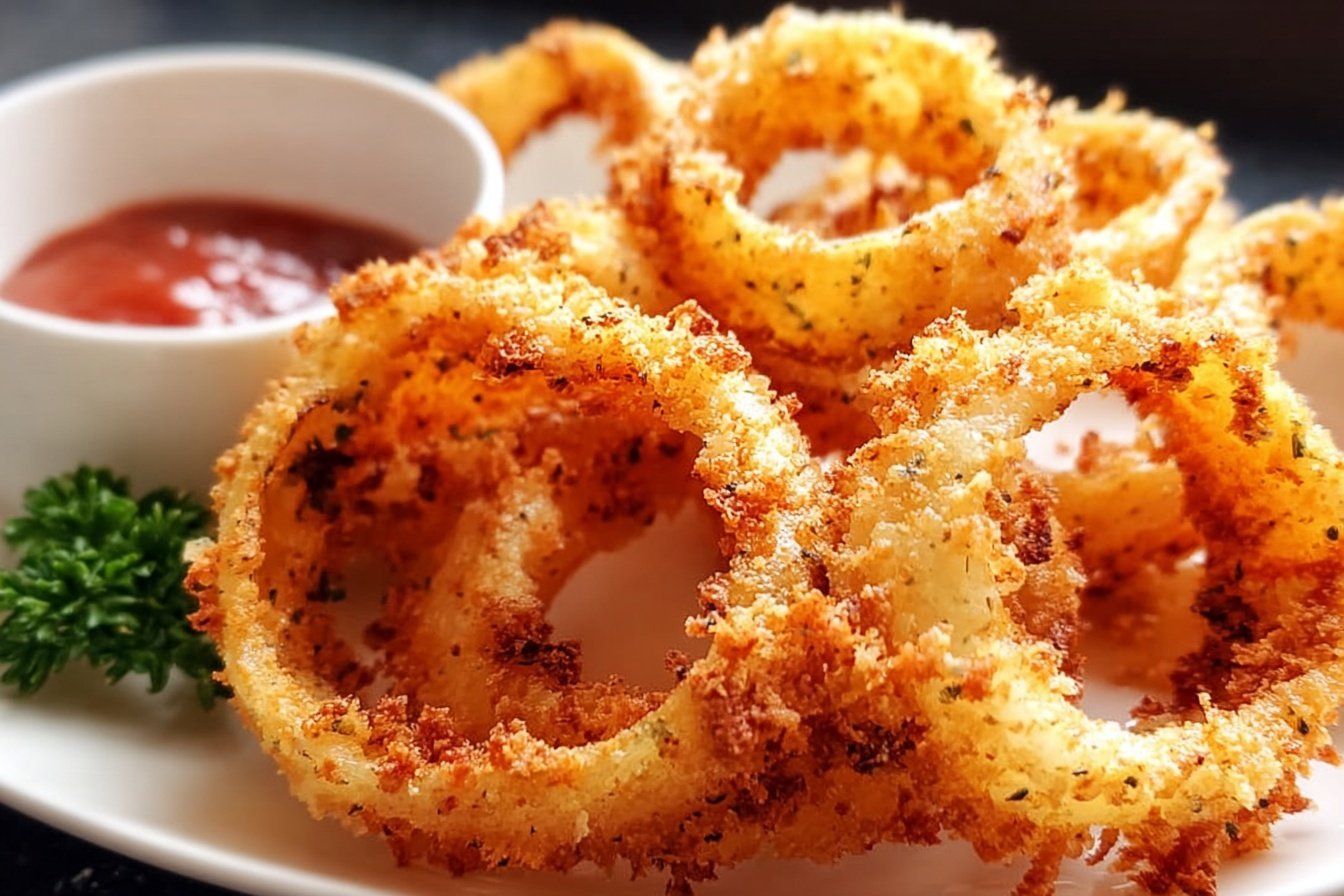
If you are craving a crunchy snack that feels a little lighter than the fried version, this Baked Onion Rings Recipe is a total winner. It gives you that classic golden bite without standing over a pot of hot oil, which is always a nice bonus on a busy weeknight.
- Easy to make: The steps are simple, the prep takes about 15 minutes, and the oven does most of the work. That makes it a great pick for home cooks, students, and busy parents who want something tasty without a lot of fuss.
- Healthier than fried onion rings: These rings are baked, not deep-fried, so they are a lighter choice while still keeping that satisfying crunch. The batter uses egg and milk to bind everything together, which helps create a crisp coating without extra oil.
- Great for many diets and occasions: This recipe is vegetarian, and it can be adjusted for different needs with a few swaps. It works well as a snack, appetizer, side dish, or even a fun topping for burgers and sandwiches.
- Big flavor in every bite: Cayenne, paprika, garlic powder, onion powder, basil, oregano, black pepper, and thyme give the rings a savory kick that tastes far more exciting than plain breadcrumbs alone.
These baked onion rings are the kind of recipe that disappears fast once they hit the table, so it is smart to make a double batch if you are serving a crowd.
If you enjoy simple comfort food recipes, you may also like this cozy chicken casserole recipe for an easy dinner idea that pairs well with crunchy sides.
Jump To
- 1. Why You’ll Love This Baked Onion Rings Recipe
- 2. Essential Ingredients for Baked Onion Rings Recipe
- 3. How to Prepare the Perfect Baked Onion Rings Recipe: Step-by-Step Guide
- 4. Dietary Substitutions to Customize Your Baked Onion Rings Recipe
- 5. Mastering Baked Onion Rings Recipe: Advanced Tips and Variations
- 6. How to Store Baked Onion Rings Recipe: Best Practices
- 7. FAQs: Frequently Asked Questions About Baked Onion Rings Recipe
- 8. Baked Onion Rings Recipe
Essential Ingredients for Baked Onion Rings Recipe
Here is everything you need for this recipe, listed clearly so you can get started with confidence. Each ingredient plays an important role in building flavor, texture, and that satisfying crisp coating.
- 2 large onions, sliced into 1/4 to 1/2 inch rings – Sweet onions work best for a mild flavor, while white or yellow onions bring a sharper taste.
- 1/2 cup flour – Half is used for the plain flour coating and half goes into the batter for structure.
- 1/2 cup milk – Helps form the thick batter and gives the coating a smooth texture.
- 1 egg, beaten – Binds the batter so it clings to the onion rings.
- 1/8 teaspoon cayenne pepper – Adds a little heat without overpowering the onions.
- 3/4 teaspoon paprika – Brings color and a warm, smoky note.
- 1/4 teaspoon sea salt – Lifts the flavor in both the batter and coating.
- 1/4 teaspoon garlic powder – Adds a savory layer that makes the rings taste more complete.
- 1/4 teaspoon onion powder – Deepens the onion flavor in a subtle way.
- 1/4 teaspoon dried basil – Adds a gentle herb note.
- 1/4 teaspoon oregano – Gives the seasoning mix a classic savory touch.
- 1/8 teaspoon black pepper – Adds mild sharpness.
- 1/8 teaspoon thyme – Gives the rings a light earthy finish.
- 1 cup breadcrumbs, preferably Panko – Panko gives the crispiest coating and best crunch.
Special dietary options
- Vegan: Replace the egg with a plant-based binder such as unsweetened dairy-free yogurt or a flax egg, and swap the milk for unsweetened almond milk, soy milk, or oat milk.
- Gluten-free: Use a gluten-free all-purpose flour blend and gluten-free breadcrumbs or crushed gluten-free cereal crumbs.
- Low-calorie: Stick with the baked method, use a light spray of oil only if needed, and pair the onion rings with a simple yogurt-based dip.
| Ingredient | What it does | Best tip |
|---|---|---|
| Onions | Give the rings their shape and natural sweetness | Choose sweet onions for a mellow flavor |
| Flour | Helps the batter stick | Use part for dredging and part for batter |
| Egg and milk | Create the binding batter | Mix until smooth and thick |
| Panko breadcrumbs | Create the crunchy outer layer | Press gently so the coating stays on |
How to Prepare the Perfect Baked Onion Rings Recipe: Step-by-Step Guide
First Step: Prepare your oven and pans
Start by preheating your oven to 425 degrees F. Line 2 baking sheets with parchment paper so the onion rings do not stick and cleanup stays easy. This temperature is hot enough to help the coating turn crisp and golden in about 17 to 20 minutes.
While the oven heats, get your ingredients and bowls ready. Setting up everything before you start dipping the rings makes the whole process smoother, especially if you are making these on a busy evening.
Second Step: Slice and separate the onions
Slice 2 large onions into rings that are about 1/4 to 1/2 inch thick. Try to keep the slices even so they bake at the same pace. Gently separate the rings and keep the smaller inner rings aside because they will cook faster than the larger ones.
If you want a milder flavor, sweet onions are the best choice. White or yellow onions also work well if you like a little more bite. Avoid cutting the rings too thin, since very thin slices can dry out during baking.
Third Step: Set up the flour coating and batter
Place 1/4 cup of the flour in a small bowl for the first coating. In a second bowl, whisk together the remaining 1/4 cup flour, milk, beaten egg, cayenne pepper, paprika, sea salt, garlic powder, onion powder, dried basil, oregano, black pepper, and thyme. Mix until you have a thick batter.
Tip: If your flour coating is not sticking well, lightly mist the onion rings with water before dredging them in flour. That little trick helps the batter cling much better.
The batter should be thick enough to coat the onion rings without running off too quickly. If it seems too loose, let it sit for a minute before dipping the onions.
Fourth Step: Coat each onion ring
Dip each onion ring into the plain flour first. Shake off any extra flour so the batter will stick evenly. Then dip the ring into the seasoned batter and let the excess drip off for about 5 to 10 seconds.
After that, coat the ring thoroughly in breadcrumbs, preferably Panko. Press lightly so the crumbs stick all over the surface. This step is what gives you that crisp finish after baking.
Fifth Step: Arrange and bake
Place the coated onion rings on the prepared baking sheets in a single layer. Leave a little space between each ring so the hot air can move around them. If the rings are crowded, they are more likely to soften instead of crisp up.
Bake for 17 to 20 minutes, flipping the rings at the 10-minute mark. Smaller inner rings may be done a bit sooner, so watch those closely. They should look golden and crisp when ready.
Final Step: Serve while hot
Remove the onion rings from the oven and let them rest for a minute or two before serving. They are best enjoyed hot, when the coating is crisp and the onion inside is tender. Serve them with ketchup, ranch, or your favorite dip.
For a full meal, try serving these alongside a hearty dinner like creamy chicken and broccoli pasta for a fun mix of creamy and crunchy textures.

Dietary Substitutions to Customize Your Baked Onion Rings Recipe
Protein and main component alternatives
This recipe is already vegetarian, which makes it a nice fit for many families. If you need to adjust the batter for special dietary needs, there are easy swaps that still give you good texture and flavor.
- Egg substitute: Use a flax egg, plain plant-based yogurt, or a thick dairy-free milk mixture to help the batter bind.
- Milk substitute: Unsweetened almond milk, oat milk, or soy milk all work well in the batter.
- Flour substitute: A gluten-free all-purpose flour blend can replace regular flour without changing the method much.
- Breadcrumb substitute: Gluten-free Panko or crushed gluten-free crackers can replace standard breadcrumbs.
Vegetable, sauce, and seasoning modifications
You can also make the recipe suit different tastes by changing the onion type, seasoning mix, or dipping sauce. Sweet onions give a softer flavor, while yellow onions bring more depth and white onions add a sharper edge. If you want a little more spice, add a pinch more cayenne or serve the rings with a spicy dipping sauce.
For a milder version, reduce the cayenne and keep the herbs simple with paprika, garlic powder, and oregano. You can also serve these onion rings with barbecue sauce, ranch, honey mustard, or a garlic yogurt dip depending on what your table is craving.
Mastering Baked Onion Rings Recipe: Advanced Tips and Variations
Pro cooking techniques
Small details make a big difference with baked onion rings. Drip off the excess batter before breading, since too much batter can make the coating clumpy or soggy. Also, keep the rings in a single layer on the baking sheet so they crisp instead of steam.
For even better results, bake the pans in the upper and lower thirds of the oven and rotate them halfway through. That helps the rings brown more evenly. If your onion rings are a mix of sizes, pull the smaller ones early so they do not overbake.
Flavor variations
Once you have the basic method down, it is easy to play with the flavors. Try adding a little smoked paprika for a deeper taste, or swap the dried basil and oregano for Italian seasoning. You can also mix grated Parmesan into the breadcrumbs if you want a salty, cheesy crust.
For a little heat, add a touch more cayenne. For a milder family-friendly version, keep the spices light and serve the rings with a cool dip. If you love savory snack recipes, you might also enjoy this cheesy jalapeno casserole recipe for another bold-flavored dish.
Presentation tips
Serve the onion rings on a platter lined with parchment or a simple basket for a casual feel. Sprinkle a tiny pinch of salt or a little chopped parsley over the top for color. A few small dipping bowls on the side make the plate look fun and inviting.
Crispy onion rings taste even better when they are served right away, so try to get them from oven to table while they are still hot and crunchy.
Make-ahead options
If your schedule is packed, you can prep the onion slices and the seasoning mix ahead of time. You can also set up the flour and batter bowls earlier in the day. For the best texture, bread and bake the rings just before serving.
If you are cooking for a gathering, you can bread several rings at once and keep them on a parchment-lined tray for a short time before baking. Just avoid letting them sit too long, since the coating can soften.
How to Store Baked Onion Rings Recipe: Best Practices
Leftovers are easy to keep, though these rings are at their crispiest when fresh from the oven. Place cooled onion rings in an airtight container and store them in the refrigerator for up to 3 days. They may soften a little, but they still taste great after reheating.
To reheat, place them on a baking sheet and warm them in the oven at 375 degrees F for 3 to 5 minutes. Covering them with foil for the first couple of minutes helps them warm through without overbrowning. Try to avoid the microwave, since it can make the coating soft and chewy.
For longer storage, freeze the onion rings after baking and cooling them completely. Reheat them straight from frozen in the oven until hot and crisp again. This makes them handy for quick snacks, simple lunches, or last-minute party food.
FAQs: Frequently Asked Questions About Baked Onion Rings Recipe
What type of onions are best for baked onion rings?
Sweet onions, like Vidalia or Walla Walla, work best for baked onion rings due to their mild, slightly sweet flavor that pairs perfectly with the crispy breading without overpowering sharpness. They hold their shape well during baking and deliver the classic taste people love. Yellow onions offer a good alternative with balanced flavor, while white onions provide a bit more bite—use them if you prefer zestier rings. Avoid red onions, as their color can bleed into the batter. Slice into 1/4- to 1/2-inch thick rings for optimal texture. Prep tip: Soak slices in ice water for 10-15 minutes beforehand to reduce pungency and make them extra crisp after baking. This simple choice elevates your homemade rings to restaurant quality. (92 words)
How do you make baked onion rings at home?
Start by preheating your oven to 425°F and lining two baking sheets with parchment paper. Slice 2-3 large onions into 1/2-inch rings, separating them gently. Prepare three bowls: one with 1 cup flour, one with a batter (1 cup flour, 1 cup milk, 1 egg, 1 tsp each salt, paprika, garlic powder), and one with 2 cups panko breadcrumbs mixed with spices like cayenne and thyme. Dredge rings in flour, dip in batter (let excess drip), then coat in breadcrumbs. Arrange in a single layer, spray lightly with oil, and bake 17-20 minutes, flipping at 10 minutes for even crispness. Serve hot with dipping sauce. Yields 4 servings; total time 30 minutes. No deep fryer needed—these are crispy and guilt-free. (118 words)
How long and at what temperature do you bake onion rings?
Bake onion rings at 425°F for 17-20 minutes total, flipping them halfway at the 10-minute mark to ensure both sides turn golden and crispy. Smaller inner rings may finish in 12-15 minutes, so separate them from larger outer rings on the baking sheet for precise timing—remove small ones early to prevent burning. Use parchment-lined sheets and a quick oil spray for best results. This high heat mimics frying without the oil, creating crunch via the Maillard reaction. Test doneness by checking for firm, browned edges. Pro tip: Position racks in upper and lower thirds of the oven and rotate sheets midway for uniform baking. Perfect every time. (102 words)
How do you store and reheat baked onion rings?
Store leftover baked onion rings in an airtight container or zip-top bag in the fridge for up to 3 days—they stay decent but may soften slightly. For longer storage, freeze uncoated rings on a sheet before breading, then transfer to a freezer bag for up to 2 months. To reheat, place on a wire rack over a baking sheet and oven at 375°F for 3-5 minutes until crisp; avoid microwave to prevent sogginess. Covering with foil for the first 2 minutes stops over-browning. Reheating revives nearly all the crunch. Fun fact: Baked versions have about 50% fewer calories than fried (around 150 per serving vs. 300). Enjoy as snacks or toppings. (109 words)
Why let excess batter drip off onion rings before breadcrumbs?
Letting excess batter drip off for 5-10 seconds before coating in breadcrumbs prevents clumpy, soggy breading that slides off during baking. Thick batter creates uneven layers, leading to patchy crispness and wasted coating. Pat rings lightly if needed for better adhesion. This step ensures a light, airy crunch like deep-fried rings but healthier. Common spices for batter include 1/2 tsp each cayenne, paprika, garlic/onion powder, salt, pepper, basil, oregano, and thyme—adjust for heat preference. Result: Professional-looking rings that hold up to dipping in ranch or ketchup. Mistake to avoid: Skipping this causes 20-30% more batter waste and chewy texture. Master it for flawless batches. (105 words)

Baked Onion Rings Recipe
- Total Time: 35 minutes
- Yield: 4 servings
- Diet: Vegetarian
Description
🧅 Savor ultra-crispy baked onion rings that are healthier than fried versions – baked with minimal oil for guilt-free crunch and bold spice flavor!
🍟 Perfect easy appetizer or side dish using simple pantry staples, ready in under 40 minutes for your next snack craving.
Ingredients
– 2 large onions, sliced into 1/4 to 1/2 inch rings
– 1/2 cup flour
– 1/2 cup milk
– 1 egg, beaten
– 1/8 teaspoon cayenne pepper
– 3/4 teaspoon paprika
– 1/4 teaspoon sea salt
– 1/4 teaspoon garlic powder
– 1/4 teaspoon onion powder
– 1/4 teaspoon dried basil
– 1/4 teaspoon oregano
– 1/8 teaspoon black pepper
– 1/8 teaspoon thyme
– 1 cup breadcrumbs, preferably Panko
Instructions
1-First Step: Prepare your oven and pans Start by preheating your oven to 425 degrees F. Line 2 baking sheets with parchment paper so the onion rings do not stick and cleanup stays easy. This temperature is hot enough to help the coating turn crisp and golden in about 17 to 20 minutes. While the oven heats, get your ingredients and bowls ready. Setting up everything before you start dipping the rings makes the whole process smoother, especially if you are making these on a busy evening.
2-Second Step: Slice and separate the onions Slice 2 large onions into rings that are about 1/4 to 1/2 inch thick. Try to keep the slices even so they bake at the same pace. Gently separate the rings and keep the smaller inner rings aside because they will cook faster than the larger ones. If you want a milder flavor, sweet onions are the best choice. White or yellow onions also work well if you like a little more bite. Avoid cutting the rings too thin, since very thin slices can dry out during baking.
3-Third Step: Set up the flour coating and batter Place 1/4 cup of the flour in a small bowl for the first coating. In a second bowl, whisk together the remaining 1/4 cup flour, milk, beaten egg, cayenne pepper, paprika, sea salt, garlic powder, onion powder, dried basil, oregano, black pepper, and thyme. Mix until you have a thick batter. The batter should be thick enough to coat the onion rings without running off too quickly. If it seems too loose, let it sit for a minute before dipping the onions.
4-Fourth Step: Coat each onion ring Dip each onion ring into the plain flour first. Shake off any extra flour so the batter will stick evenly. Then dip the ring into the seasoned batter and let the excess drip off for about 5 to 10 seconds. After that, coat the ring thoroughly in breadcrumbs, preferably Panko. Press lightly so the crumbs stick all over the surface. This step is what gives you that crisp finish after baking.
5-Fifth Step: Arrange and bake Place the coated onion rings on the prepared baking sheets in a single layer. Leave a little space between each ring so the hot air can move around them. If the rings are crowded, they are more likely to soften instead of crisp up. Bake for 17 to 20 minutes, flipping the rings at the 10-minute mark. Smaller inner rings may be done a bit sooner, so watch those closely. They should look golden and crisp when ready.
6-Final Step: Serve while hot Remove the onion rings from the oven and let them rest for a minute or two before serving. They are best enjoyed hot, when the coating is crisp and the onion inside is tender. Serve them with ketchup, ranch, or your favorite dip. For a full meal, try serving these alongside a hearty dinner like creamy chicken and broccoli pasta for a fun mix of creamy and crunchy textures.
Notes
🧅 Choose sweet onions for a milder, balanced flavor or yellow onions for sharper taste.
⏲️ Bake smaller inner rings separately as they cook faster and prevent uneven crisping.
💧 Always drip off excess batter before breading to avoid clumping and ensure even coating.
- Prep Time: 15 minutes
- Cook Time: 20 minutes
- Category: Appetizers & Snacks
- Method: Bake
- Cuisine: American
Nutrition
- Serving Size: about 8 rings
- Calories: 220 kcal
- Sugar: 3 g
- Sodium: 350 mg
- Fat: 6 g
- Saturated Fat: 1.5 g
- Unsaturated Fat: 4.5 g
- Trans Fat: 0 g
- Carbohydrates: 35 g
- Fiber: 2 g
- Protein: 6 g
- Cholesterol: 50 mg
Keywords: baked onion rings, healthy onion rings, crispy onion rings, easy snack