Why You’ll Love This Baked Chicken Legs
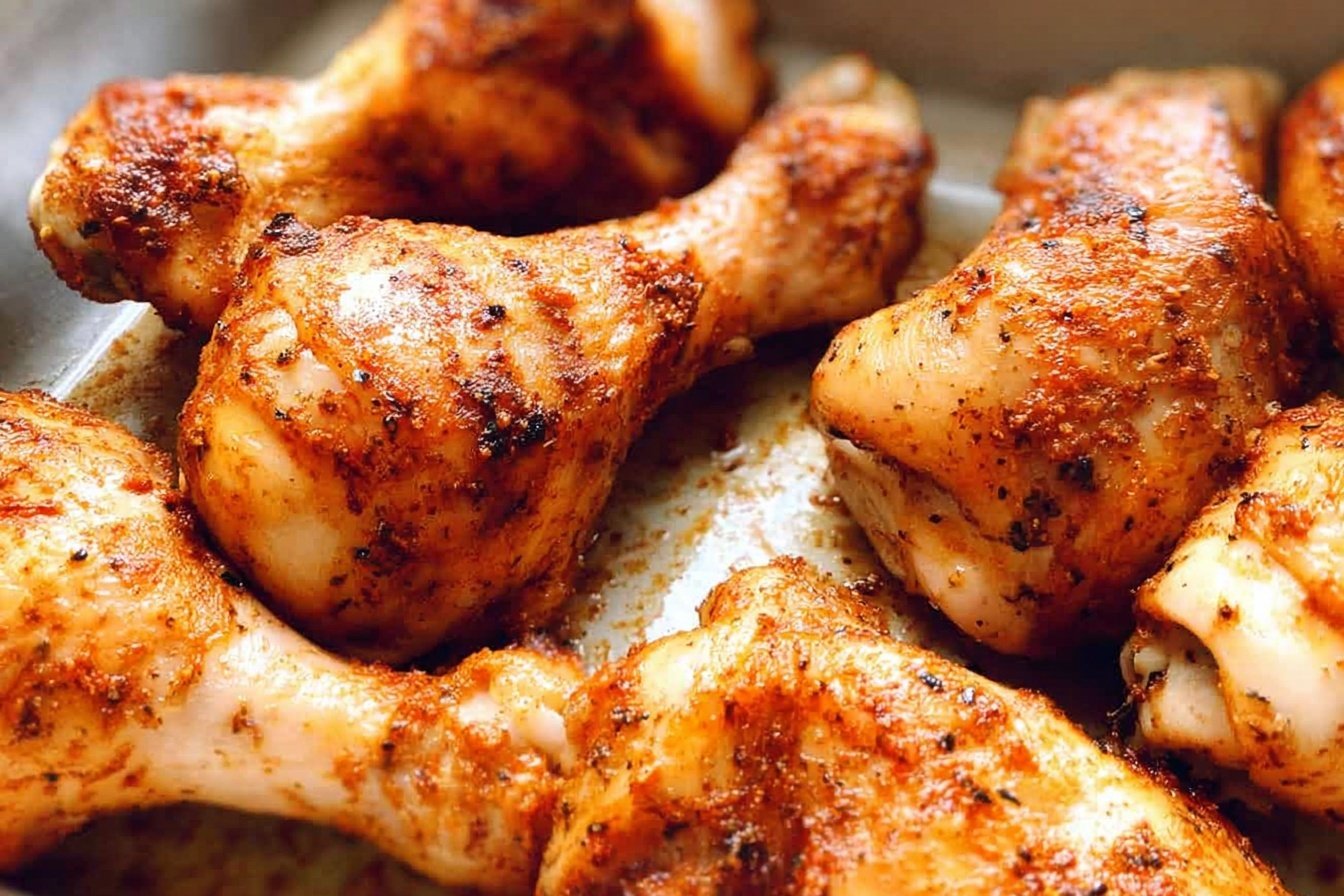
There’s something truly satisfying about pulling a tray of perfectly golden, crispy baked chicken legs from the oven. This recipe has become a family favorite for so many reasons, and once you try it, you’ll understand exactly why it deserves a permanent spot in your weekly meal rotation.
- Ease of preparation: With just 10 minutes of prep time and simple pantry staples, this recipe comes together effortlessly. You don’t need any fancy equipment or hard-to-find ingredients. Simply toss the chicken with oil and seasonings, pop it in the oven, and let the heat do all the work for you.
- Health benefits: Chicken drumsticks are an excellent source of lean protein, packing 27 grams per serving. This recipe keeps things light with olive oil and simple seasonings, making it a nutritious choice for anyone watching their calorie intake while still wanting flavorful, satisfying meals.
- Versatility: These baked chicken legs work beautifully with countless side dishes and can be customized with different seasoning blends to match your mood. Whether you’re serving them for a casual weeknight dinner or a weekend gathering, they never disappoint.
- Distinctive flavor: The combination of smoked paprika, garlic powder, and onion powder creates a deeply savory, slightly smoky flavor profile that penetrates the meat while the high heat creates that irresistible crispy skin everyone loves.
This baked chicken legs recipe delivers everything you want in a main dish: minimal effort, maximum flavor, and results that will have everyone at the table asking for seconds. The best part? Cleanup is a breeze when you line your baking sheet with foil.
Jump To
- 1. Why You’ll Love This Baked Chicken Legs
- 2. Essential Ingredients for Baked Chicken Legs
- 3. How to Prepare the Perfect Baked Chicken Legs: Step-by-Step Guide
- 4. Dietary Substitutions to Customize Your Baked Chicken Legs
- 5. Mastering Baked Chicken Legs: Advanced Tips and Variations
- 6. How to Store Baked Chicken Legs: Best Practices
- 7. FAQs: Frequently Asked Questions About Baked Chicken Legs
- 8. Baked Chicken Legs
Essential Ingredients for Baked Chicken Legs
One of the things I love most about this recipe is how it transforms simple, everyday ingredients into something truly special. Here’s everything you’ll need to make the best baked chicken legs:
Main Ingredients
- 8 chicken drumsticks (about 2 lb) – The star of the show! Drumsticks are affordable, flavorful, and naturally juicy. Their higher fat content compared to breast meat means they stay tender even at high temperatures.
- 2 tablespoons olive oil – Helps the seasonings adhere to the chicken while promoting that beautiful golden-brown color and crispy skin. You can also use avocado oil or melted butter.
- 1 teaspoon sea salt – Essential for bringing out the natural flavors of the chicken. Don’t skip this! Proper seasoning makes all the difference.
- ½ teaspoon black pepper – Adds a subtle warmth and depth to the overall flavor profile.
- 1 teaspoon garlic powder – Provides that savory, aromatic base note without the risk of burning that fresh garlic can have at high temperatures.
- 1 ½ teaspoons smoked paprika (or regular paprika) – The secret weapon for beautiful color and a subtle smoky undertone. Smoked paprika adds extra dimension, but regular paprika works wonderfully too.
- ¼ teaspoon chili powder – Just enough to add a tiny kick of warmth without making the dish spicy. It rounds out the flavor beautifully.
- 1 teaspoon onion powder – Works hand in hand with the garlic powder to create that classic savory flavor combination everyone recognizes and loves.
Special Dietary Options
- Gluten-free: This recipe is naturally gluten-free as written! Just double-check any pre-mixed seasoning blends if you use them.
- Low-carb/Keto: Perfect for low-carb and keto diets with only 2 grams of carbohydrates per serving.
- Dairy-free: This recipe uses olive oil instead of butter, making it completely dairy-free.
| Prep Time | Cook Time | Total Time | Servings |
|---|---|---|---|
| 10 minutes | 40 minutes | 50 minutes | 8 drumsticks |
How to Prepare the Perfect Baked Chicken Legs: Step-by-Step Guide
Making perfectly crispy and juicy baked chicken legs is easier than you might think. Follow these simple steps, and you’ll have restaurant-quality chicken right from your own oven.
Step 1: Preheat and Prepare Your Baking Sheet
Start by preheating your oven to 425°F. This high temperature is crucial for achieving that crispy skin while keeping the meat tender and juicy inside. While the oven heats up, line a large baking sheet with aluminum foil and lightly spray it with non-stick cooking oil. The foil makes cleanup incredibly easy, and the spray prevents the chicken from sticking.
Pro tip: If you want extra crispy skin all around, place a wire cooling rack on top of your foil-lined baking sheet and spray that with cooking oil. This allows hot air to circulate under the chicken for even crisping.
Step 2: Prepare the Chicken Drumsticks
Take your chicken drumsticks out of the package and pat them thoroughly dry with paper towels. This step is absolutely essential for crispy skin! Any moisture on the surface will create steam in the oven, which prevents proper browning and crisping. Don’t rush this step take your time and get those drumsticks nice and dry.
Place the dried drumsticks in a large bowl or a resealable plastic bag. I personally love using a bag because it makes coating the chicken even easier and contains the mess, but a bowl works perfectly fine too.
Step 3: Add the Olive Oil
Drizzle the 2 tablespoons of olive oil over the chicken drumsticks. Using your hands or tongs, toss the chicken until every piece is evenly coated with oil. This oil does more than just help the seasonings stick it also promotes that beautiful golden-brown color and contributes to the crispy texture of the finished skin.
Make sure the oil gets into all the nooks and crannies of each drumstick. You want complete coverage for the best results.
Step 4: Mix and Apply the Seasonings
In a small bowl, combine all your dried seasonings: 1 teaspoon sea salt, ½ teaspoon black pepper, 1 teaspoon garlic powder, 1 ½ teaspoons smoked paprika (or regular paprika if that’s what you have), ¼ teaspoon chili powder, and 1 teaspoon onion powder. Mix them together well so the flavors are evenly distributed.
Sprinkle the seasoning mixture over the oiled chicken and toss thoroughly to coat. If using a bag, seal it and give it a good shake, massaging the seasonings into the meat. If using a bowl, use your hands to rub the seasonings all over each drumstick. Don’t be shy about getting in there with your hands it’s the best way to ensure even coverage!
Step 5: Arrange and Bake
Arrange the seasoned drumsticks on your prepared baking sheet. Make sure they’re not touching each other giving them space allows hot air to circulate around each piece for even cooking and browning. You don’t need to turn them during baking, which makes this recipe wonderfully hands-off.
Place the baking sheet in your preheated 425°F oven and bake uncovered for 40 to 45 minutes. The chicken is done when the internal temperature reaches at least 165°F at the thickest part of the meat, without touching the bone.
For the best texture, many cooks prefer to let chicken legs reach 175°F to 180°F. This higher temperature renders more of the connective tissue and fat, resulting in more tender meat that pulls easily from the bone.
Step 6: Rest and Serve
Once your baked chicken legs reach the proper temperature, remove them from the oven and let them rest for about 5 minutes before serving. This resting period allows the juices to redistribute throughout the meat instead of running out when you cut into it. The result? Every bite is as juicy and flavorful as the first.
Serve these crispy drumsticks with your favorite sides for a complete meal. They pair beautifully with everything from mashed potatoes to roasted vegetables.
If you’re looking for more delicious chicken recipes, check out my crispy baked parmesan chicken for another family favorite that’s sure to please.

Dietary Substitutions to Customize Your Baked Chicken Legs
One of the best things about this baked chicken legs recipe is how easily it adapts to different dietary needs and preferences. Let’s explore some simple swaps and modifications you can make.
Protein and Main Component Alternatives
While chicken drumsticks are the star of this recipe, you can easily adapt the seasoning blend and cooking method for other proteins. Chicken thighs work beautifully with the same seasoning and timing just adjust for bone-in versus boneless cuts. Boneless, skinless thighs will cook faster, typically needing 25 to 30 minutes at 425°F.
For a lighter option, you could use chicken breast, though you’ll need to adjust the cooking time significantly. Bone-in breasts take about 35 to 40 minutes, while boneless breasts only need 20 to 25 minutes. Keep a close eye on them and always use a meat thermometer.
Surprisingly, this seasoning blend also works wonderfully on pork chops or even firm white fish fillets. Just adjust cooking times accordingly and always check for proper doneness with a thermometer.
Vegetable, Sauce, and Seasoning Modifications
The seasoning blend in this recipe is just a starting point. Once you master the basic technique, feel free to experiment with different flavor profiles. For an Italian twist, replace the smoked paprika with dried oregano and add some grated Parmesan cheese to the mix.
Love bold flavors? Add some cayenne pepper for heat, or swap the smoked paprika for a good quality Cajun seasoning blend. Lemon pepper seasoning is another crowd favorite that pairs beautifully with chicken drumsticks.
For those watching their sodium intake, you can reduce the salt or use a salt-free seasoning blend. Just remember that salt plays an important role in both flavor and browning, so you may need to compensate with additional herbs and spices.
Want to serve these with a sauce? They’re delicious with everything from honey mustard to barbecue sauce. You can even brush them with your favorite sauce during the last few minutes of baking for a sticky, glazed finish. Just be careful not to add sugary sauces too early or they might burn at high temperatures.
For another flavorful baked chicken dish, my balsamic chicken breast offers a completely different but equally delicious flavor profile.
Mastering Baked Chicken Legs: Advanced Tips and Variations
Once you’ve mastered the basic recipe, these advanced tips will help you take your baked chicken legs to the next level.
Pro Cooking Techniques
The secret to restaurant-quality baked chicken legs lies in the details. Always bring your chicken to room temperature before baking take it out of the refrigerator about 20 to 30 minutes before cooking. Cold chicken straight from the fridge takes longer to cook and can result in uneven doneness.
Using a wire rack on your baking sheet is a game-changer for crispy skin. It elevates the chicken so hot air circulates underneath, crisping the skin on all sides rather than just the top. If you don’t have a wire rack that fits your baking sheet, you can achieve similar results by turning the chicken once halfway through cooking.
For extra crispy skin, try the baking powder trick. Add ½ teaspoon of baking powder to your seasoning blend. The baking powder raises the pH of the skin, helping it brown and crisp more effectively. Just don’t confuse it with baking soda baking soda has a more pronounced flavor that can taste metallic.
Flavor Variations
This recipe is incredibly versatile and works as a blank canvas for countless flavor combinations. Here are some of my favorite variations:
- Honey Garlic: Add 1 tablespoon honey to the olive oil and reduce the salt slightly. The natural sugars create a beautiful glazed finish.
- Lemon Herb: Add 1 teaspoon dried thyme or rosemary and finish with fresh lemon juice and zest after baking.
- BBQ Style: Brush with your favorite BBQ sauce during the last 5 minutes of baking for sticky, saucy drumsticks.
- Everything Bagel: Roll the seasoned drumsticks in everything bagel seasoning before baking for a savory, onion-garlic flavor punch.
Presentation Tips
They say we eat with our eyes first, and a little attention to presentation makes these baked chicken legs even more appealing. Arrange them on a platter with fresh herbs like parsley or chives scattered around. Lemon wedges add a pop of color and give diners the option to brighten their chicken with a squeeze of citrus.
For a complete meal presentation, consider roasting vegetables alongside your chicken. Potato wedges, carrot sticks, or broccoli florets can roast on the same sheet pan with the drumsticks just adjust cooking times as needed.
Make-Ahead Options
For busy weeknights, you can prep these baked chicken legs ahead of time. Season the drumsticks and store them in an airtight container in the refrigerator for up to 24 hours before baking. This actually allows the seasonings to penetrate the meat more deeply for even better flavor.
According to WebMD, chicken is rich in protein, vitamins, and minerals that support muscle growth and overall health. Having a simple, nutritious recipe like this in your rotation makes healthy eating easier.
How to Store Baked Chicken Legs: Best Practices
Properly storing your leftover baked chicken legs ensures you can enjoy them safely and deliciously for days to come. Here’s everything you need to know about storage and reheating.
Refrigeration Guidelines
Allow your baked chicken legs to cool completely before storing them in the refrigerator. Place them in an airtight container or wrap them tightly with plastic wrap or aluminum foil. Properly stored, they’ll keep in the refrigerator for up to 4 days.
For food safety, never leave cooked chicken at room temperature for more than 2 hours. If it’s a hot day (above 90°F), that window shrinks to just 1 hour. When in doubt, refrigerate sooner rather than later.
Freezing for Longer Storage
These baked chicken legs freeze beautifully for longer storage. Wrap each drumstick individually in plastic wrap or foil, then place them in a freezer bag or airtight container. This double-wrapping prevents freezer burn and makes it easy to grab just what you need. Properly frozen, they’ll maintain good quality for up to 3 months.
Label your container with the date so you can keep track of freshness. When you’re ready to enjoy them, thaw overnight in the refrigerator rather than at room temperature.
Reheating for Best Results
To maintain the best texture when reheating, skip the microwave if possible. Instead, place the drumsticks on a baking sheet and warm them in a 350°F oven for 10 to 15 minutes, or until heated through. This method helps preserve the crispy skin and prevents the rubbery texture that microwaving can cause.
If you’re short on time, the microwave will work just know the skin won’t stay crispy. Place the drumstick on a microwave-safe plate, cover with a damp paper towel, and heat for 1 to 2 minutes or until warmed through.
Meal Prep Considerations
These baked chicken legs are perfect for meal prep. Cook a double batch at the beginning of the week and use them in various dishes. The meat pulls easily from the bone for sandwiches, salads, and wraps. They’re even delicious cold, making them great for packed lunches.
For more meal prep inspiration, this detailed guide on the best oven baked chicken legs offers additional techniques and serving suggestions worth exploring.
FAQs: Frequently Asked Questions About Baked Chicken Legs
How long to bake chicken legs in the oven?
Bake chicken legs at 400°F (200°C) for 40-45 minutes, flipping halfway through for even cooking. Start checking the internal temperature at 35 minutes using a meat thermometer—it should reach 165°F (74°C) at the thickest part without touching bone. For crispier skin, pat legs dry before seasoning and bake uncovered on a wire rack over a baking sheet. Thicker drumsticks may need 45-50 minutes. Rest for 5 minutes after baking to lock in juices. This method yields juicy meat with golden skin. Always preheat the oven fully for best results. (78 words)
What temperature to bake chicken legs?
The ideal oven temperature for chicken legs is 400°F (200°C) for crispy skin and tender meat. Place seasoned legs on a foil-lined baking sheet or wire rack and bake for 40-50 minutes until the internal temperature hits 165°F (74°C). Lower temps like 375°F take longer (50-60 minutes) but keep meat moister. For extra crispiness, broil for 2-3 minutes at the end. Avoid overcrowding the pan to ensure even heat circulation. Use an instant-read thermometer for accuracy every time. (92 words)
How do you know when baked chicken legs are done?
Use a meat thermometer to check the internal temperature at the thickest part near the bone—it must reach 165°F (74°C) for safety. For best texture, aim for 175-180°F to eliminate any pink near the bone while keeping meat juicy. Juices should run clear, not pink, when pierced. Visual cues include firm, opaque meat and pulled-away skin. Cut into one leg if no thermometer; avoid overcooking by checking early. Rest 5 minutes post-bake. This prevents dry chicken and ensures food safety. (96 words)
How long do baked chicken legs last in the fridge?
Store cooked baked chicken legs in an airtight container in the fridge for up to 4 days. Cool completely first to avoid condensation and sogginess. Reheat in a 350°F oven for 10-15 minutes to restore crispiness, or microwave covered for 1-2 minutes. The skin may soften upon reheating, but meat stays flavorful for salads, sandwiches, or wraps. For longer storage, freeze in freezer bags up to 3 months—thaw overnight in fridge before reheating to 165°F. Label with dates to track freshness. (98 words)
What to serve with baked chicken legs?
Pair baked chicken legs with simple sides like roasted potatoes, mashed potatoes, or rice for hearty carbs. Add veggies such as steamed green beans, asparagus, broccoli, or a fresh green salad for balance. Corn on the cob, dinner rolls, or pasta salad work well too. For a complete meal, try coleslaw or mac and cheese. These combos highlight the chicken’s savory flavors. Season sides similarly with garlic, herbs, or butter. Aim for 1-2 legs per person with 1-2 sides for satisfying dinners. (92 words)

Baked Chicken Legs
- Total Time: 50 minutes
- Yield: 4 servings
- Diet: Gluten-Free
Description
🍗 Crispy baked chicken legs with smoky paprika rub – juicy inside, crunchy skin without frying oil!
🔥 High-heat oven method tenderizes meat perfectly in 50 minutes – effortless weeknight protein!
Ingredients
– 8 chicken drumsticks (about 2 lb)
– 2 tablespoons olive oil
– 1 teaspoon sea salt
– ½ teaspoon black pepper
– 1 teaspoon garlic powder
– 1 ½ teaspoons smoked paprika (or regular paprika)
– ¼ teaspoon chili powder
– 1 teaspoon onion powder
Instructions
1-Step 1: Preheat and Prepare Your Baking Sheet Start by preheating your oven to 425°F. This high temperature is crucial for achieving that crispy skin while keeping the meat tender and juicy inside. While the oven heats up, line a large baking sheet with aluminum foil and lightly spray it with non-stick cooking oil. The foil makes cleanup incredibly easy, and the spray prevents the chicken from sticking.
2-Step 2: Prepare the Chicken Drumsticks Take your chicken drumsticks out of the package and pat them thoroughly dry with paper towels. This step is absolutely essential for crispy skin! Any moisture on the surface will create steam in the oven, which prevents proper browning and crisping. Don’t rush this step take your time and get those drumsticks nice and dry. Place the dried drumsticks in a large bowl or a resealable plastic bag. I personally love using a bag because it makes coating the chicken even easier and contains the mess, but a bowl works perfectly fine too.
3-Step 3: Add the Olive Oil Drizzle the 2 tablespoons of olive oil over the chicken drumsticks. Using your hands or tongs, toss the chicken until every piece is evenly coated with oil. This oil does more than just help the seasonings stick it also promotes that beautiful golden-brown color and contributes to the crispy texture of the finished skin. Make sure the oil gets into all the nooks and crannies of each drumstick. You want complete coverage for the best results.
4-Step 4: Mix and Apply the Seasonings In a small bowl, combine all your dried seasonings: 1 teaspoon sea salt, ½ teaspoon black pepper, 1 teaspoon garlic powder, 1 ½ teaspoons smoked paprika (or regular paprika if that’s what you have), ¼ teaspoon chili powder, and 1 teaspoon onion powder. Mix them together well so the flavors are evenly distributed. Sprinkle the seasoning mixture over the oiled chicken and toss thoroughly to coat. If using a bag, seal it and give it a good shake, massaging the seasonings into the meat. If using a bowl, use your hands to rub the seasonings all over each drumstick. Don’t be shy about getting in there with your hands it’s the best way to ensure even coverage!
5-Step 5: Arrange and Bake Arrange the seasoned drumsticks on your prepared baking sheet. Make sure they’re not touching each other giving them space allows hot air to circulate around each piece for even cooking and browning. You don’t need to turn them during baking, which makes this recipe wonderfully hands-off. Place the baking sheet in your preheated 425°F oven and bake uncovered for 40 to 45 minutes. The chicken is done when the internal temperature reaches at least 165°F at the thickest part of the meat, without touching the bone.
6-Step 6: Rest and Serve Once your baked chicken legs reach the proper temperature, remove them from the oven and let them rest for about 5 minutes before serving. This resting period allows the juices to redistribute throughout the meat instead of running out when you cut into it. The result? Every bite is as juicy and flavorful as the first. Serve these crispy drumsticks with your favorite sides for a complete meal. They pair beautifully with everything from mashed potatoes to roasted vegetables. If you’re looking for more delicious chicken recipes, check out my crispy baked parmesan chicken for another family favorite that’s sure to please.
Notes
🧻 Pat chicken completely dry with paper towels for crispiest skin possible.
🌡️ Use meat thermometer – aim for 165°F+ internal for safety and tenderness.
🧹 Foil-lined sheet sprayed with oil makes cleanup effortless.
- Prep Time: 10 minutes
- Cook Time: 40 minutes
- Category: Main Dishes
- Method: Oven
- Cuisine: American
Nutrition
- Serving Size: 2 drumsticks
- Calories: 310
- Sugar: 1g
- Sodium: 743mg
- Fat: 21g
- Saturated Fat: 5g
- Unsaturated Fat: 16g
- Trans Fat: 0g
- Carbohydrates: 2g
- Fiber: 1g
- Protein: 27g
- Cholesterol: 139mg
Keywords: baked chicken legs, crispy chicken drumsticks, juicy oven chicken, easy baked drumsticks