Introduction to Red Velvet Brownies
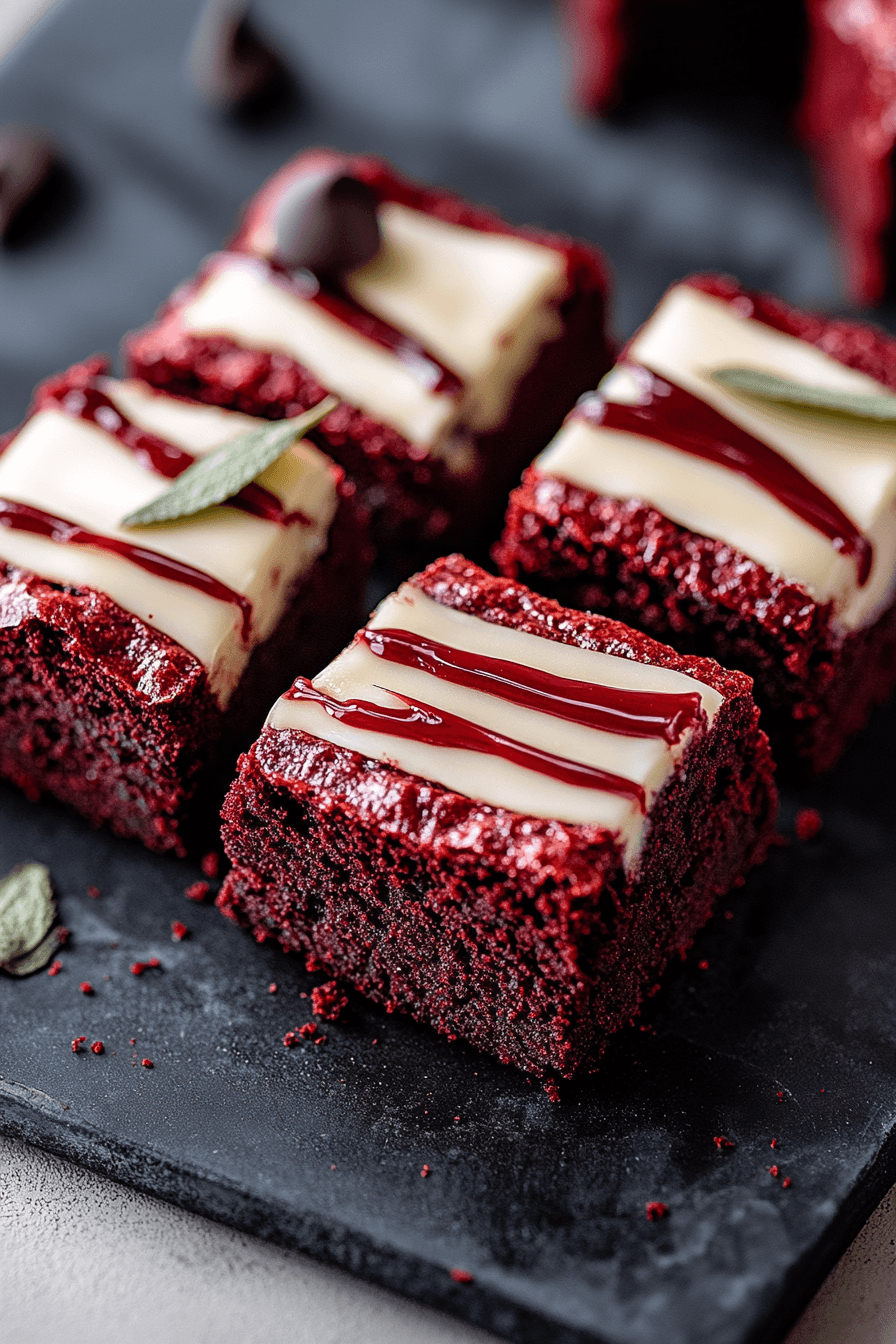
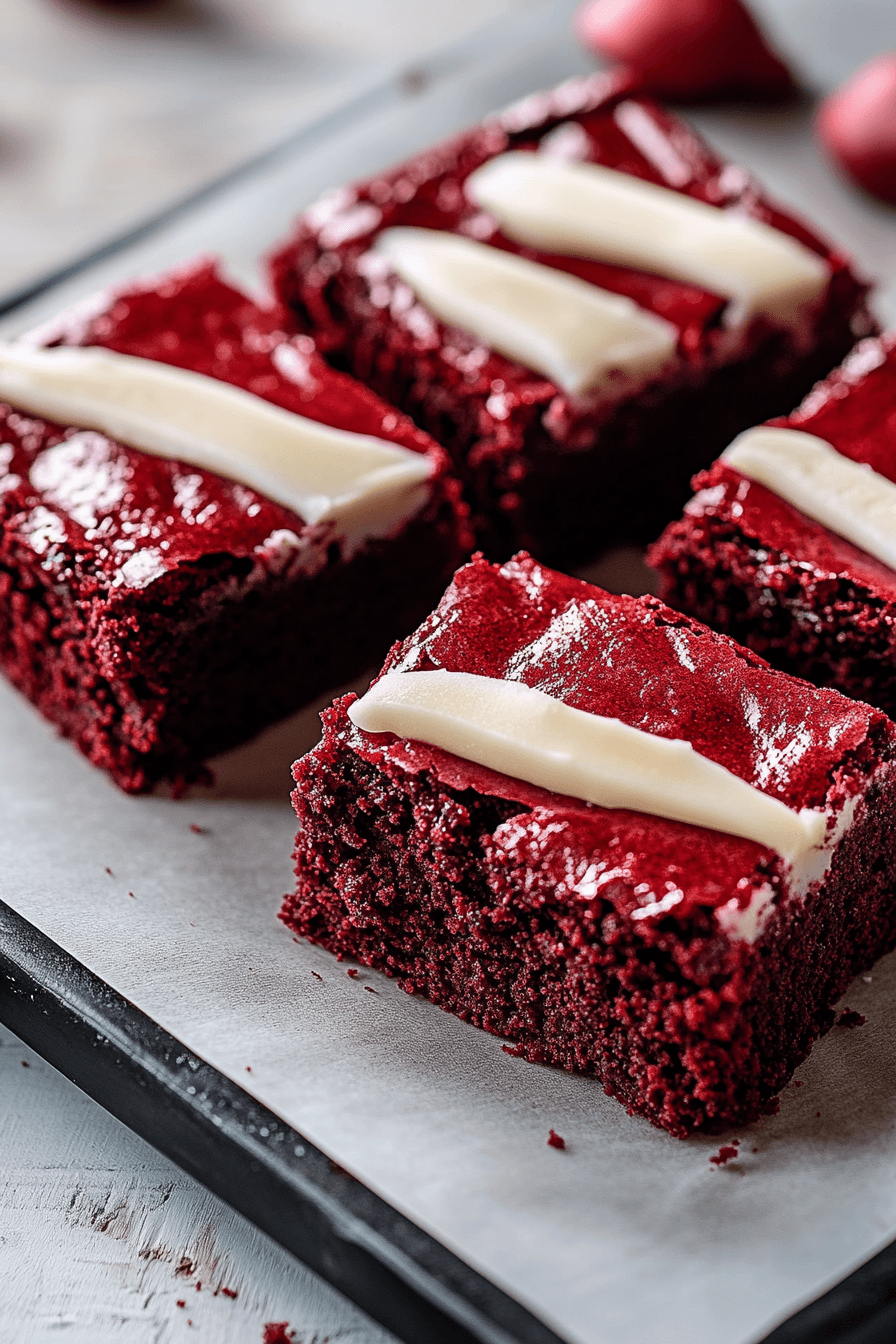
Red Velvet Brownies with cream cheese frosting are a delightful treat that combines the rich flavor of chocolate with a vibrant red hue, making it an irresistible dessert for any occasion. These tender and fudgy brownies not only please the eyes but also the palate, offering a distinct taste heightened by the tangy twist of cream cheese. The recipe is straightforward yet indulgent, perfect for capturing the hearts of busy parents looking for an easy bake, students in need of a quick treat, or baking enthusiasts eager to experiment with classic flavors. The result? An unforgettable culinary experience.
Jump To
- 1. Introduction to Red Velvet Brownies
- 2. Benefits and Advantages of Red Velvet Brownies
- 3. Ingredients Overview
- 4. How to Prepare the Perfect Red Velvet Brownies: Step-by-Step Guide
- 5. Mastering Red Velvet Brownies: Advanced Tips and Variations
- 6. How to Store Red Velvet Brownies: Best Practices
- 7. Nutritional Value of Red Velvet Brownies
- 8. FAQs: Frequently Asked Questions About Red Velvet Brownies
- 9. Red Velvet Brownies with Cream Cheese Frosting
Benefits and Advantages of Red Velvet Brownies
Opting for Red Velvet Brownies promises numerous benefits: their preparation is simple, appealing to both novice and experienced bakers. The combination of ingredients like cocoa powder and vinegar not only delivers a unique flavor but also ensures a satisfying texture. Moreover, the recipe is adaptable for those mindful of diet, with vegan and gluten-free options available. By offering a perfect balance between taste and ease, these brownies stand out as a dessert choice that invites creativity and satisfies a broad range of dietary preferences, making it a favored recipe among diverse groups of individuals.

Ingredients Overview
Essential Ingredients for Red Velvet Brownies
- Butter – 1/2 cup, melted. It provides the necessary fat for richness and a moist texture.
- Granulated Sugar – 1 cup. Essential for sweetness and creating a nicely textured top crust when combined with whipped eggs.
- Eggs – 2 large. These bind the ingredients and provide structure.
- Vanilla Extract – 1 teaspoon. This adds depth to the flavor profile of the brownies.
- All-purpose Flour – 3/4 cup. Provides structure without making the brownies too cakey.
- Cocoa Powder – 2 tablespoons. Adds the desired chocolate flavor.
- Red Food Coloring – 1 tablespoon (or gel equivalent). Provides the classic vibrant red color.
- Vinegar – 1 teaspoon. Enhances the tangy red velvet flavor.
- Salt – A pinch. Balances out the sweetness.
- Cream Cheese – For the frosting, use 8oz, softened. It contributes to the tangy creaminess of the topping.
- Powdered Sugar – 2 cups. Essential for the frosting’s smooth texture and sweetness.
Dietary Substitutions to Customize Your Red Velvet Brownies
For those with dietary restrictions, you can easily adapt the red velvet brownies:
- Vegan Option: Substitute butter with coconut oil and eggs with flax eggs (1 tablespoon ground flaxseed mixed with 2.5 tablespoons water, let sit until gelatinous).
- Gluten-Free: Use a 1:1 gluten-free baking flour blend to replace all-purpose flour.
- Low-Sugar: Substitute granulated sugar with a sugar alternative like stevia or erythritol, adjusting amounts per product instructions.
How to Prepare the Perfect Red Velvet Brownies: Step-by-Step Guide
- First Step: Preheat your oven to 350°F (175°C). Line an 8-inch square baking pan with parchment paper, leaving some overhang for easy removal after baking.
- Second Step: In a microwave-safe bowl, melt the butter and let it cool slightly. Meanwhile, in a separate bowl, whisk together cocoa powder, flour, and salt for a consistent mixture.
- Third Step: Whisk melted butter and sugar in a large mixing bowl until well combined. Add eggs one at a time, beating each one in thoroughly before adding the next to ensure a smooth batter.
- Fourth Step: Stir in the vanilla extract, red food coloring, and vinegar. This combination will give your brownies the classic red velvet hue and flavor.
- Fifth Step: Gradually add the dry ingredients to the wet mixture, folding them in gently with a spatula until just combined. Be careful not to overmix.
- Sixth Step: Pour the batter into the prepared baking pan, smoothing the top for an even layer. If you’re adding white chocolate chips or cream cheese swirls, now is the time to gently fold them in before smoothing again.
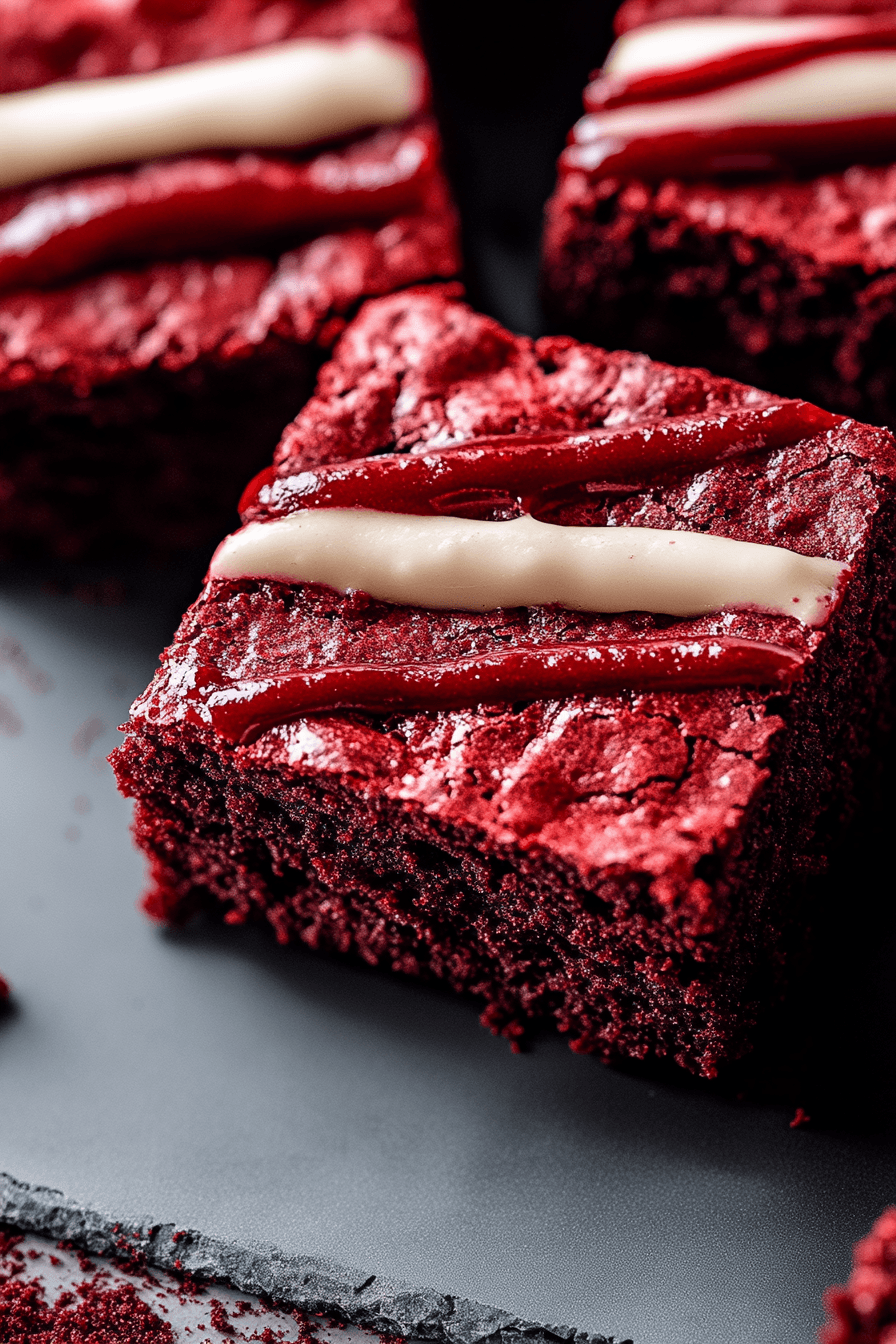
- Seventh Step: Bake in the preheated oven for 25-35 minutes. Use a toothpick to check; it should come out with moist crumbs but not wet batter. This ensures a fudgy texture.
- Eighth Step: Allow the brownies to cool completely in the pan to maintain their structure. Use the parchment paper overhang to lift them out, then cut into squares with a clean knife.
- Ninth Step: To make the cream cheese frosting, beat softened cream cheese and powdered sugar until creamy and spreadable. Spread over cooled brownies for a luscious finish.
Following these steps will yield a delightful batch of red velvet brownies that are perfect for any occasion. If you love experimenting, consider making Lemon Brownies for a citrus twist or explore our Chocolate Mousse Brownies for an extra decadent experience!
Mastering Red Velvet Brownies: Advanced Tips and Variations
Perfecting the red velvet brownie can be an enjoyable challenge, and with these advanced tips and variations, you can create a dessert that’s both unique and delightful. Not only will these insights enhance the texture and taste of your brownies, but they will also allow you to customize them to suit your special occasions or personal preferences.
Advanced Tips for Perfect Red Velvet Brownies
- Use Gel Food Coloring: To achieve the signature red velvet hue, opt for gel over liquid food coloring. Gel provides a more intense red without altering the moisture balance of the batter.
- Whip the Eggs and Sugar: Whipping your eggs and sugar helps create a lighter, crackly top crust. It contributes to a professional finish that aesthetically elevates your dessert presentation.
- Check for Doneness Carefully: Insert a toothpick in the center of the brownies. If it comes out with moist crumbs, not wet batter, your brownies are done. Over-baked brownies can lose their fudgy texture, which is a hallmark of the perfect red velvet brownie.
- Cool Completely: Cooling ensures clean slices. Let your brownies cool completely in the pan before cutting. This step improves both the taste and presentation of your dessert.
Flavor Variations to Try
Explore these appealing variations to incorporate additional flavors into your red velvet brownies:
- White Chocolate Chips: Fold a cup of white chocolate chips into the batter to add a sweet, creamy contrast that complements the red velvet brownies beautifully.
- Swirls of Cream Cheese: Drop spoonfuls of cream cheese mixture on top of the batter, swirling it in before baking. This method brings a rich, tangy flavor that matches perfectly with the traditional red velvet taste.
- Nutty Addition: For a crunchy twist, mix in a half cup of chopped pecans or walnuts. These nuts will provide a delightful texture contrast.
Incorporating these tips and variations not only ensures a delicious outcome but also adds a touch of creativity to your baking adventures. Consider pairing these treats with a Nutella Bread Bomb for an exciting dessert platter combination.
How to Store Red Velvet Brownies: Best Practices
Proper storage of your red velvet brownies ensures they remain fresh and delicious, whether you’re saving them for a later date or planning for upcoming festivities. Follow these best practices to extend the longevity of your culinary creations.
Refrigeration and Room Temperature
Store your freshly baked red velvet brownies at room temperature for up to three days. Place them in an airtight container lined with parchment paper to prevent them from becoming dry. If you plan to keep them longer, refrigeration is your best option. Wrap each brownie in plastic wrap before placing them in a sealed container to maintain their moisture for up to a week. For details on keeping other delicious treats fresh, check out our French Cinnamon Apple Tart storage tips.
Freezing and Reheating
For more extended storage, freezing is highly effective. Individually wrap each piece in plastic wrap, then cover them with aluminum foil. Place them in a freezer-safe bag or container, where they can remain for up to three months. When you crave these delectable treats again, remove them from the freezer and allow them to thaw at room temperature. If you prefer warm brownies, reheat them in the microwave for about 20 seconds, ensuring they remain as fudgy and delightful as when they were originally baked.
Utilizing these storage techniques ensures you’re always prepared with a delicious batch of red velvet brownies, ready to wow your family and friends. For more food science insights, take a look at the history and nuances of red velvet cake.
Nutritional Value of Red Velvet Brownies
Understanding the nutritional composition of red velvet brownies is essential for diet-conscious individuals. These delightful treats are not only a feast for the taste buds but also provide a moderate amount of energy.
| Nutrient | Per Serving (1 Brownie) |
|---|---|
| Calories | 250 |
| Total Fat | 12g |
| Saturated Fat | 7g |
| Cholesterol | 50mg |
| Sodium | 180mg |
| Total Carbohydrates | 30g |
| Dietary Fiber | 1g |
| Sugars | 20g |
| Protein | 3g |
A red velvet brownie primarily provides a source of carbohydrates, which contribute to its rich texture and sweetness. Remember, moderation is key. For those adhering to a specific diet, consider substituting ingredients for lighter options. For instance, using a low-calorie sweetener or reduced-fat alternatives can impact these nutritional values. You can always pair a piece of these decadent treats with a nutritious snack like a banana bread for a balanced indulgence.
FAQs: Frequently Asked Questions About Red Velvet Brownies
Is Red Velvet just dyed chocolate?
No, red velvet is not merely chocolate with dye. Although it contains cocoa powder, the red velvet flavor is distinctively characterized by the combination of cocoa, buttermilk, and vinegar, which lends a subtle tanginess unique to red velvet desserts. You can learn more about the origins of red velvet on Wikipedia.
Can I use regular cocoa powder instead of red cocoa powder for red velvet brownies?
Yes, you can use regular cocoa powder; however, you will need to add red food coloring to achieve the traditional red velvet hue. Gel food coloring is often recommended to prevent adding excess liquid to your brownie mixture.
How do I know when the red velvet brownies are done baking?
Red velvet brownies are typically baked at 350°F for about 25-35 minutes. To check for doneness, insert a toothpick into the center. If it comes out with moist crumbs, rather than wet batter, your brownies are ready. Cooling them completely before slicing ensures clean cuts and enhances the eating experience. For more crispiness tips, check other desserts like our chocolate chip cookie dough dip.
Can I store red velvet brownies in the refrigerator or freezer for later use?
Absolutely! Red velvet brownies can be stored in an airtight container in the refrigerator for up to one week. For extended storage, you can freeze them for up to three months. Simply thaw them at room temperature or reheat them gently in the oven to recapture their fudgy goodness. You can discover more storage tips at Gourmandise.com.
Print
Red Velvet Brownies with Cream Cheese Frosting
- Total Time: 45 minutes
Description
🍫❤️ Indulge in the perfect balance of rich chocolate flavor and a tangy red velvet twist, all packed into a fudgy, irresistible brownie! ❤️🍫
🎂✨ With a crackly top, vibrant color, and optional cream cheese frosting, these brownies are a must-try for any festive occasion or sweet craving! ✨🎂
Ingredients
All-purpose flour
Unsweetened cocoa powder
Granulated sugar
Unsalted butter
Eggs
Vanilla extract
Red gel food coloring
White vinegar
Baking powder
Salt
White chocolate chips (optional)
Cream cheese (optional, for swirl or frosting)
Instructions
1. Preheat the oven to 350°F and line a baking pan with parchment paper.
2. Melt butter and chocolate together until smooth, then let it cool slightly.
3. In a bowl, whisk sugar and eggs until light and fluffy to create a shiny top crust.
4. Add vanilla extract, red gel food coloring, and vinegar to the egg mixture and mix well.
5. Sift together flour, cocoa powder, and a pinch of salt, then gradually fold into the wet mixture.
6. Gently mix in the melted butter and chocolate until fully combined.
7. If using, fold in white chocolate chips for extra sweetness.
8. Pour the batter into the prepared baking pan and smooth the top.
9. Bake for 25-35 minutes, checking with a toothpick; it should come out with moist crumbs, not wet batter.
10. Let the brownies cool completely in the pan before slicing for clean edges.
11. Optionally, top with cream cheese frosting for added richness before serving.
Notes
Use gel food coloring to achieve a deep red hue without altering the batter’s consistency.
Whip eggs and sugar together to create a shiny, crackly top crust.
Allow the brownies to cool completely before cutting for clean and precise slices.
- Prep Time: 15
- Cook Time: 30
- Category: Dessert
- Method: Baking
- Cuisine: American